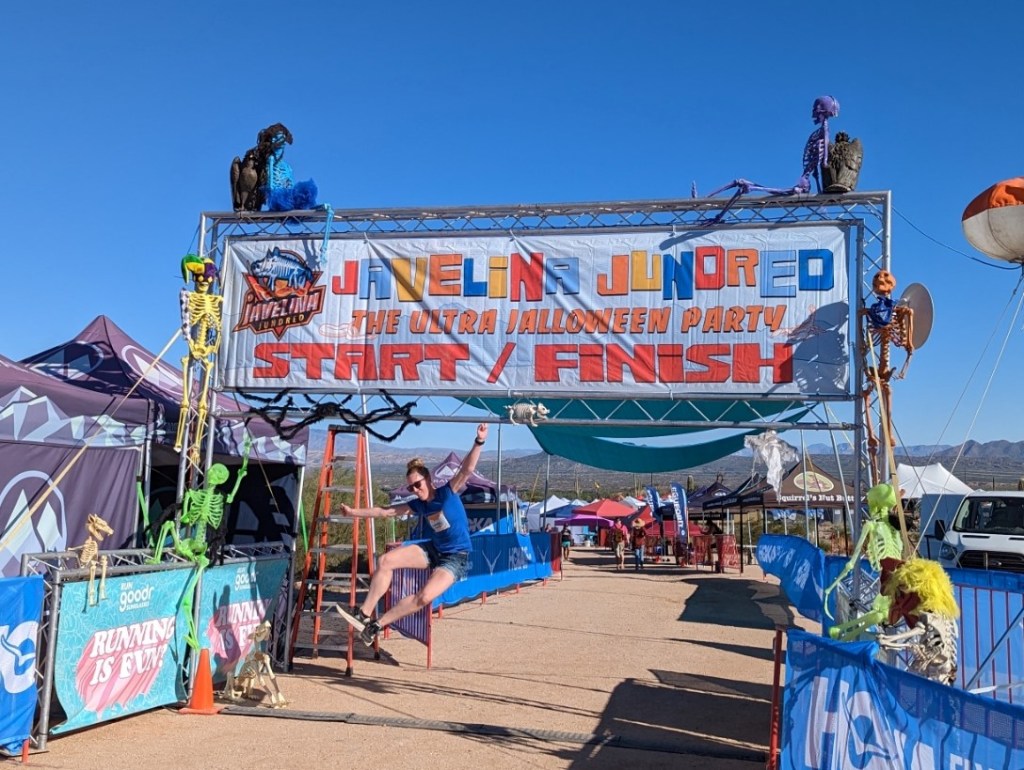
Welcome to the big show! The Javelina Jundred. This is 100 miles of ultramarathon trail running party in the desert at McDowell Mountain Regional Park north of Fountain Hills, Arizona. The 5-loop course features moderate elevation gain.
I will be live capturing our run-up to and event to update all those following along!
Raceiscomplete!
Race Results (Beth is bib # 397) – go to Results > Split Times 100M near the bottom
Live stream – start/finish line from the race organizers
Race Day
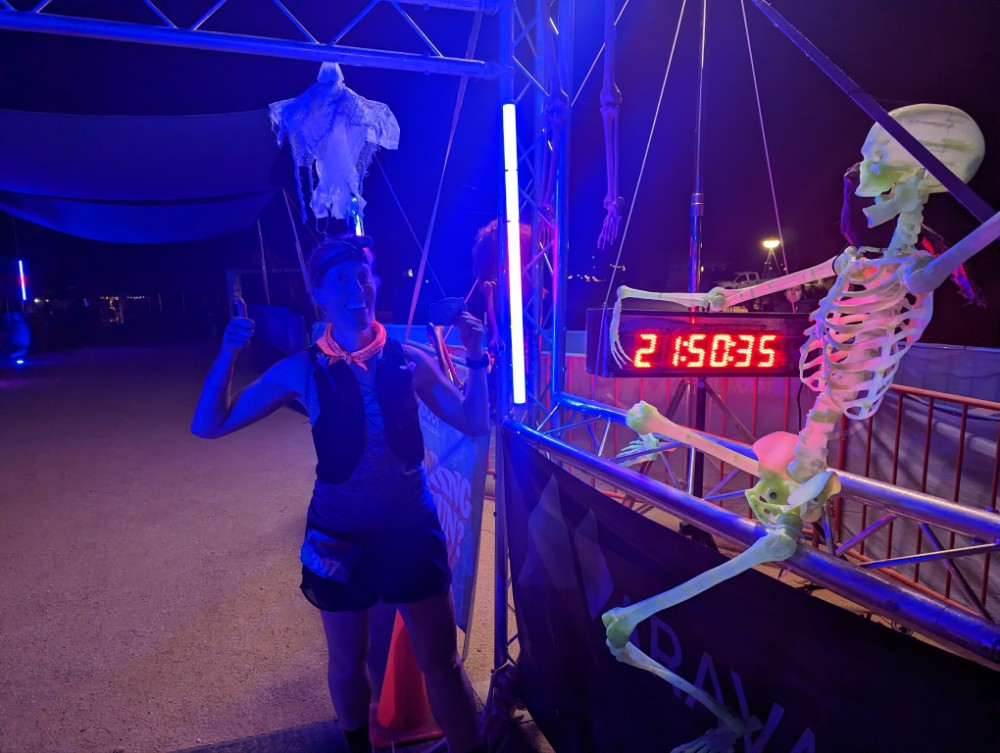
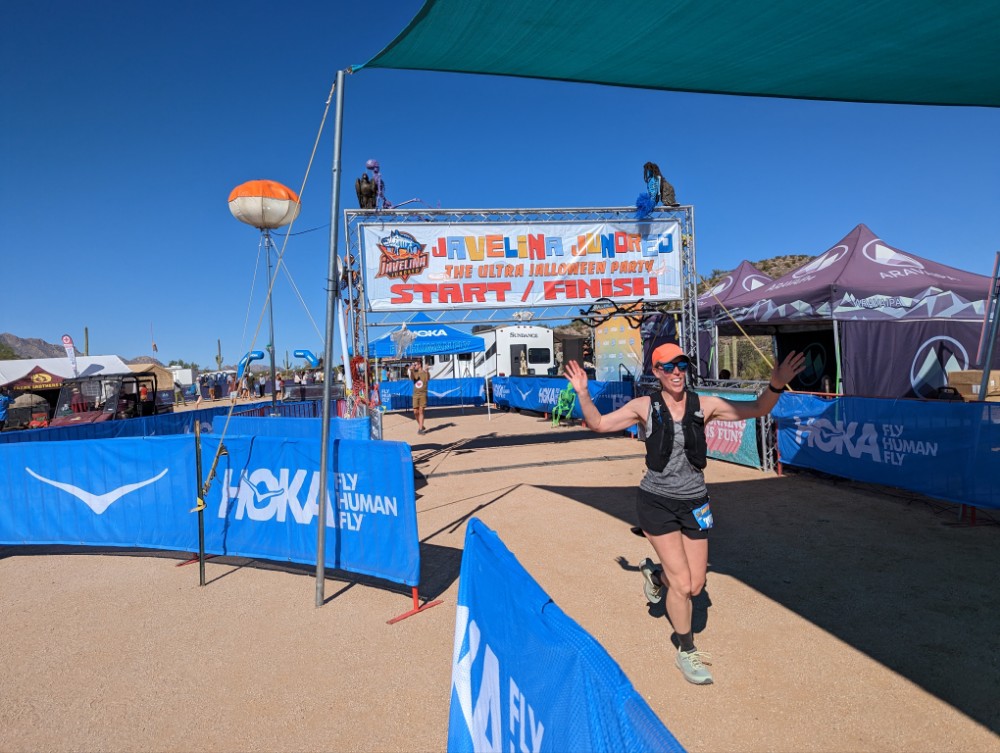
2022-10-30, 0349 – it is done. After 5 loops, 2 in complete darkness, the finish time was 21-hours and 49-minutes!
2022-10-29, 2230 – time for me to gear up! Beth is almost on the last lap. Its as dark as it gets.
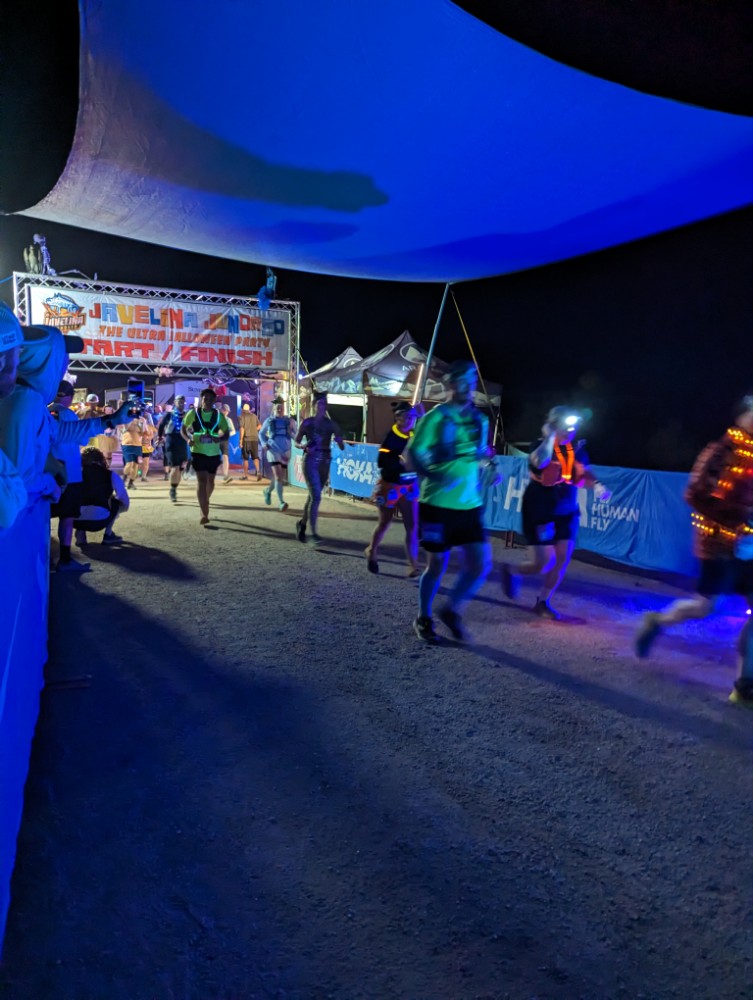
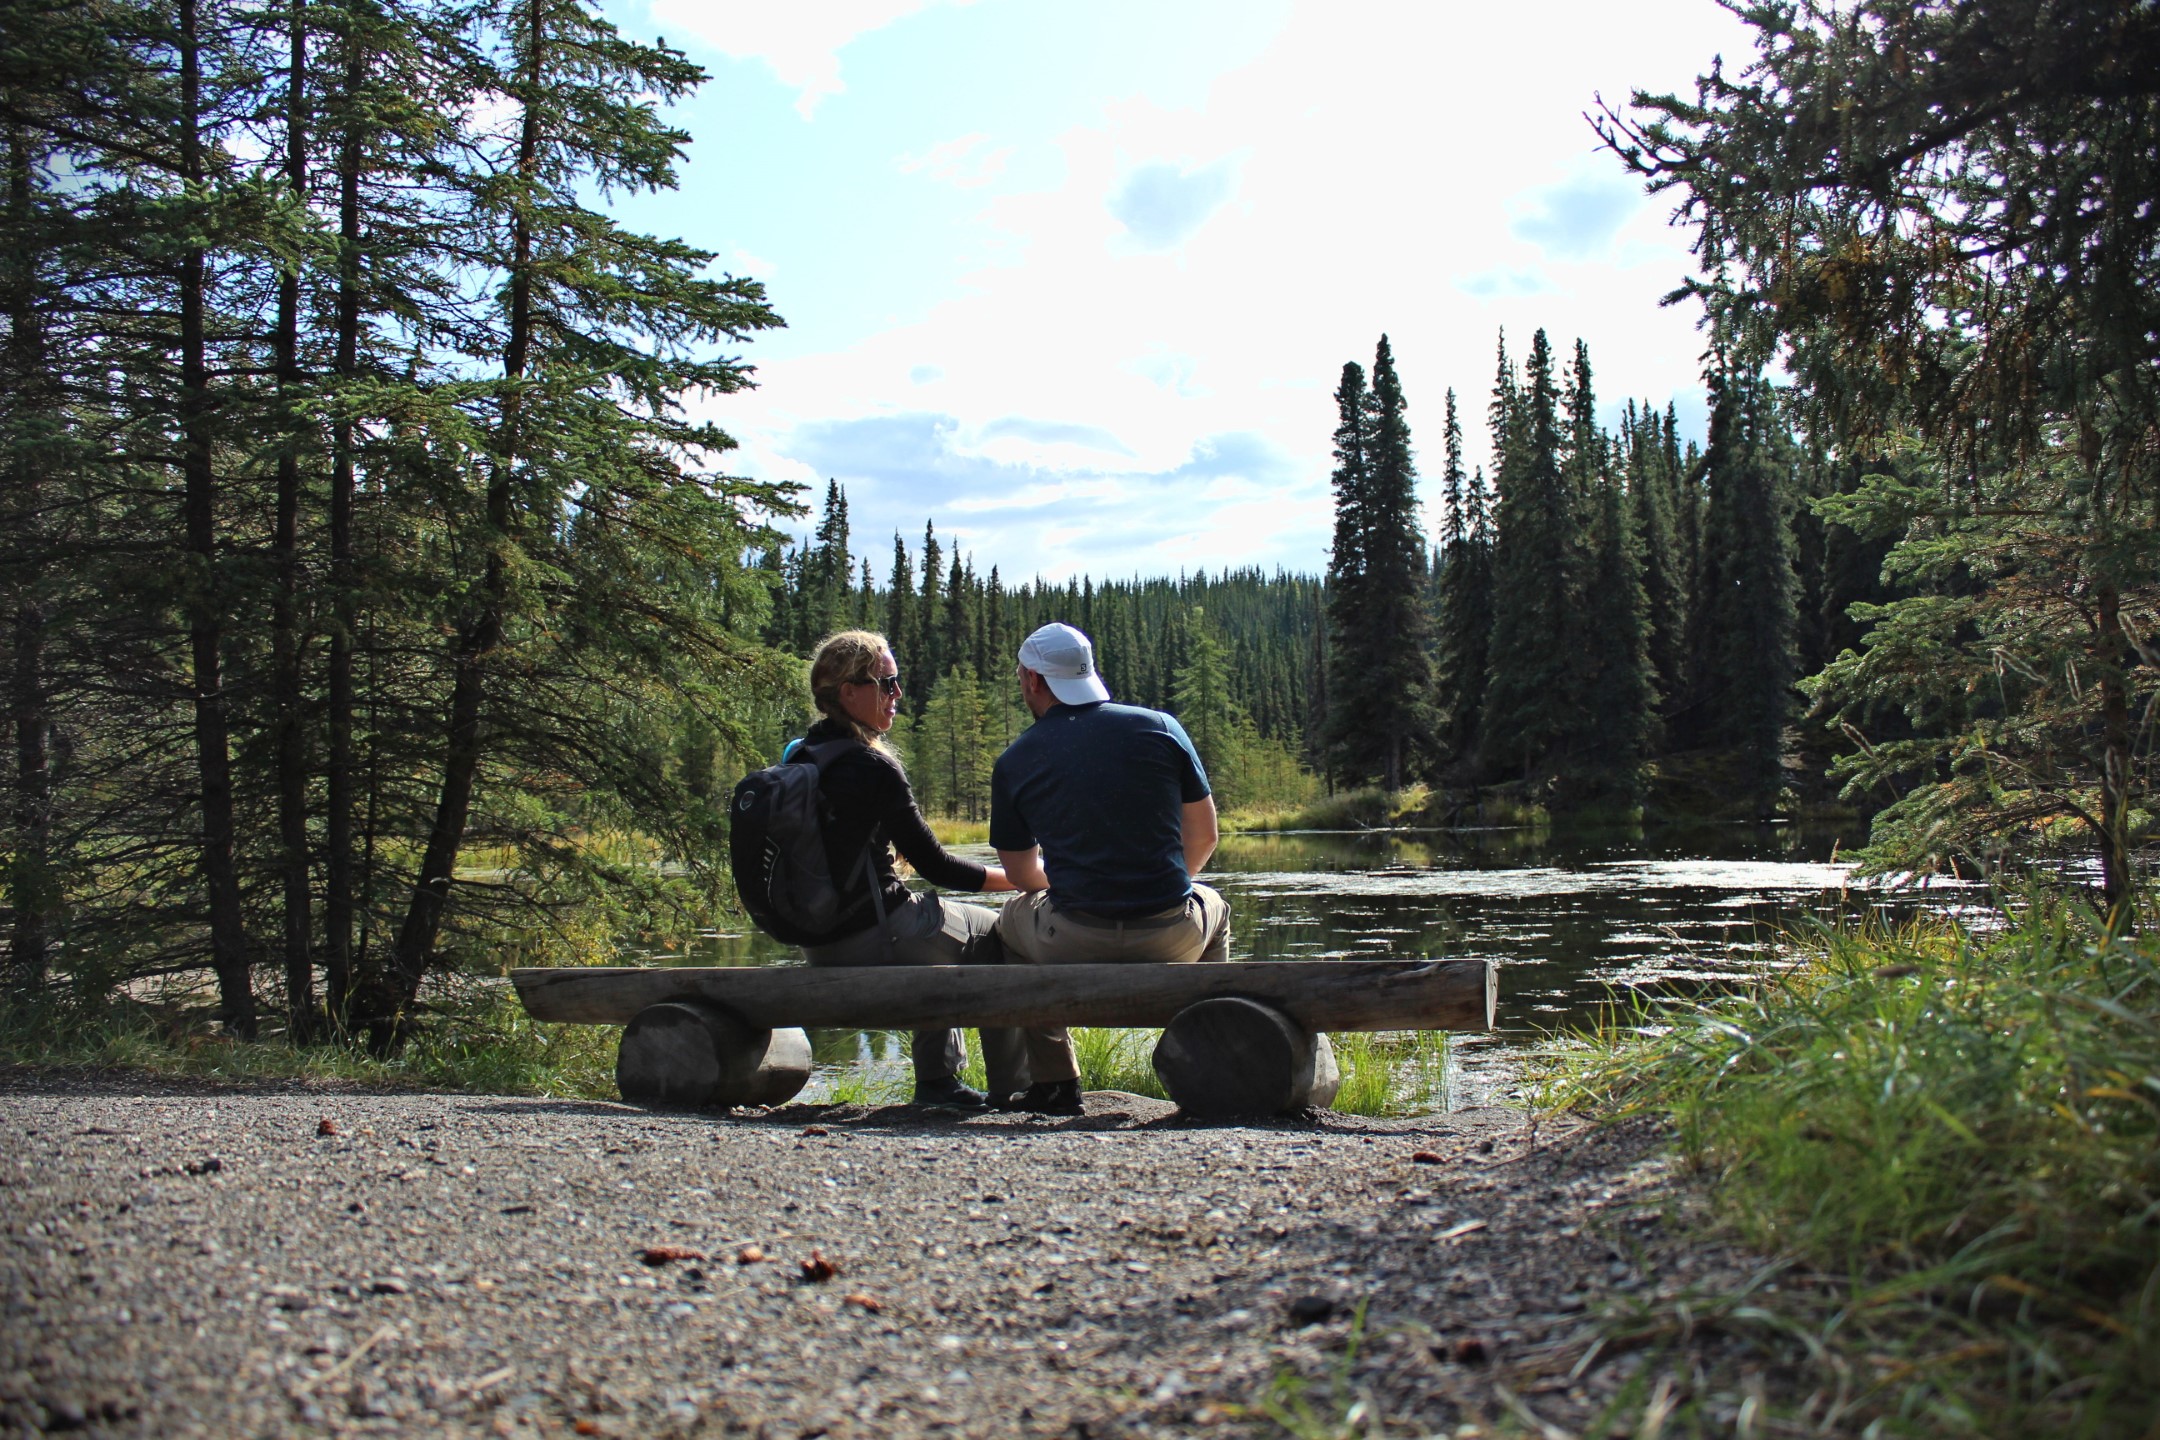
2022-10-29, 1850 – beth just left for lap 4 at 61.7 mi and is back on pace! Next lap I join her as she paces me I pace her to 100! And its a party here.
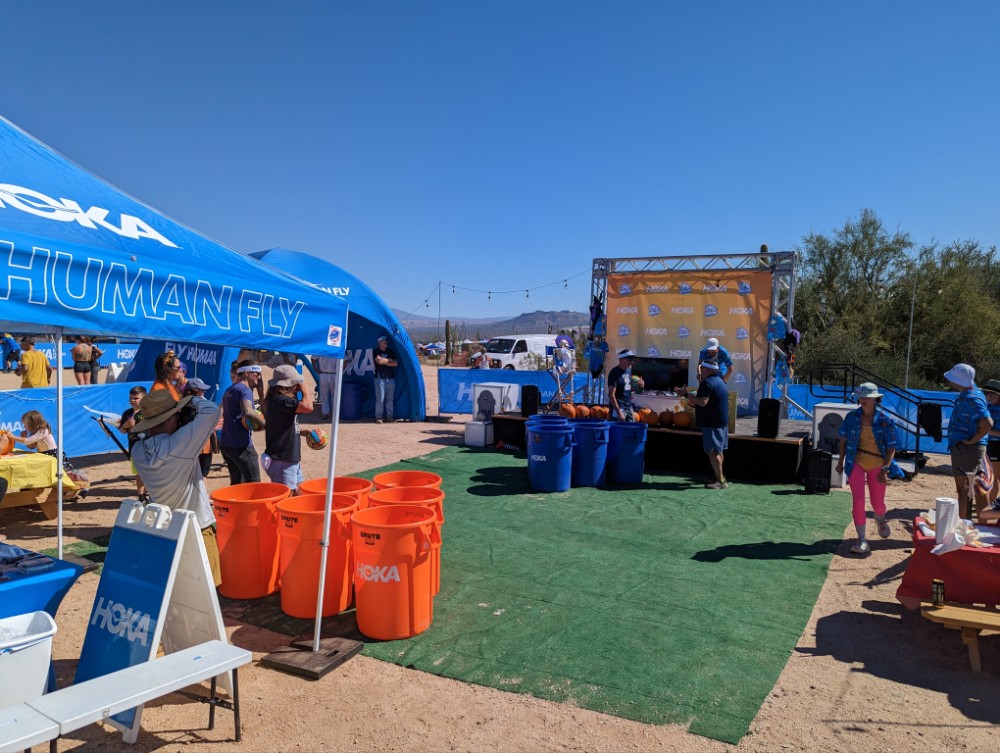
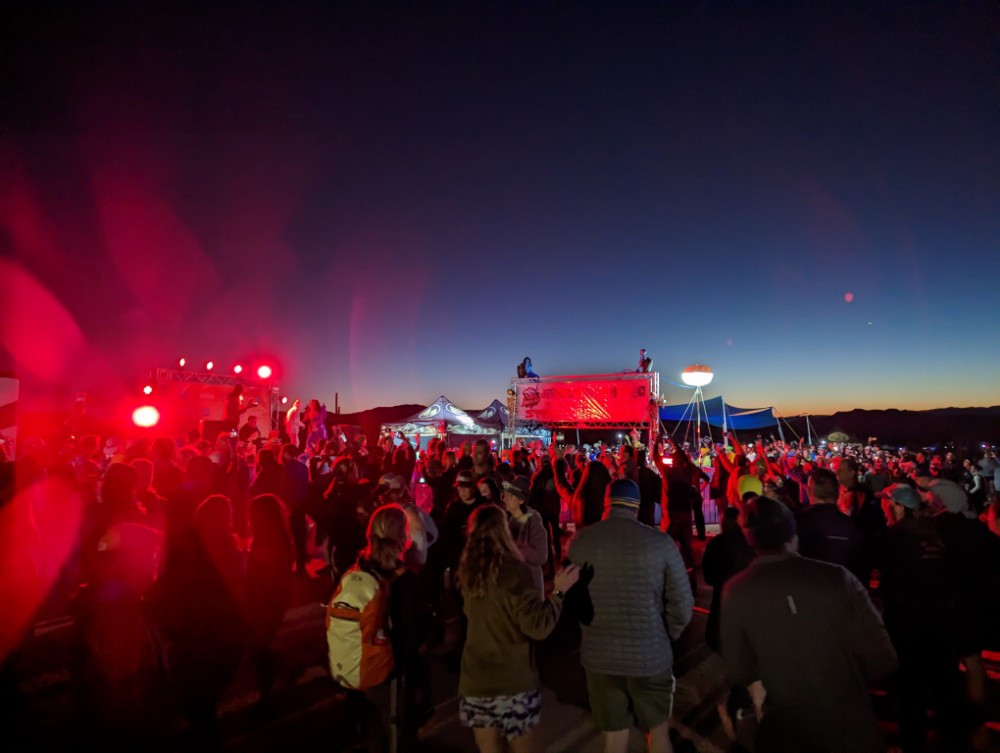
2022-10-29, 1800 – the jackass 31k night run just started. What a sight!
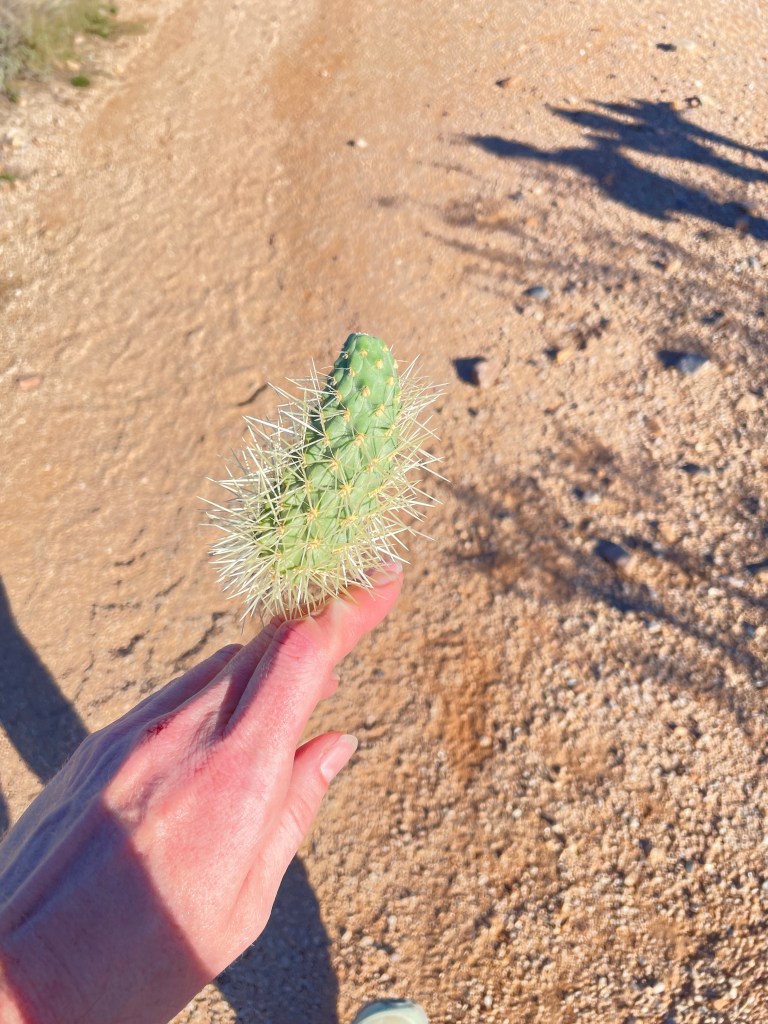
2022-10-29, 1630 – Beth just hit 50 miles in 10.5 hours!! That’s just under pace. She lost some time due to a run in with a cactus and medic visit, but she’s back on.
2022-10-29, 1420 – beth is on pace, done with Lap 2, thats 41 miles!! Updates are slow due to congested network.
2022-10-29, 1310 – I will be pacing beth from mile 80-100, the last loop!! I should start running sometime around midnight.
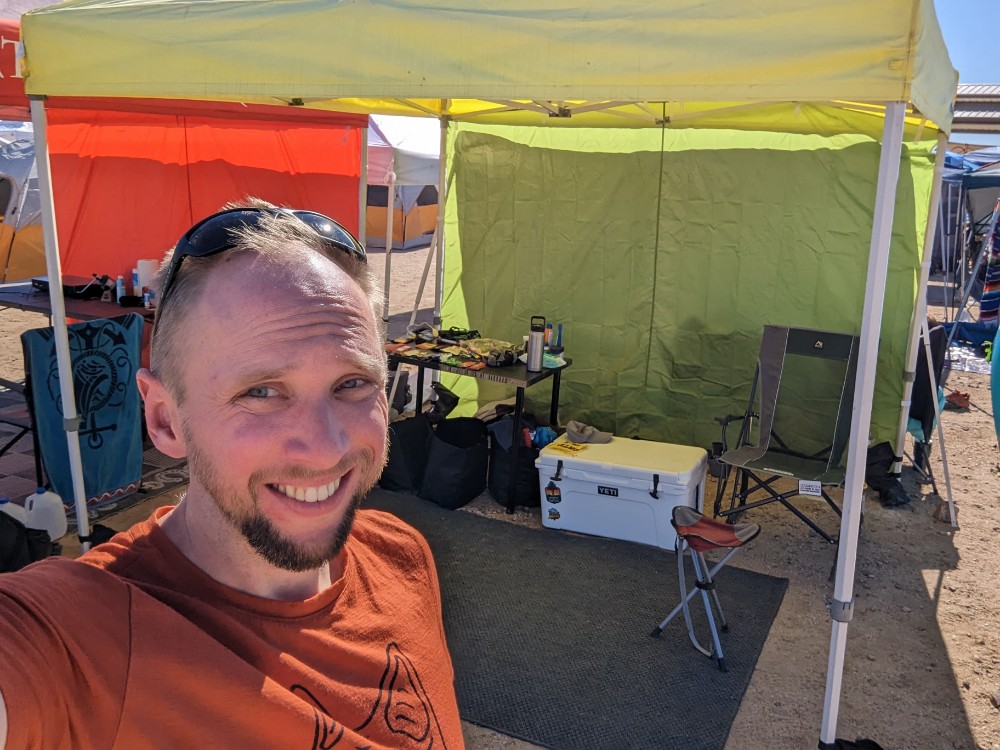
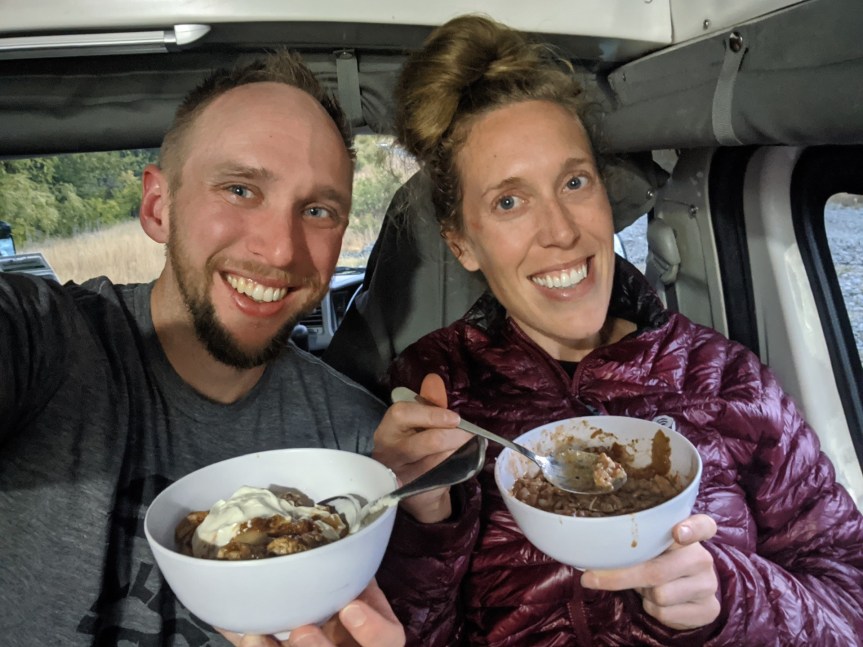
So, what do I do while I’m waiting? 1) crewing, my first responsibility is to make sure the table is set to fuel up and refill water! 2) I also get to interact with the other pacers and crews! I played giant pong and lost, but got all kinds of swag out of the deal
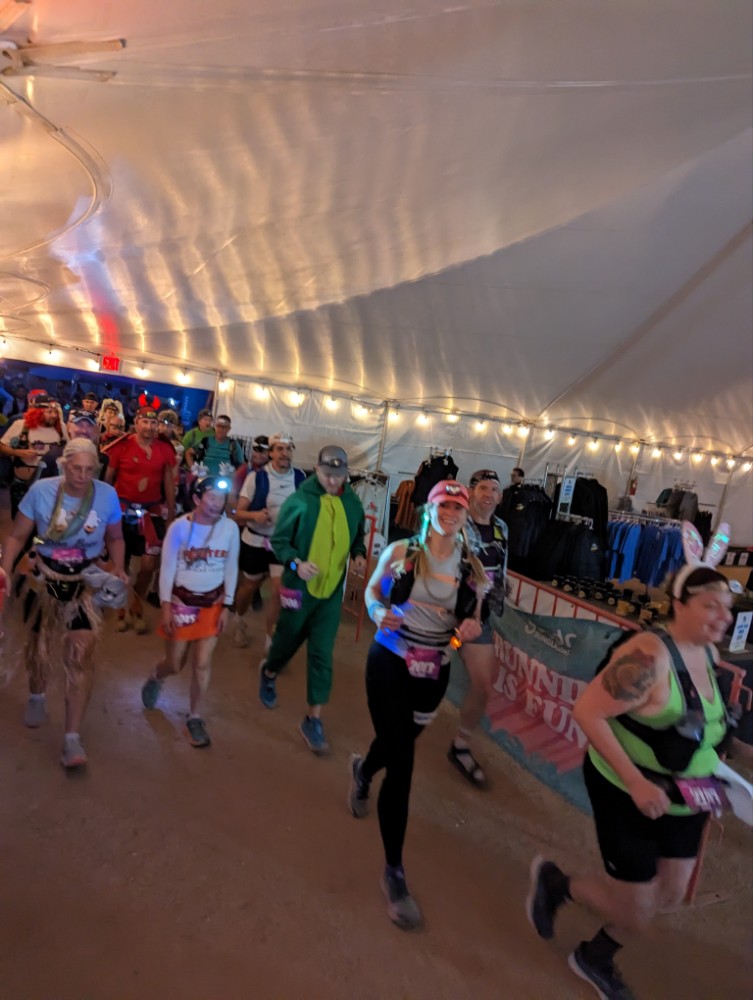
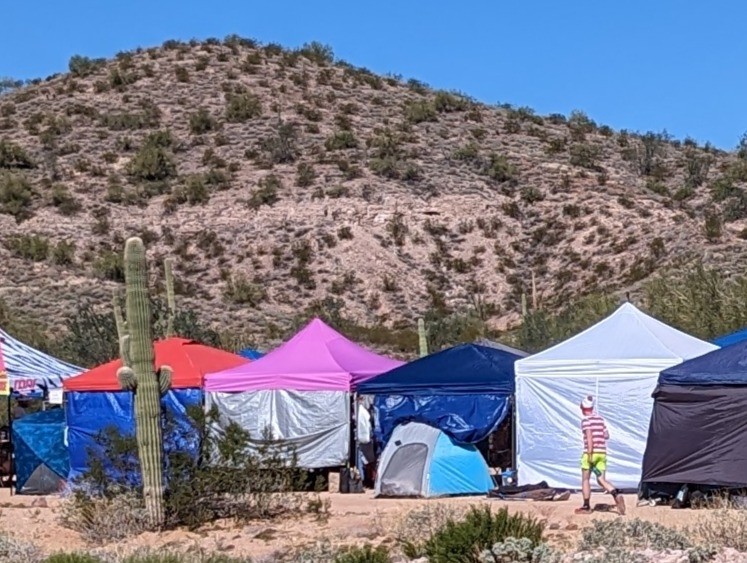
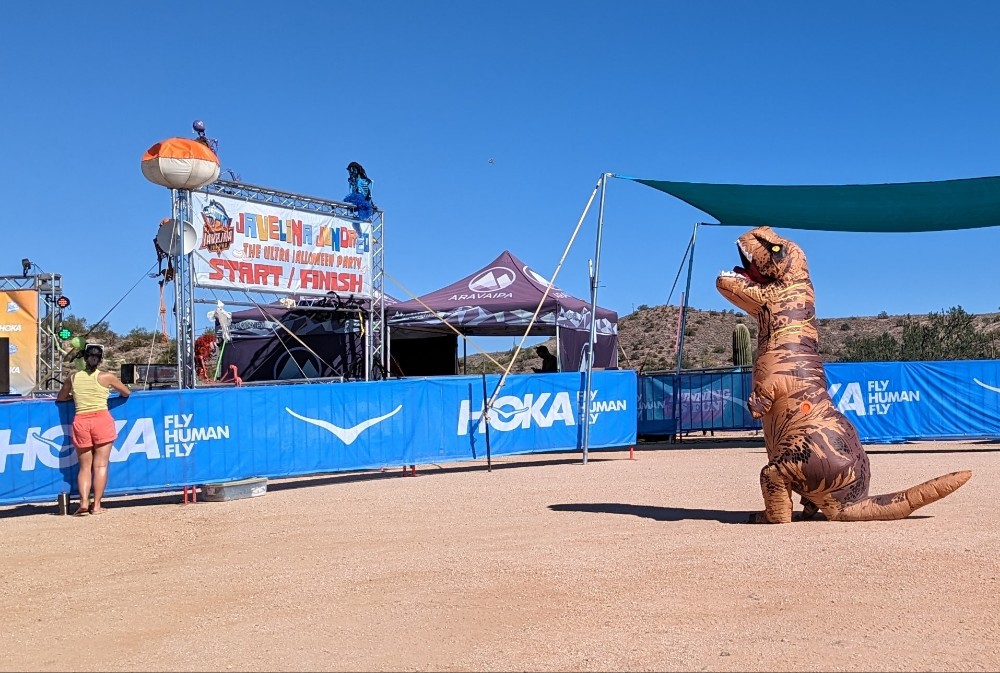
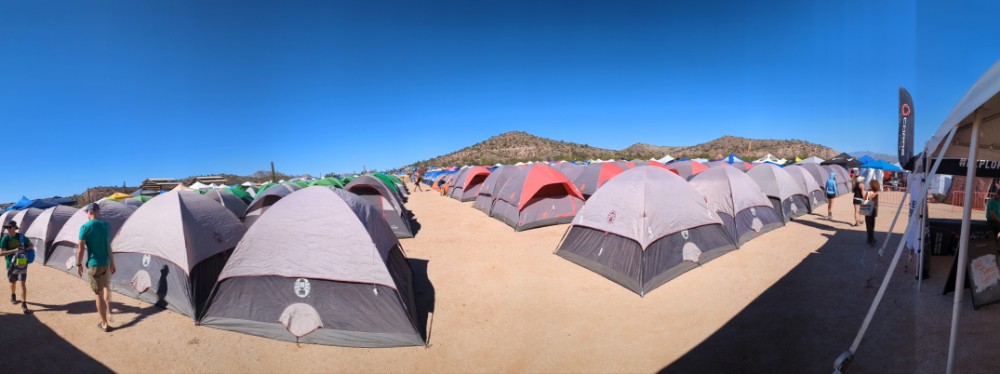
2022-10-29, 1120 – camp photos. Unleashed dinos, where’s Waldo, and acid wash jeans ARE ultrarunning gear.
2022-10-29, 1020 – on pace after lap 1 and doing great!
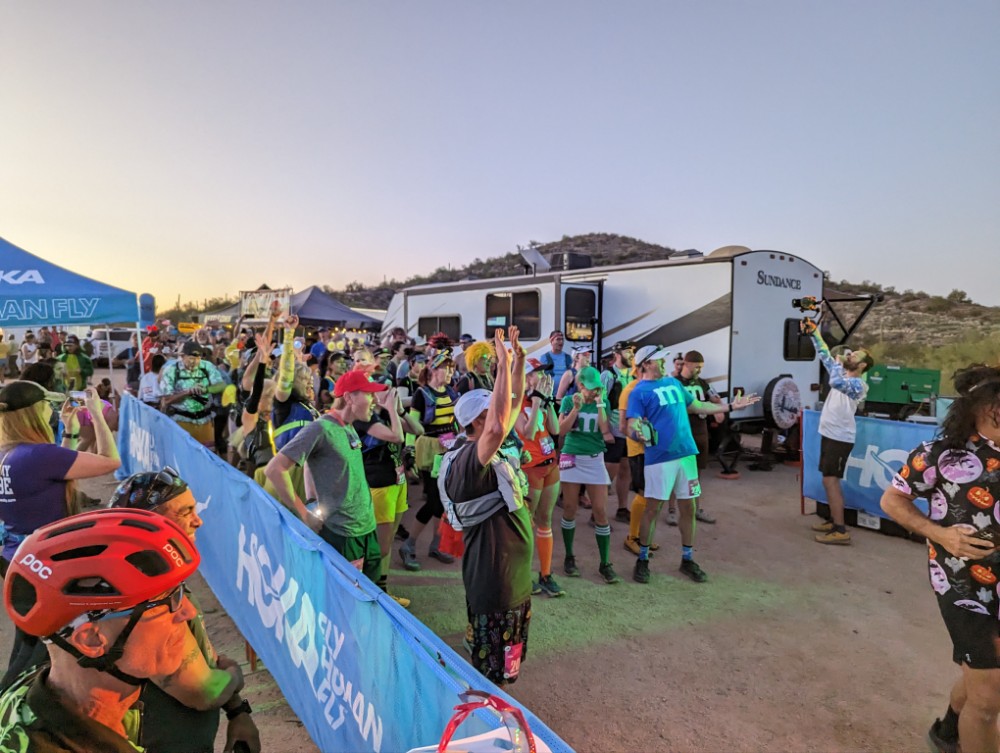
2022-10-29, 0600 – it’s headlamp city at the start line as the sun comes up!
Estimated timing
2022-10-28, 1300 – based on Beth’s pace for the Latest Not Fastest 2022 she should be able to maintain a 12-minute per mile pace at least through 80 miles. Here is the expected breakdown for each of the 5 loops:
Distance (miles) Start/finish line
Estimated Total Time (hours:min) @ 12 min/mile + 15-min for aid stations
Estimated Time of Day (+3-h for EDT)
0 (start)
0:00
0600 PDT Sat
22.3
4-h 28-min
1028 PDT Sat
41.8
8-h 36-min
1436 PDT Sat
61.2
12-h 44-min
1844 PDT Sat
80.7
16-h 54-min
2254 PDT Sat
100.1 (finish!)
21-h 1-min
0301 PDT Sunday
These times are when you should watch the Live stream to see Beth!
Pre-race
2022-10-28, 1600 – the race expo and race info session is making it feel real! There will be five laps through here tomorrow.
2022-10-28, 1100 – race day weather high 78, low 52 with a light breeze. That might be as good as it gets out there!
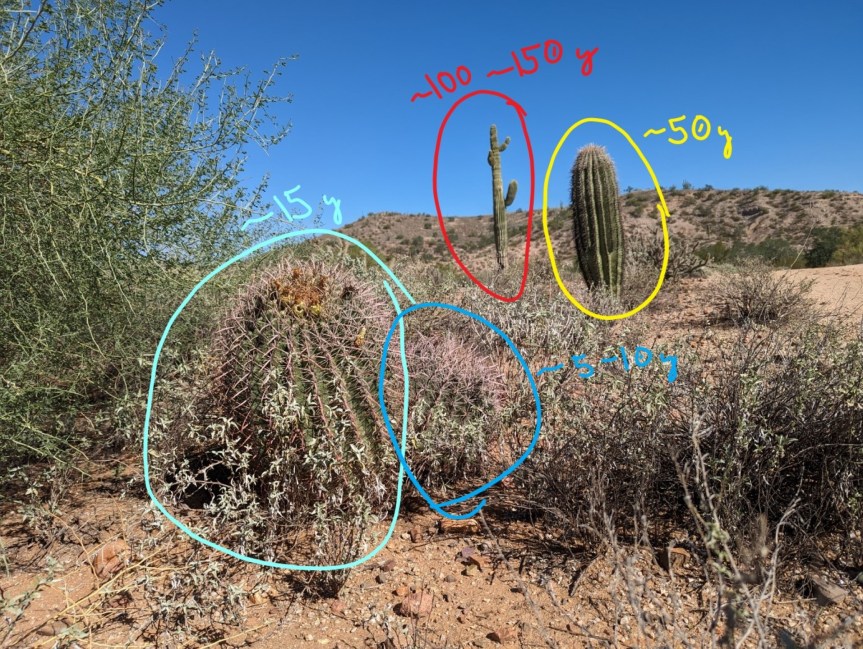
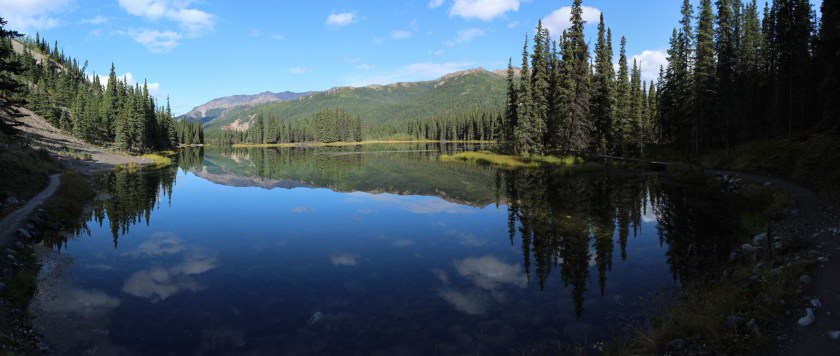
2022-10-28, 0900 – saguaro cacti are unmistakably unique! These things are also _old_ when they are big. It can take them 75-100 years to grow their first arm. I found a spot where you can see the progression of growth, from the 1 meter tall 15 year old cactus in the front to the potentially 150 year old monster in the back of the photo. Beth will be dodging around these all day tomorrow.
2022-10-27, 2100 – astrophotography of the night sky with a saguaro cactus in the foreground. The bright line might be a satellite that reflected the sun! Fountain hills dark sky association.
2022-10-27, 1600 – What is a javelina?? Apparently it is a peccary (a New World pig) found in Southwest North America, among other places. Maybe we’ll see a live one out in the Park?
2022-10-27, 1030 – This time on Saturday Beth should be done with 20 of 100 miles. Track her at Javelina Jundred. (Beth is out on a quick 3-mile run testing out the course, so she’s not in this pic!)
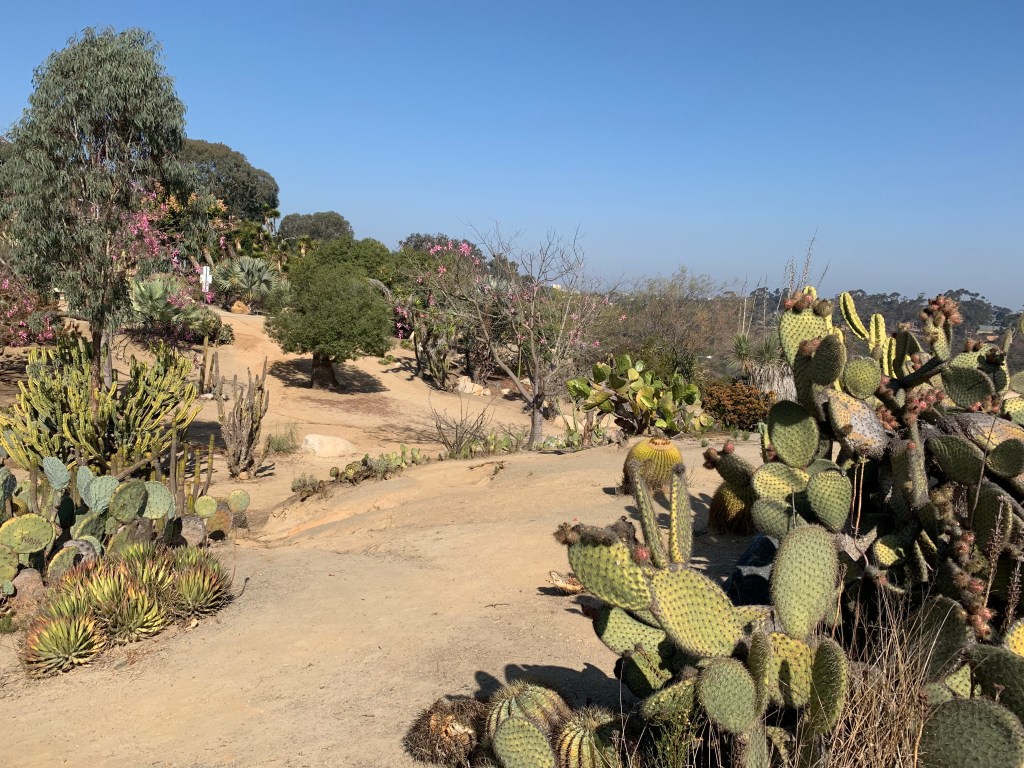
With COVID-19 ramping up this spring, we followed California’s stay at home orders and didn’t leave our house or neighborhood much at all. However, there were two days where we were all feeling a little too cooped up, so we ventured East into the desert to stretch our legs away from people.
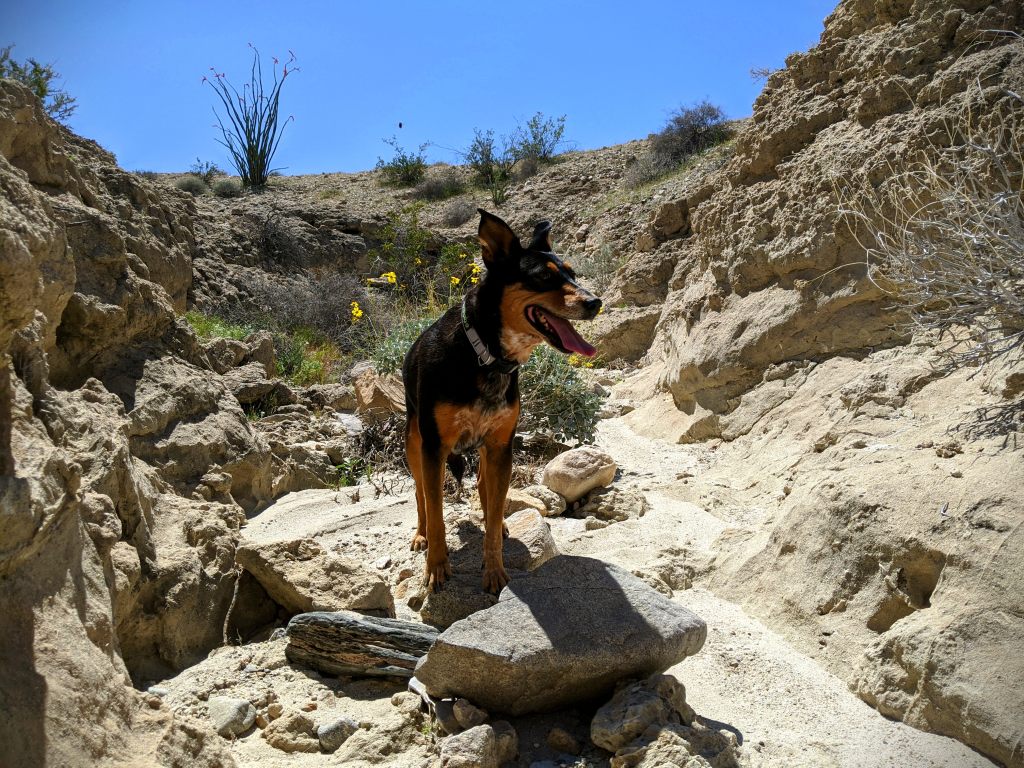
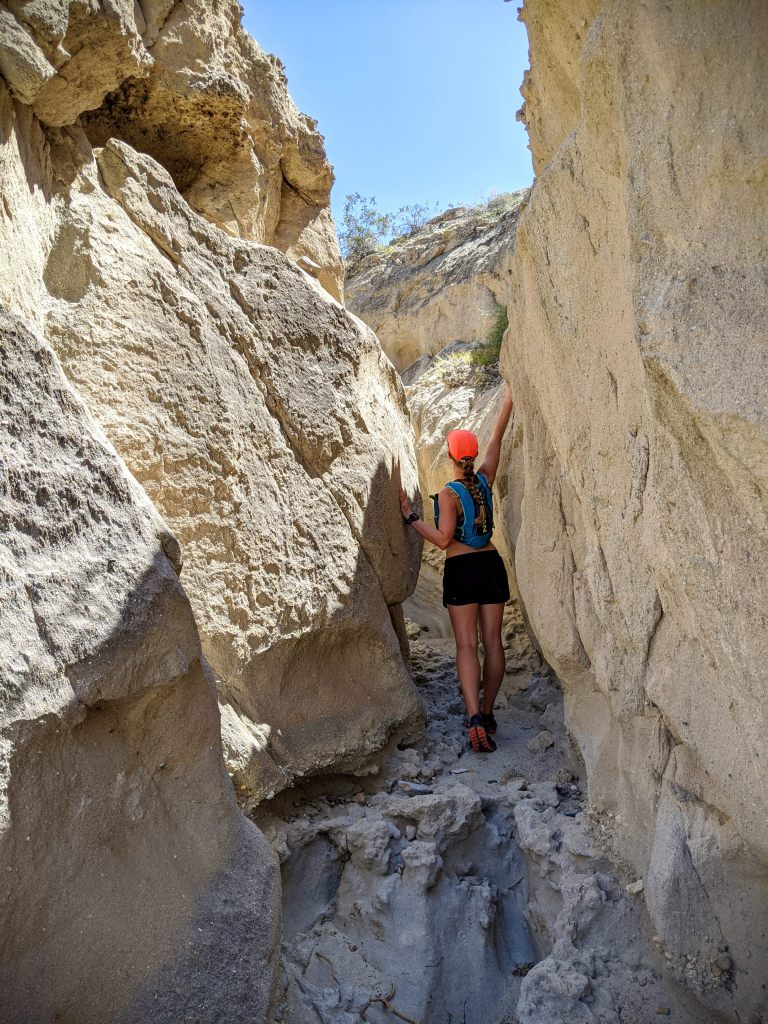
Domelands Trail
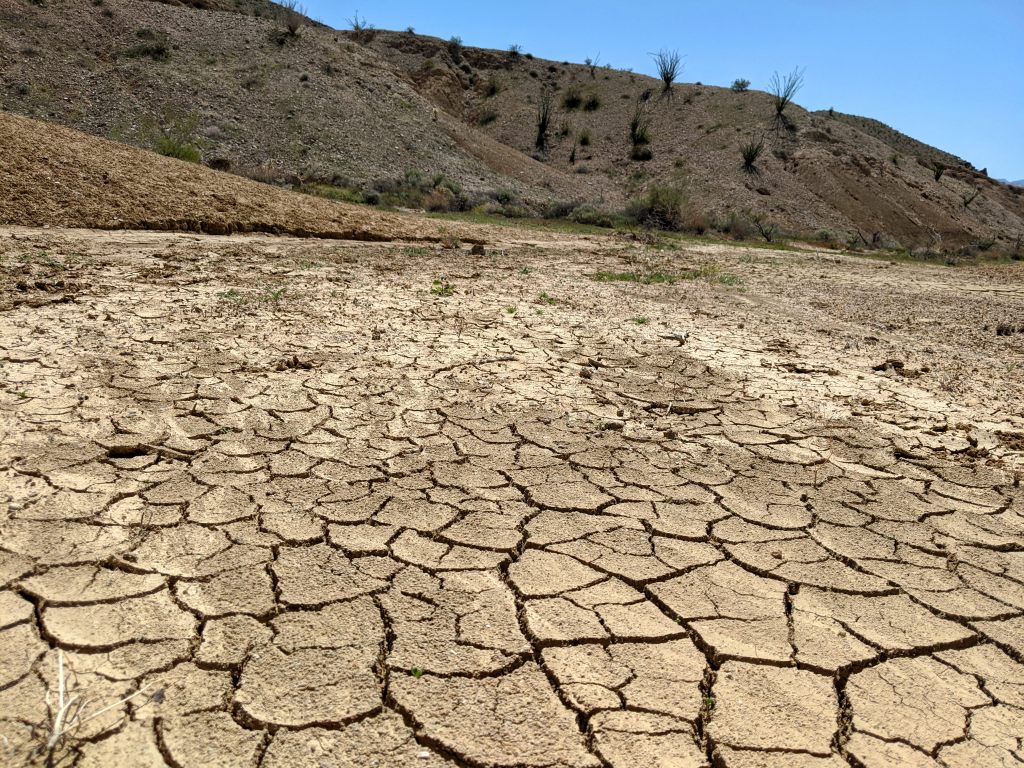
The Domelands Trail is a 7 mile trail in the Coyote Mountain Wilderness. It was a 1.5 hour drive East of San Diego, which was a little longer than we typically go for a hike. The trail is in the desert and can be difficult to find at times, but it offers some amazing landscapes. There are wind caves and slot canyons throughout the area and it is a perfect spot for exploring. Be aware that there is no shade and it can get very hot very quickly. The day we went was in the mid-70s, but the sun made it way too hot for the dog. Without her, we would’ve made the entire loop, but, even with plenty of water, pets can overheat very quickly in the desert. We wandered around for 3.5 miles before calling it a day. This was a very neat hike with very few people (the day we went) but not worth the 3 hours in the car if that’s your only destination.
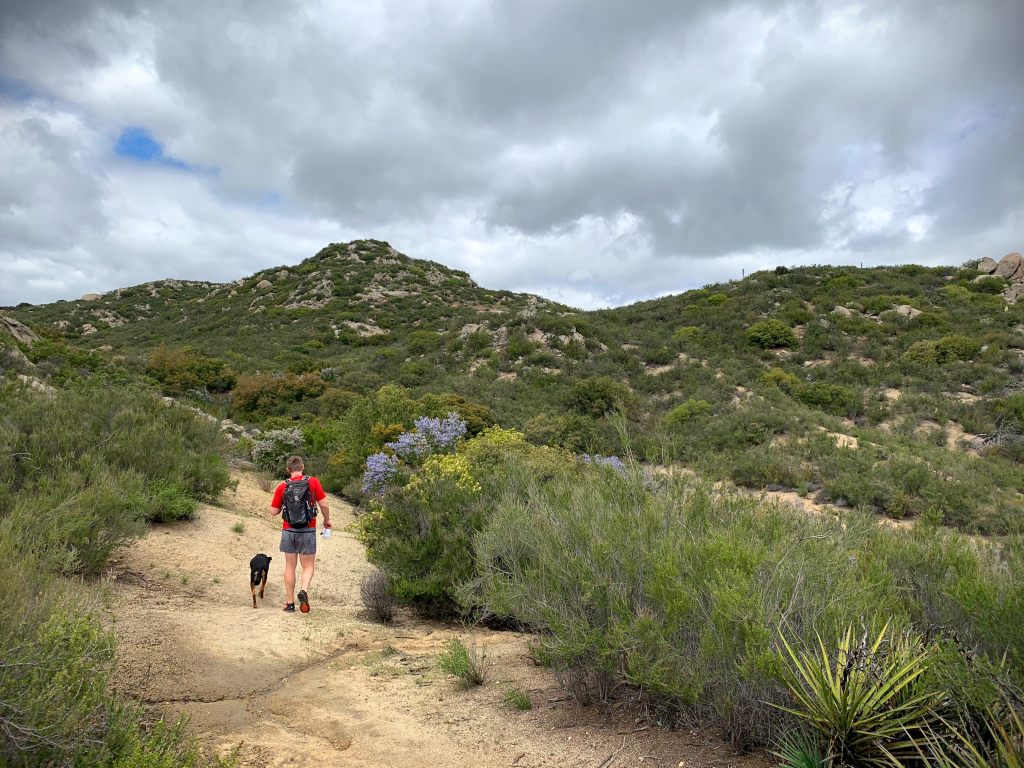
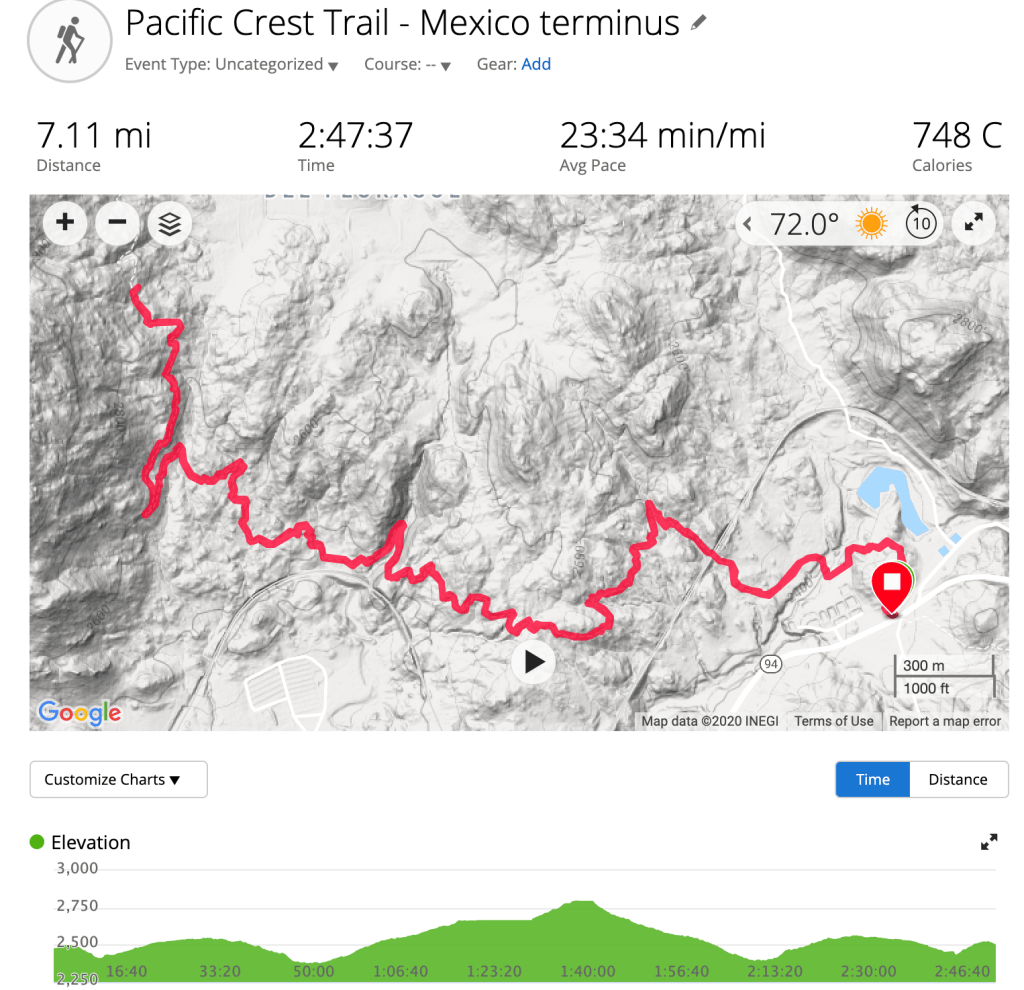
The Pacific Crest Trail runs 2,650 miles from Mexico to Canada. We’ve hiked portions of this trail in California, Oregon, and Washington, but this time we started at the southern terminus (well, technically 2 miles from Mexico). The day we went, we didn’t pass a single person on the trail and ended up hiking 7 miles. It was an overcast and cool day, which made it perfectly enjoyable as there is minimal shade. We did an out and back, and would call this section on the moderate end of easy. There was <900 ft. of elevation gain and the trail was very even; it would be a great trail to run. There was one stream crossing along the way and a couple of vantage points looking out over the valley to Mexico. This was a great day hike not too far from the city.
We wanted to provide a light-hearted and photo-filled read to get your mind off of everything life is bringing to us all. This is part 1 to a multi-part post about our trip. Enjoy!
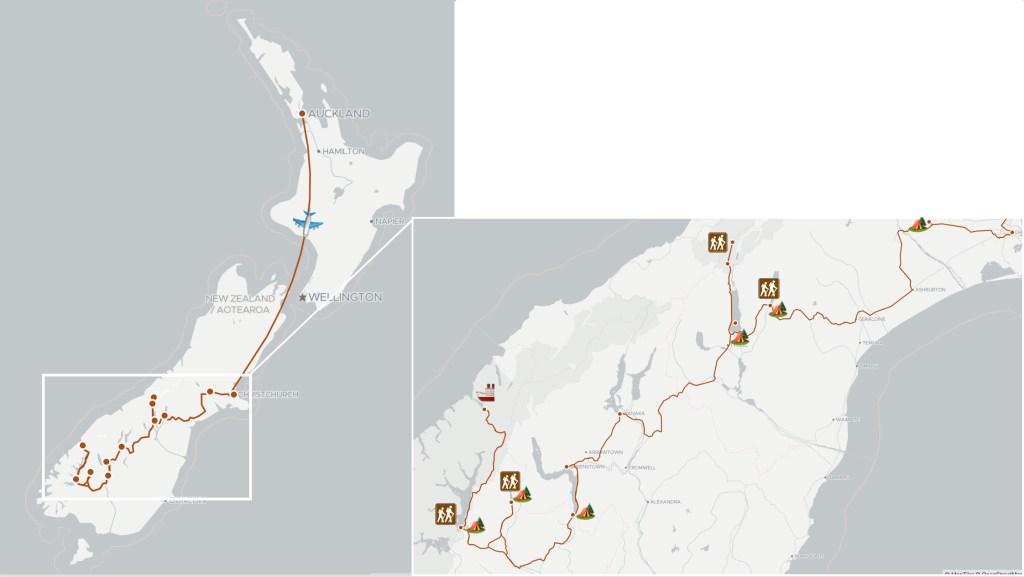
We recently returned from a whirlwind, 10 day holiday in New Zealand. There is so much that we want to share from our trip that we can’t fit it in a single post. Here we’re going to dive into some of the nitty-gritty around camping.
It’s worth noting that aside from 24 hours in Auckland we spent our time exploring the South Island. The logistics would still apply to those visiting the North Island, but we can’t speak to places to visit in that area.
Going into this trip we knew we were going to be camping. While we’re not normally big campers, we had read and heard that is the best way to experience the country. In fact, many locals also prefer this method of travel. Thankfully it is so common, and the country is set up in such a way that camping was a total breeze.
Itinerary
Day 1 – Auckland
Day 2 – fly Auckland to Christchurch, pick up campervan, camp in Whitecliffs Domain
Day 3 – Tekapo Lake hike, camp at Patterson Ponds
Day 4 – Mt. Cook hike, camp at Lake Pukaki
Day 5 – spend day in Wanaka, camp in Kingston (south Lake Wakatipu)
Day 6 – Te Anau hike, camp in Te Anau
Day 7 – Milford Sound boat ride, camp at Mavora Lake
Day 8 – Mavora Lake hike, spend night in Queenstown
Day 9 – Queenstown
Day 10 – Fly back to USA
Getting Around
There are many ways to get around New Zealand, but we would highly recommend driving. We chose to rent a campervan for our time, but there are plenty of Hotels and BnBs around if you’d prefer not to camp. We saw a lot of No Vacancy signs, so if you go that route be sure to make arrangements ahead of time.
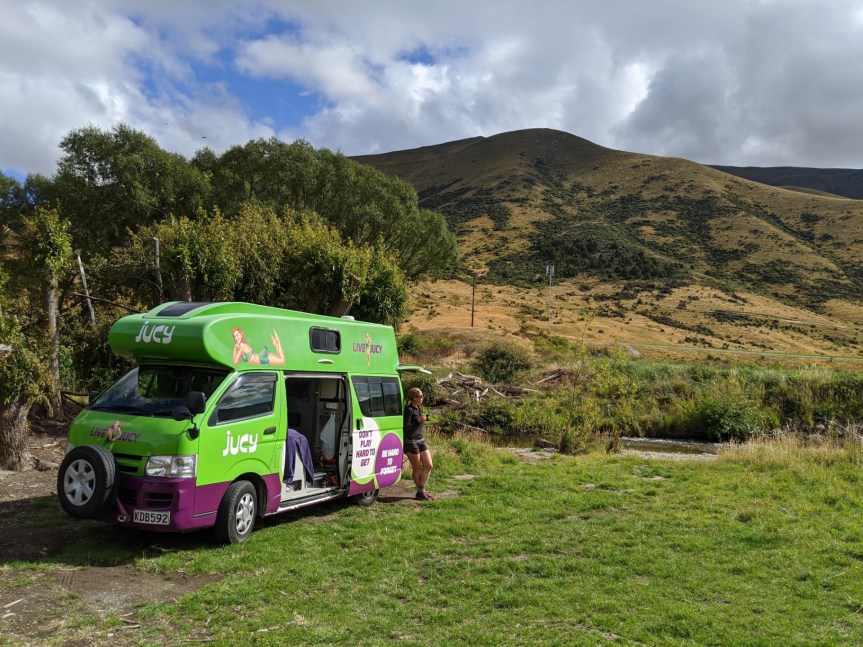
Camping at Kingston Lake Camp
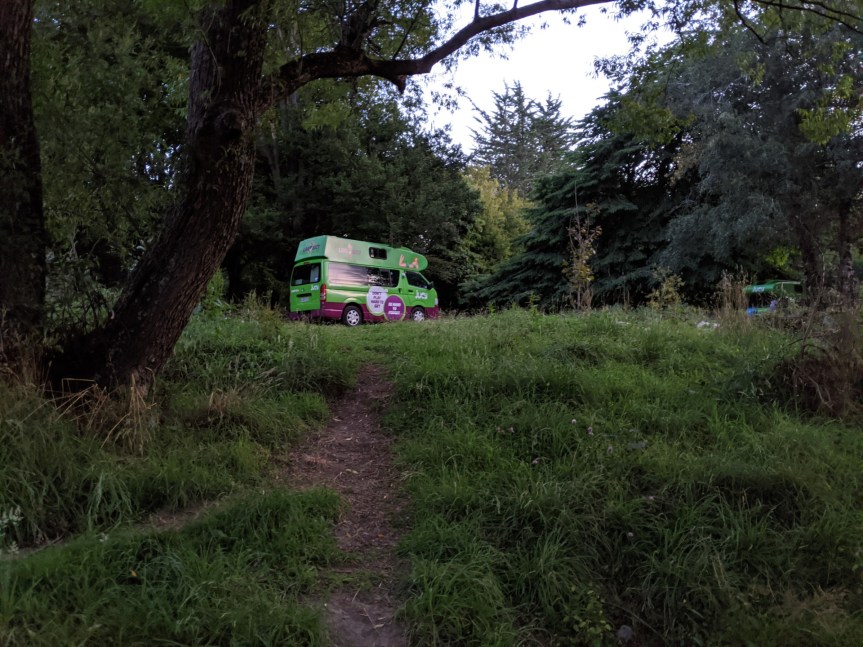
Whitecliff Domain camping area
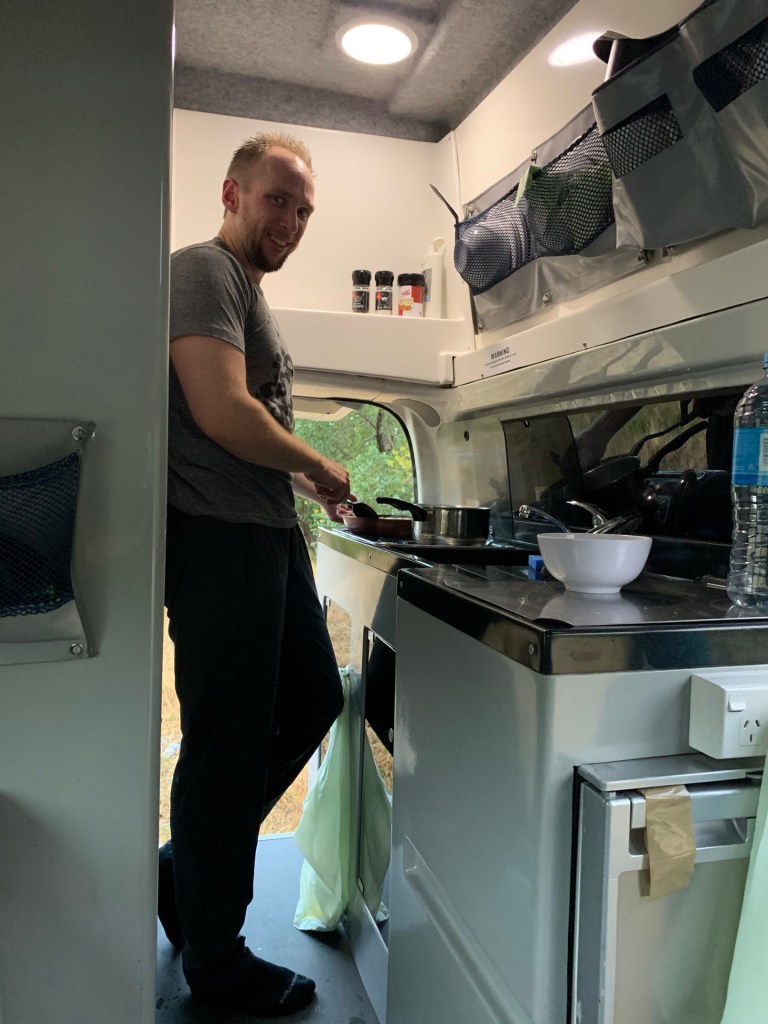
We rented our van through Jucy and had a few options to choose from. We went with the Jucy Chaser because it had a toilet and shower. We found plenty of public toilets around so didn’t have much use for that, but the shower was very nice to have after a long day. Overall, we were very pleased with the setup. The van had a bench seat that converted to a bed as well as a lofted bed. We chose to use the lofted bed since it was more comfortable for us, but we did use that space to store our luggage during the day. There was a small kitchen in the back with a two burner stove and a sink. We were able to cook most of our meals from the comfort of our van, including a delicious chicken curry :). The main downside for us was that the beds weren’t all that comfortable. We never really got a restful night’s sleep, but it was still lightyears better than tent camping.
We chose Jucy because it was a middle-of-the-road option that was small enough for us to be comfortable driving while also having the amenities we wanted. There are plenty of other companies out there offering different size vehicles at a price point for any budget. The main ones we saw on the road were: Britz, Maui (these two were typically larger campers), Travellers Autobarn, Mad Campers, and Escape. This post on TwoWanderingSoles has great information on how to select a campervan that meets your specific needs.
Lake Pukaki overnight Campervan area near Mount Cook
Camping
There are a few things to know before you plan to camp in New Zealand. The country encourages camping and many campsites have vault toilets, but all of the campsites we stayed at required your vehicle to be self-contained. At a basic level this means that you must be able to function without outside resources – you will need to ensure you have a toilet and a container to hold grey water. Rentals in New Zealand meeting these requirements will come with a sticker indicating they are self-contained.
We heard a lot about “freedom camping” prior to our trip, and (wrongfully) assumed this meant you could park and camp anywhere. While you technically can camp on public lands, it’s difficult to know exactly where those begin and end. At the risk of incurring a hefty fine, we opted to utilize the Campermate App which was beyond useful. This app aggregates data not only on available campsites (free, low cost, and holiday parks) but also on potable water, dumping stations, showers, toilets, etc. Not all, but many free campsites have vault toilets and running water (not potable!).
Full kitchen setup on the right, and the privy and shower “room” on the left in the campervan.
Matt cooking up a delicious meal in the camper van.
Eating some delicious campervan-made curry chicken after a long day of hiking.
Typical NZ breakfast in the campervan, steel cut oats, sausages, eggs, and pour over coffee
We stayed at free campsites for 4 of the nights, a holiday park for one, and a low-cost campground operated by the Department of Conservation for one. By far our favorites were the free sites, but we can’t deny how nice it was to have a regular sized shower and full kitchen the night we stayed at a holiday park. Do take into consideration that most paid campsites charge per person not per vehicle so they can add a large expense on top of what you’ve already paid for the van.
Taking a rest along a stream with the campervan
We loved the flexibility that the campervan offered – we didn’t have to rush to a new hotel and could just pick a campsite based on how far we wanted to drive. It was also really nice to hop directly in the shower after a hike or pull over and brew up a cup of coffee. Overall, we highly recommend this mode of travel in New Zealand.
Kitchen Creek Falls is a moderately trafficked, 5 mile out-and-back portion of the Pacific Crest Trail. We continued along the trail for a bit after the falls making our hike an even 6.5 miles. The great thing about the PCT is that you can make your hike as long or short as you like. It is located in the Cuyamaca Mountains about 50 miles east of San Diego. The trail is on the easy side of moderate; the trail climbs 600 ft. very gradually over the course of 2.25 miles. There is a steep portion right as you get to the falls, which is what puts this into the moderate section. We’d recommend some poles as this portion can be a little tricky to maneuver. The turn off to the falls is easy to miss, so keep your eyes peeled or have a map handy. The falls are a series of small waterfalls along a creek. In the winter, after a rain, there was quite a bit of water flowing, but we’ve heard that it can be pretty dry in the summer.
Paradise Mountain Loop is an 8 mile trail located in Hellhole Canyon near Escondido. Hellhole Canyon is a nature preserve that is only open Friday-Monday and is not open during the month of August due to high heat. Keep that in mind as you plan your visit. In our opinion, the trail is on the hard side of moderate. It climbs 1,900 ft. over the course of 8 miles with all but 300 ft occurring in the first half of the trail. It’s not too steep, but it is rocky and we definitely recommend hiking poles if you have them. On a Sunday in January, the trail was lightly trafficked, though this may change during high tourism seasons. The best part of the trail was how quiet it is. Many of the trails around San Diego are also near large interstates, but Hellhole Canyon is nestled in the mountains away from traffic. There were great vistas along the trail and the top had amazing views across the valley. We did read that in the spring and summer the trail can get quite overgrown, but we had no issue with brush while we were there.
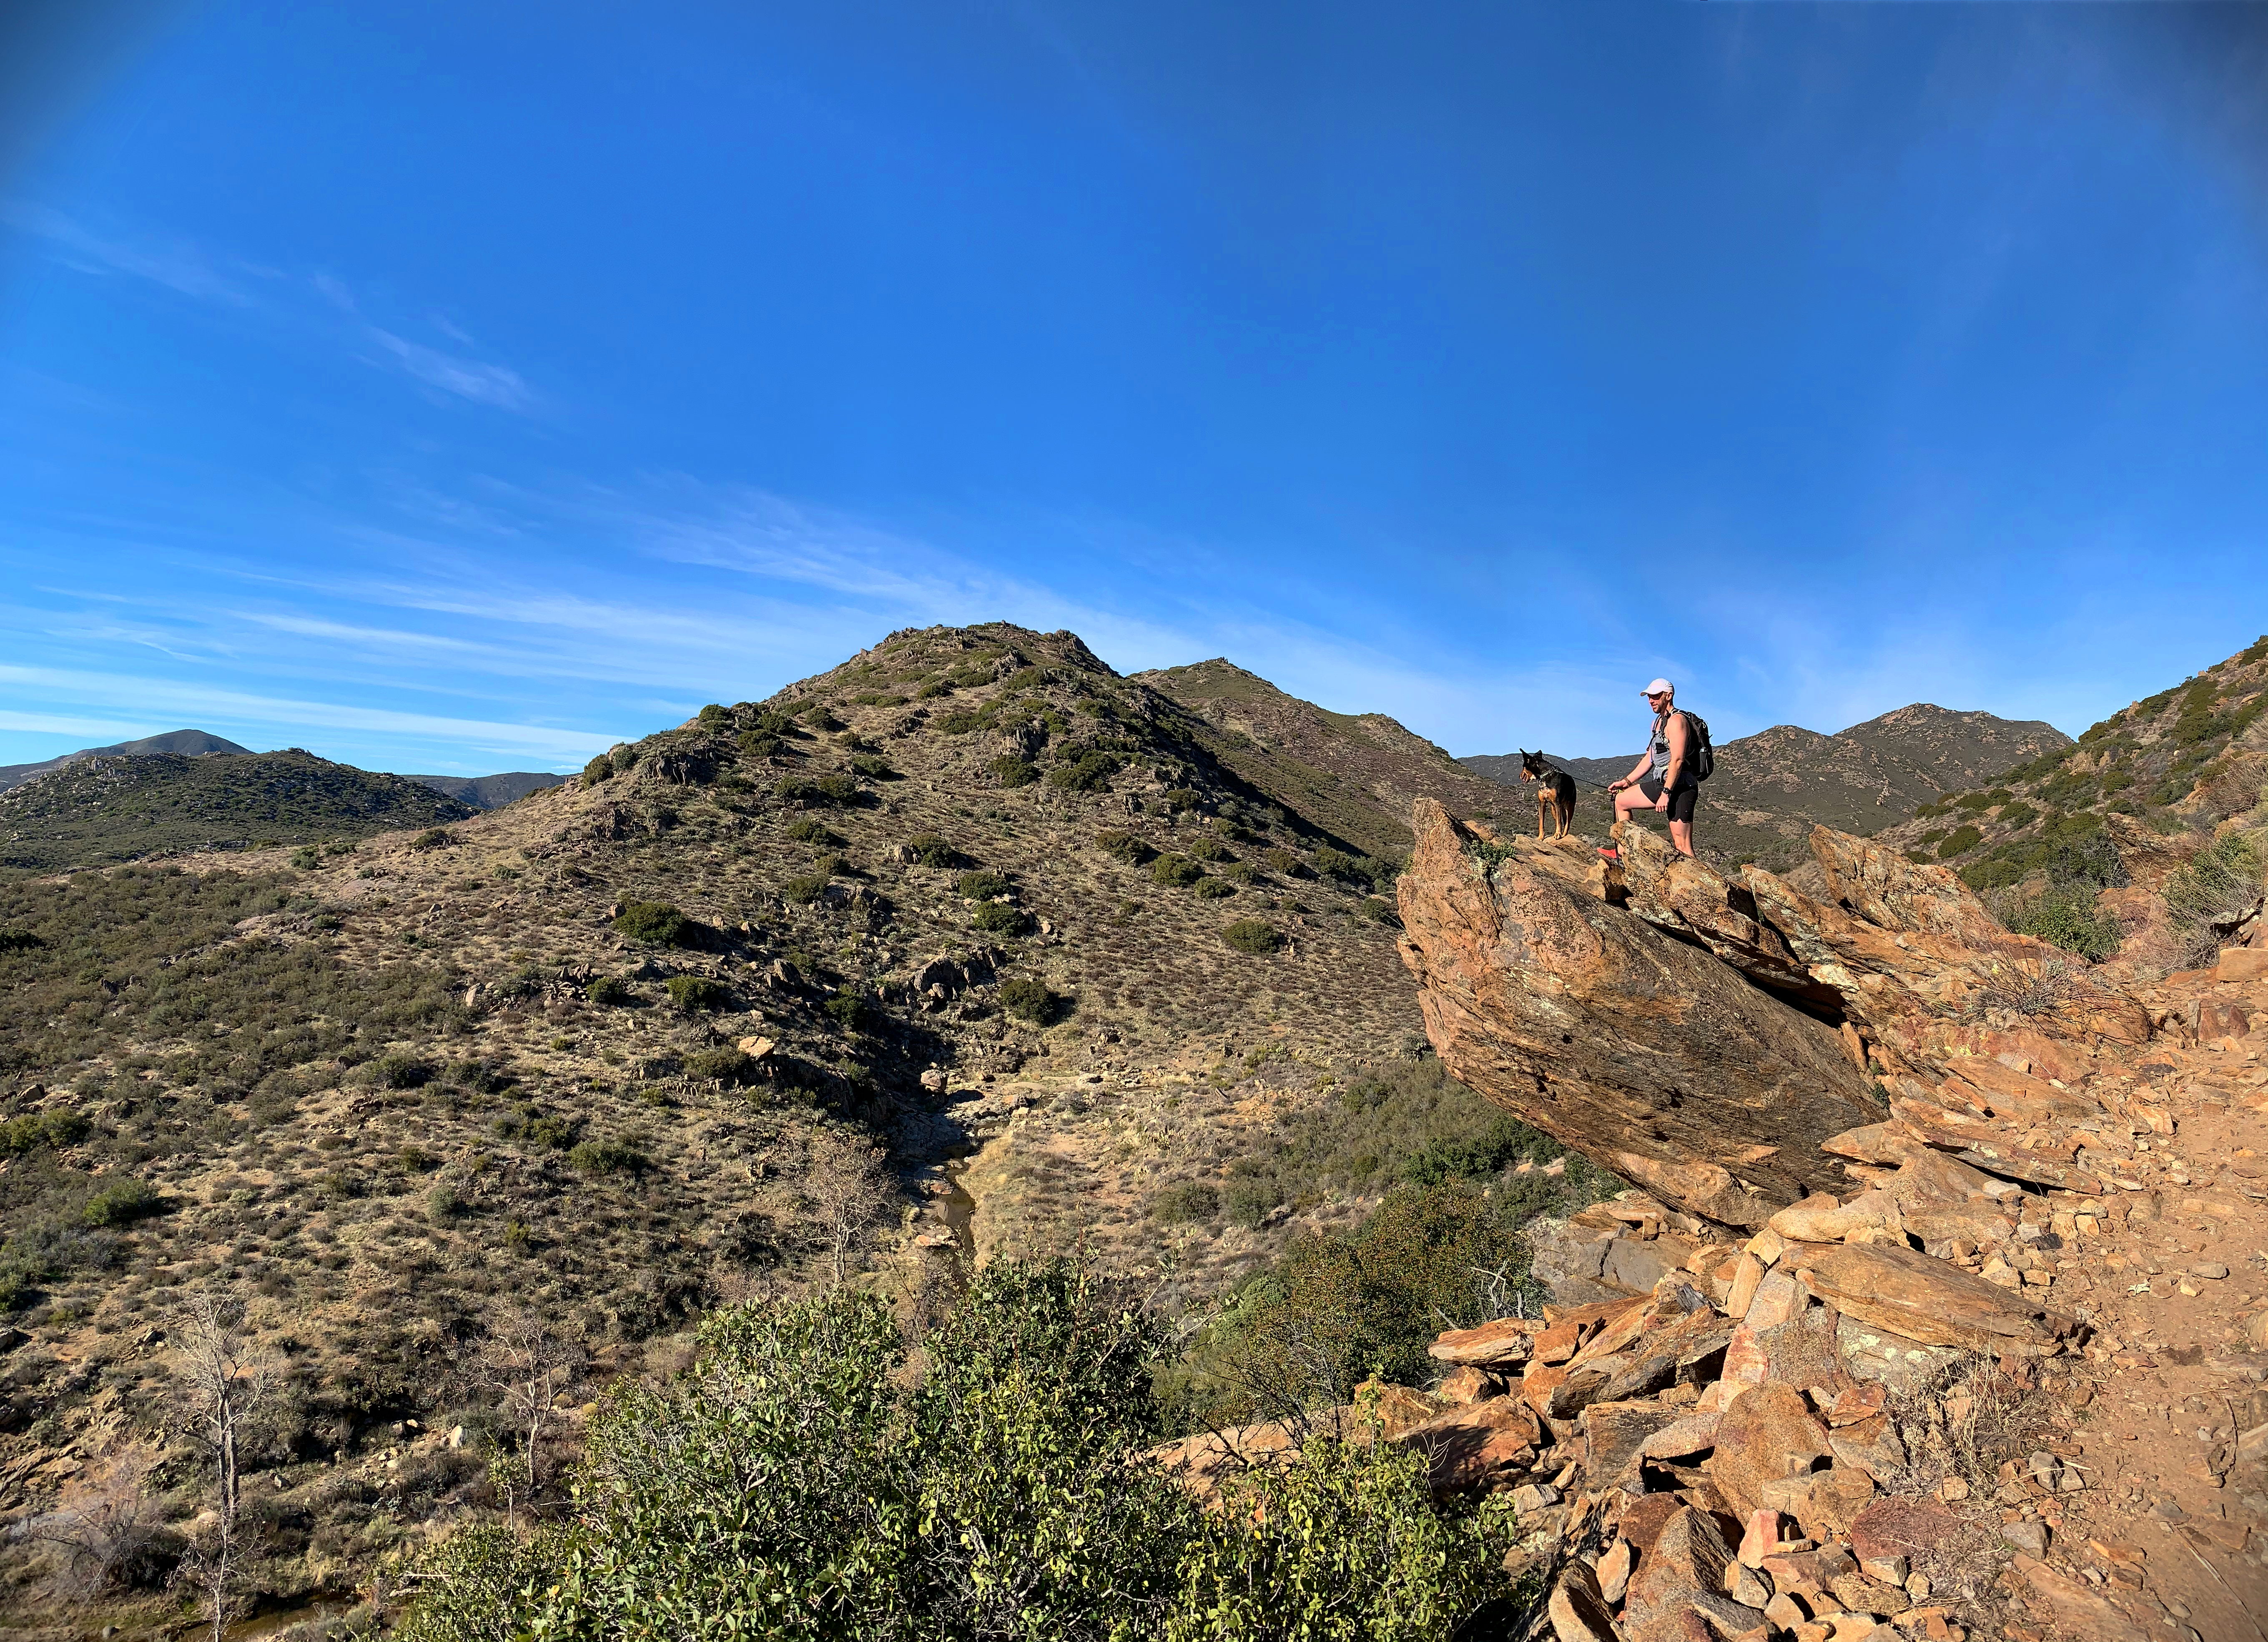
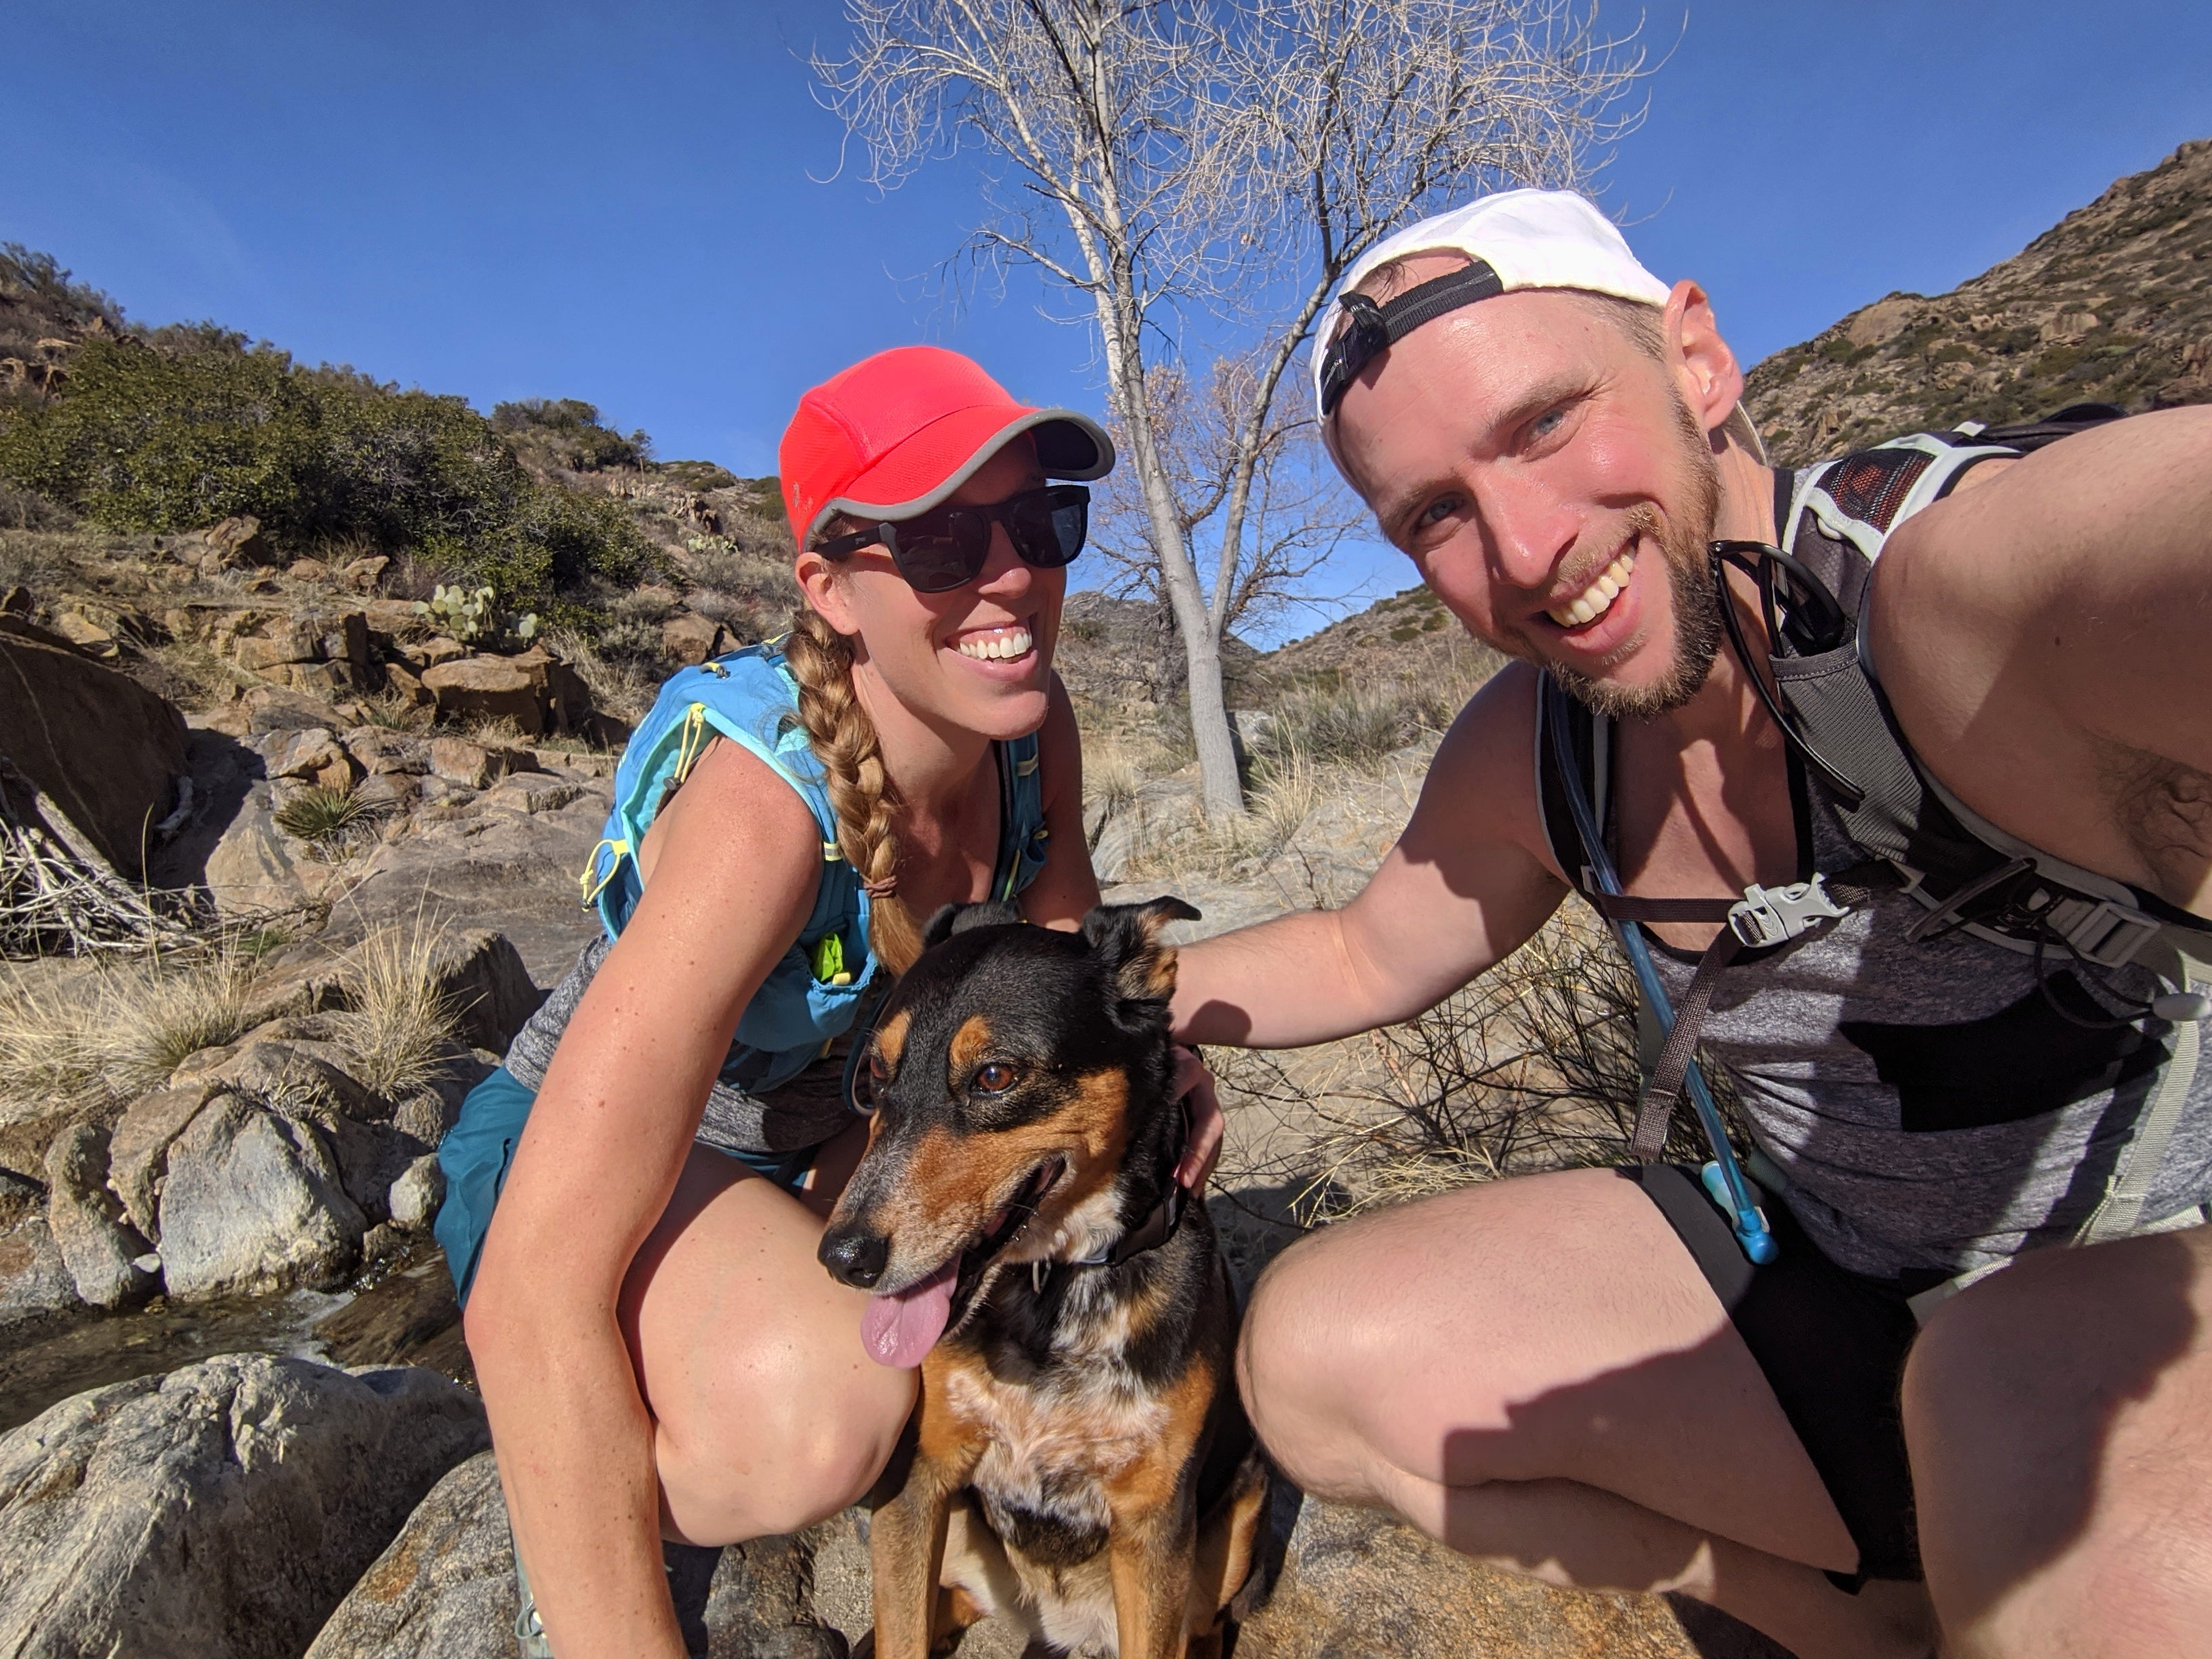
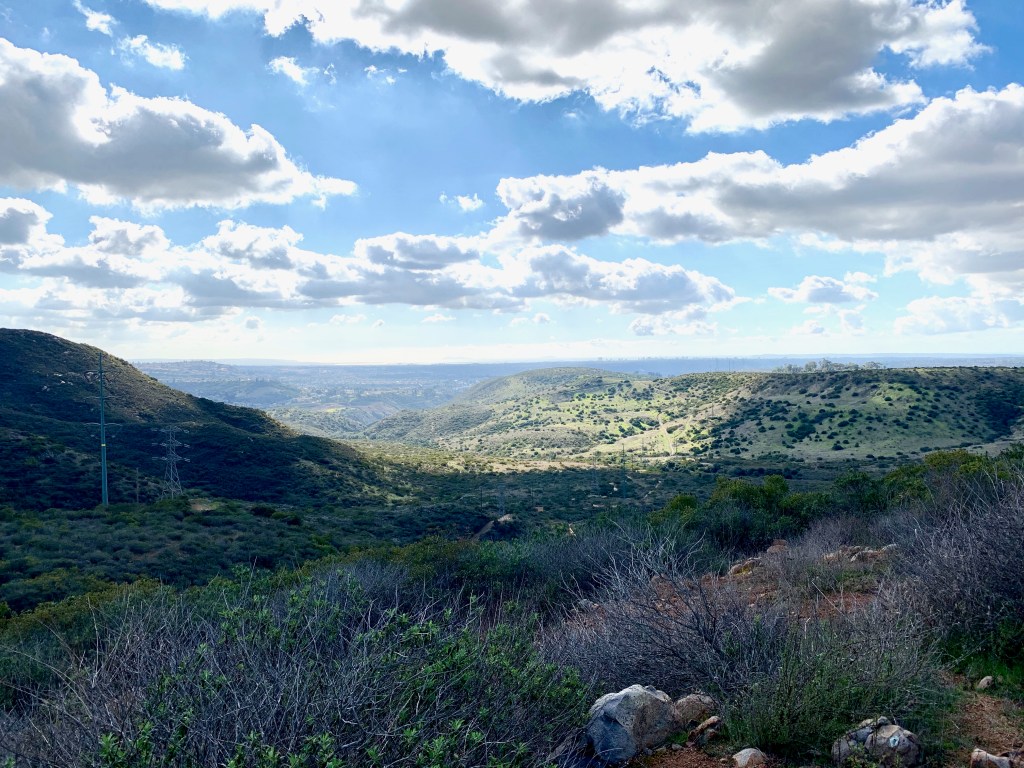
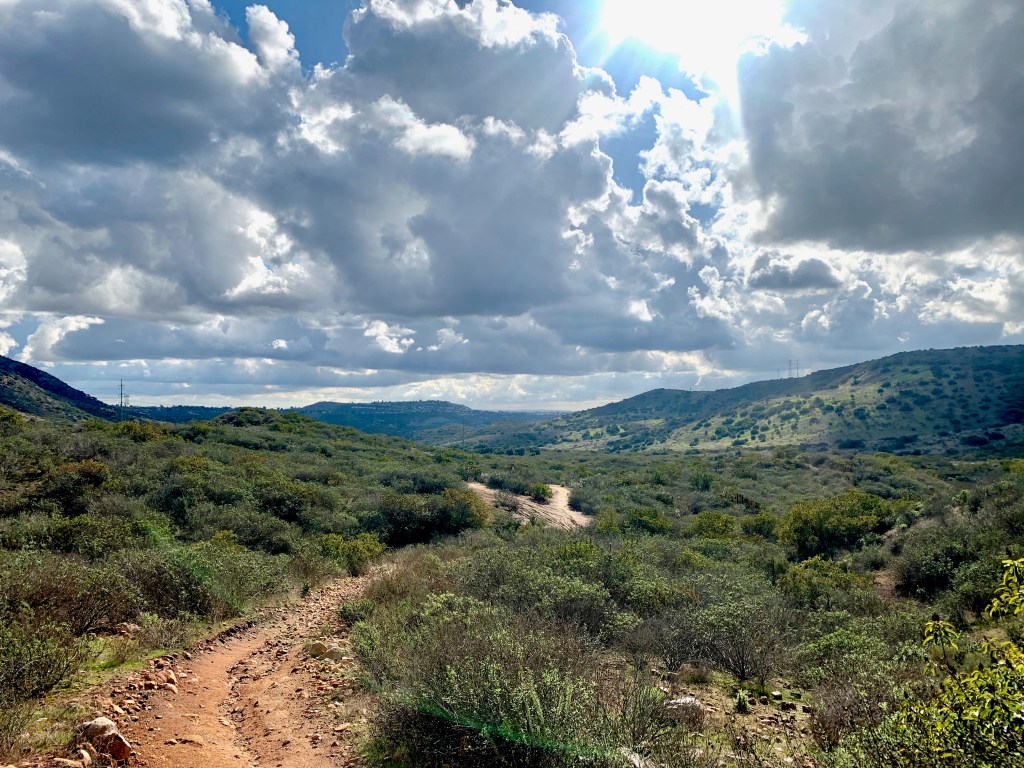
November and December saw fewer hikes than previous months. Having left the lush Pacific Northwest, we’re a bit less enthused getting out on the trails. San Diego isn’t known for hiking and the trails near the city are lackluster. Suffice to say, it’s been a bit harder finding places to hike. Nonetheless, we’ve found a few places to get our hearts pumping and have staked out a few more routes further into the mountains.
Tecolote Canyon is a nature park near Mission Bay with roughly 7 miles of trails. The trails are fairly rocky and wide but aren’t too difficult. There are a few spots under the power lines that are very steep, but otherwise the trails are relatively flat and easy to walk or run. It’s along a golf course and near a road, so don’t expect to feel like you’re in nature, but for something close to the city it’s a decent spot to walk around.
Balboa Park
Balboa Park is another in-city option for getting off road. There are 65 miles of trails – this includes both paved and dirt – throughout the park. We live less than 1 mile from the park so getting on the trails is an easy activity during the week. The trails aren’t very well marked and run along heavily trafficked roads so keep that in mind. On the plus side, they are pretty lightly trafficked so you’ll likely have the trail mostly to yourself.
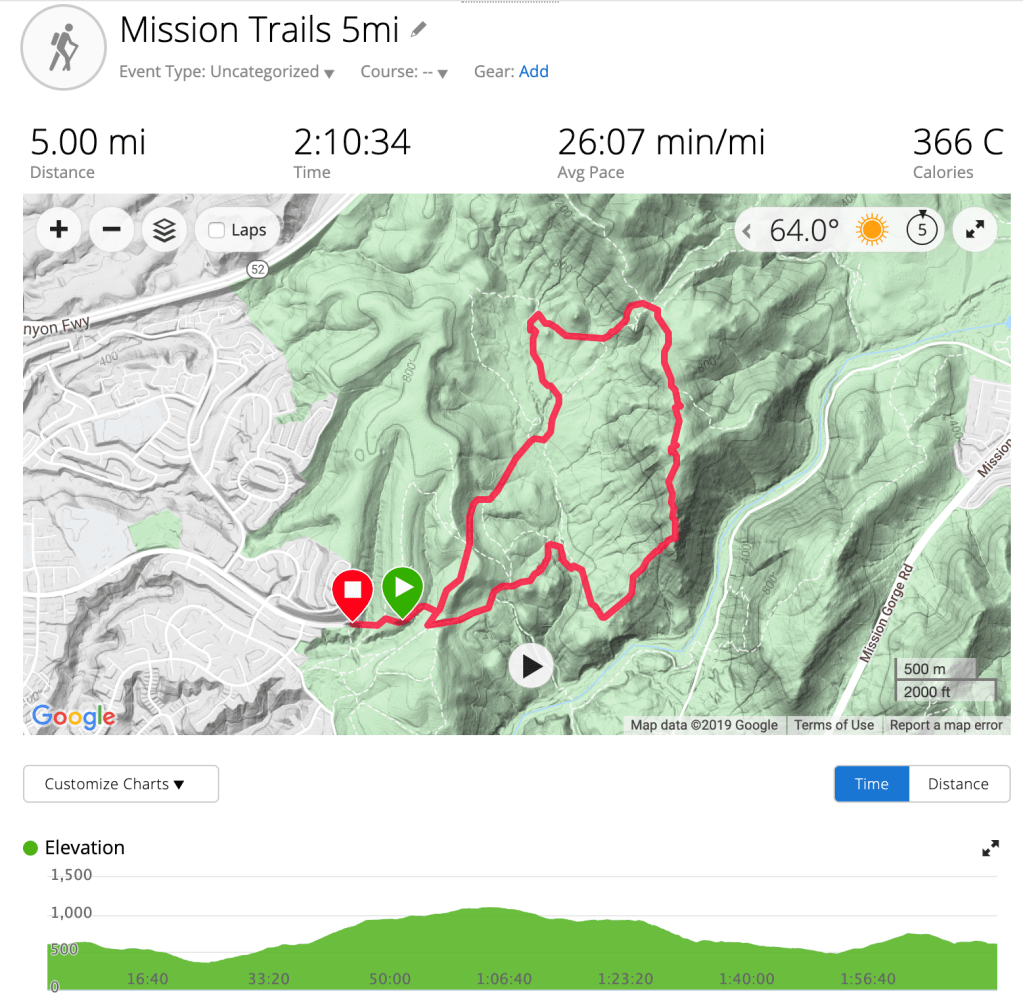
So far, this has been the best spot for hiking we’ve found in San Diego. It’s a bit of a drive from our apartment, but worth it to get some trail time on the weekend. We’ve actually done three separate hikes here in December alone. There are 60+ miles of hiking trails with varying degrees of difficulty. Our first trip took us from the south entrance to South Fortuna Peak. It was a 5 mile, moderate loop with a mile of glute-burning stairs to the peak. The second two times, I did a 15k and 21k loop that are marked through the park. Both start at the east entrance and go through the Grasslands Loop before climbing to the peaks. The 15k winds through the valley before ascending to South Fortuna Peak with 1,900 ft of ascent, while the 21k begins with North Fortuna Peak before cruising along the park perimeter and joining back with the 15k loop at the South Fortuna ascent for a total of 2,880 ft of ascent. It’s not for the faint of heart, but aside from the two major climbs it’s very doable. The views of San Diego and the Cuyamaca and Laguna Mountains are spectacular.
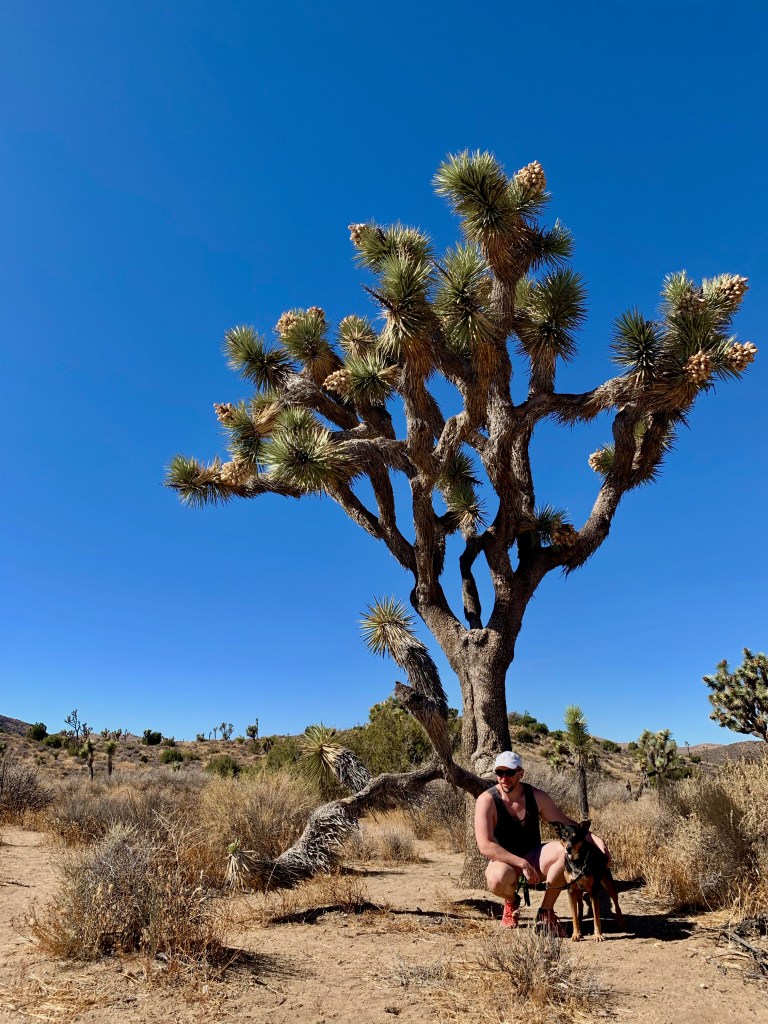
In late October we spent two weeks in Yucca Valley, CA. We were able to take advantage of the proximity and visited Joshua Tree National Park on a warm, sunny afternoon.
Joshua Tree is the intersection of the Colorado and Mojave Deserts. The park has a vast array of landscape, flora, and fauna with amazing geologic features brought about by strong winds and torrential rain. The Western side of the park – the Mojave Desert – is higher elevation and is home to some spectacular rock features and the famous Joshua Trees. Many of the rock formations are a result of historic weather when the climate was much wetter than it is currently.
We entered the park through the West Entrance and drove the park road to Keys View. National Parks don’t allow dogs on trails, so we were limited in where we could go and do with Snickers. We were able to hop out of the car and walk along some dirt roads, but our visit was mostly limited to what we could see from the car. We also only scratched the surface, mostly limiting our tour to the Western side.
The rock formations through Hidden Valley were amazing. We would’ve loved to hop out and explore. There are some very popular rocks – arch rock, skull rock, heart rock – and we would definitely recommend getting out and exploring if you are able. Surprisingly, we didn’t snag a photo of these, but the photo below is a good representation.
Of course, we have to mention the Joshua Trees. These prehistoric-looking trees are mostly contained to the Mojave Desert, and can be found in California, Utah, Arizona, and Nevada. These unique trees often live hundreds of year, with some species living for a thousand.
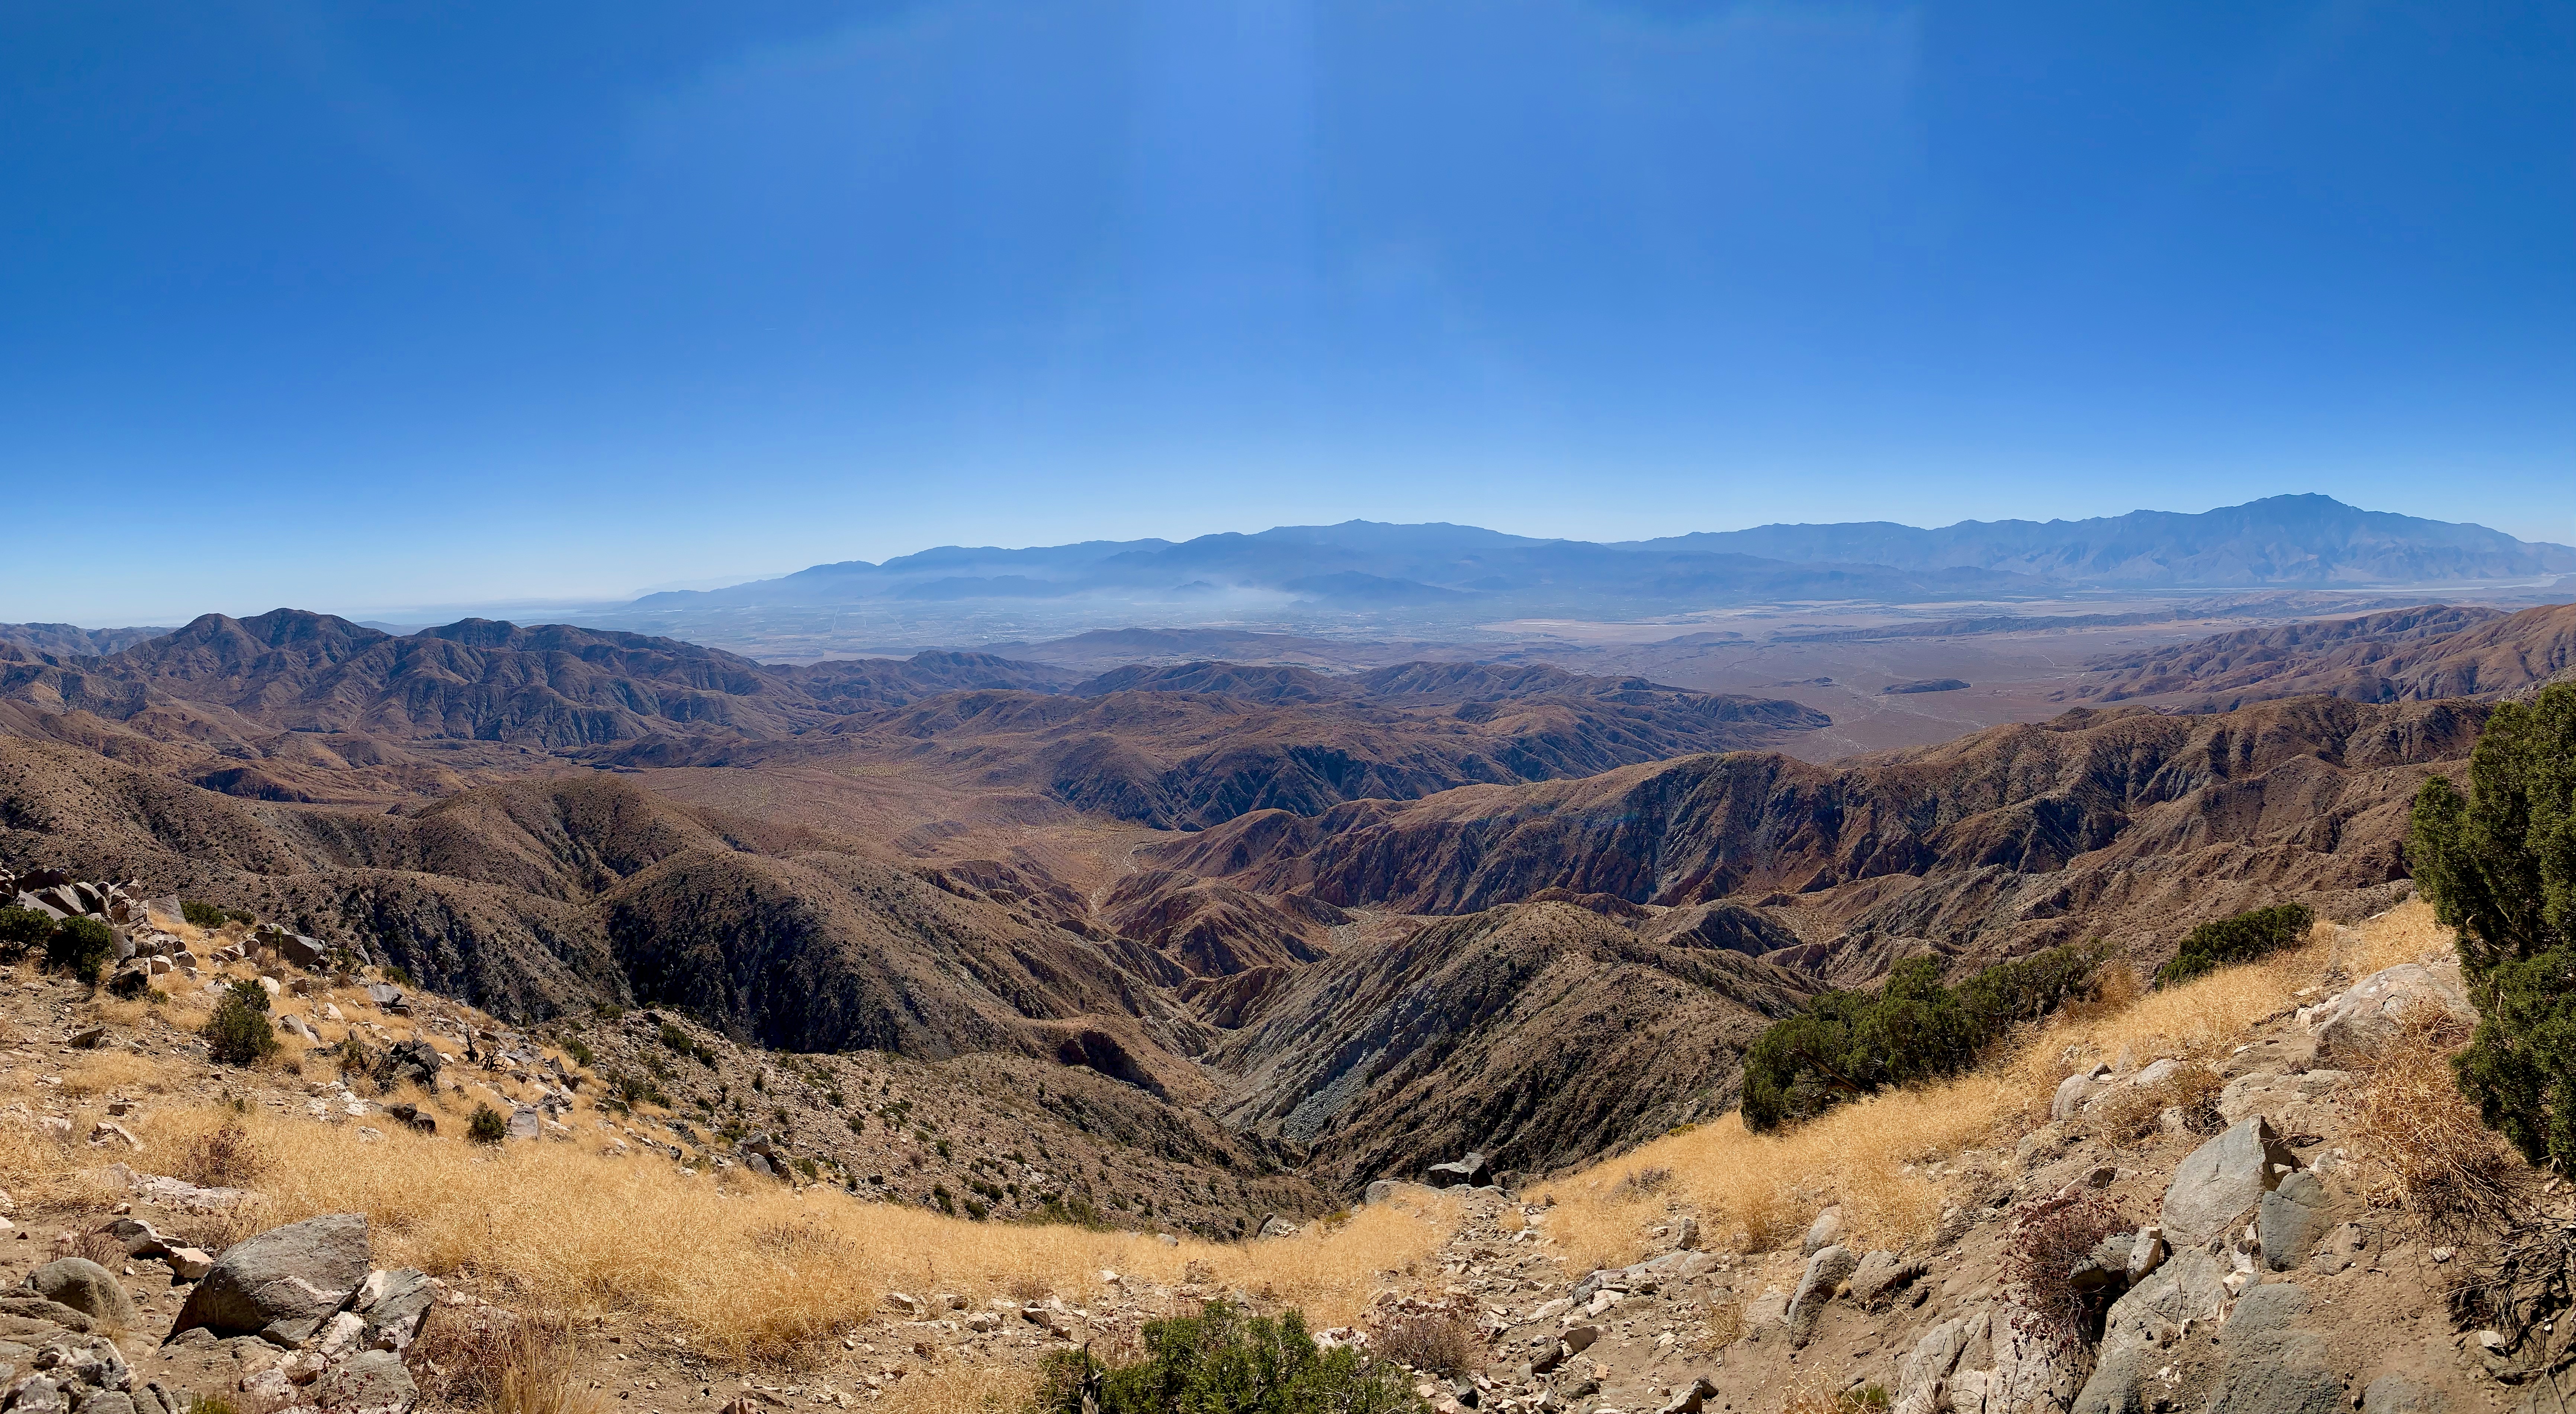
Keys View is a spectacular vista on the crest of the Little San Bernadino Mountains overlooking Coachella Valley and the Salton Sea. The mountain drops a mile to the valley, and the San Andreas Fault runs right through it. On clear days you can see all the way to Mexico, though the skies were hazy the day we visited.
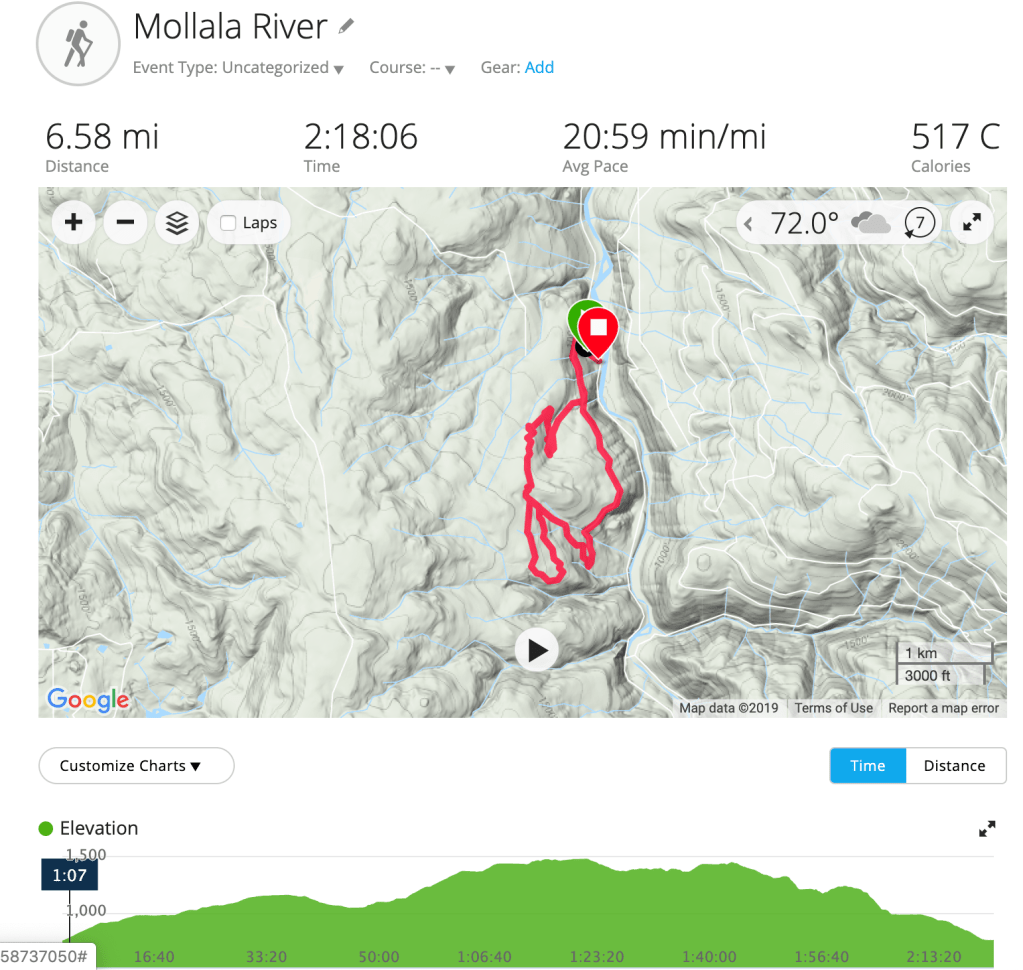
In early September, we hiked in the Molalla Forest, just east of Salem. There were a lot of trails in the forest, so we didn’t do the exact loop listed on AllTrails, but we did a combination of trails for a total of 6.5 miles. The trail started on the Huckleberry Trail, which is a service road. After a couple of miles on that, we were getting bored so we hopped onto some single-track trail and wound our way through the forest. It was a rainy day and very lightly trafficked. The trails were easy, with little elevation gain – we averaged ~1,000 feet over the course of our hike. While it was enjoyable, we wouldn’t recommend this hike since it was mostly service road with a few short single-track trails thrown in.
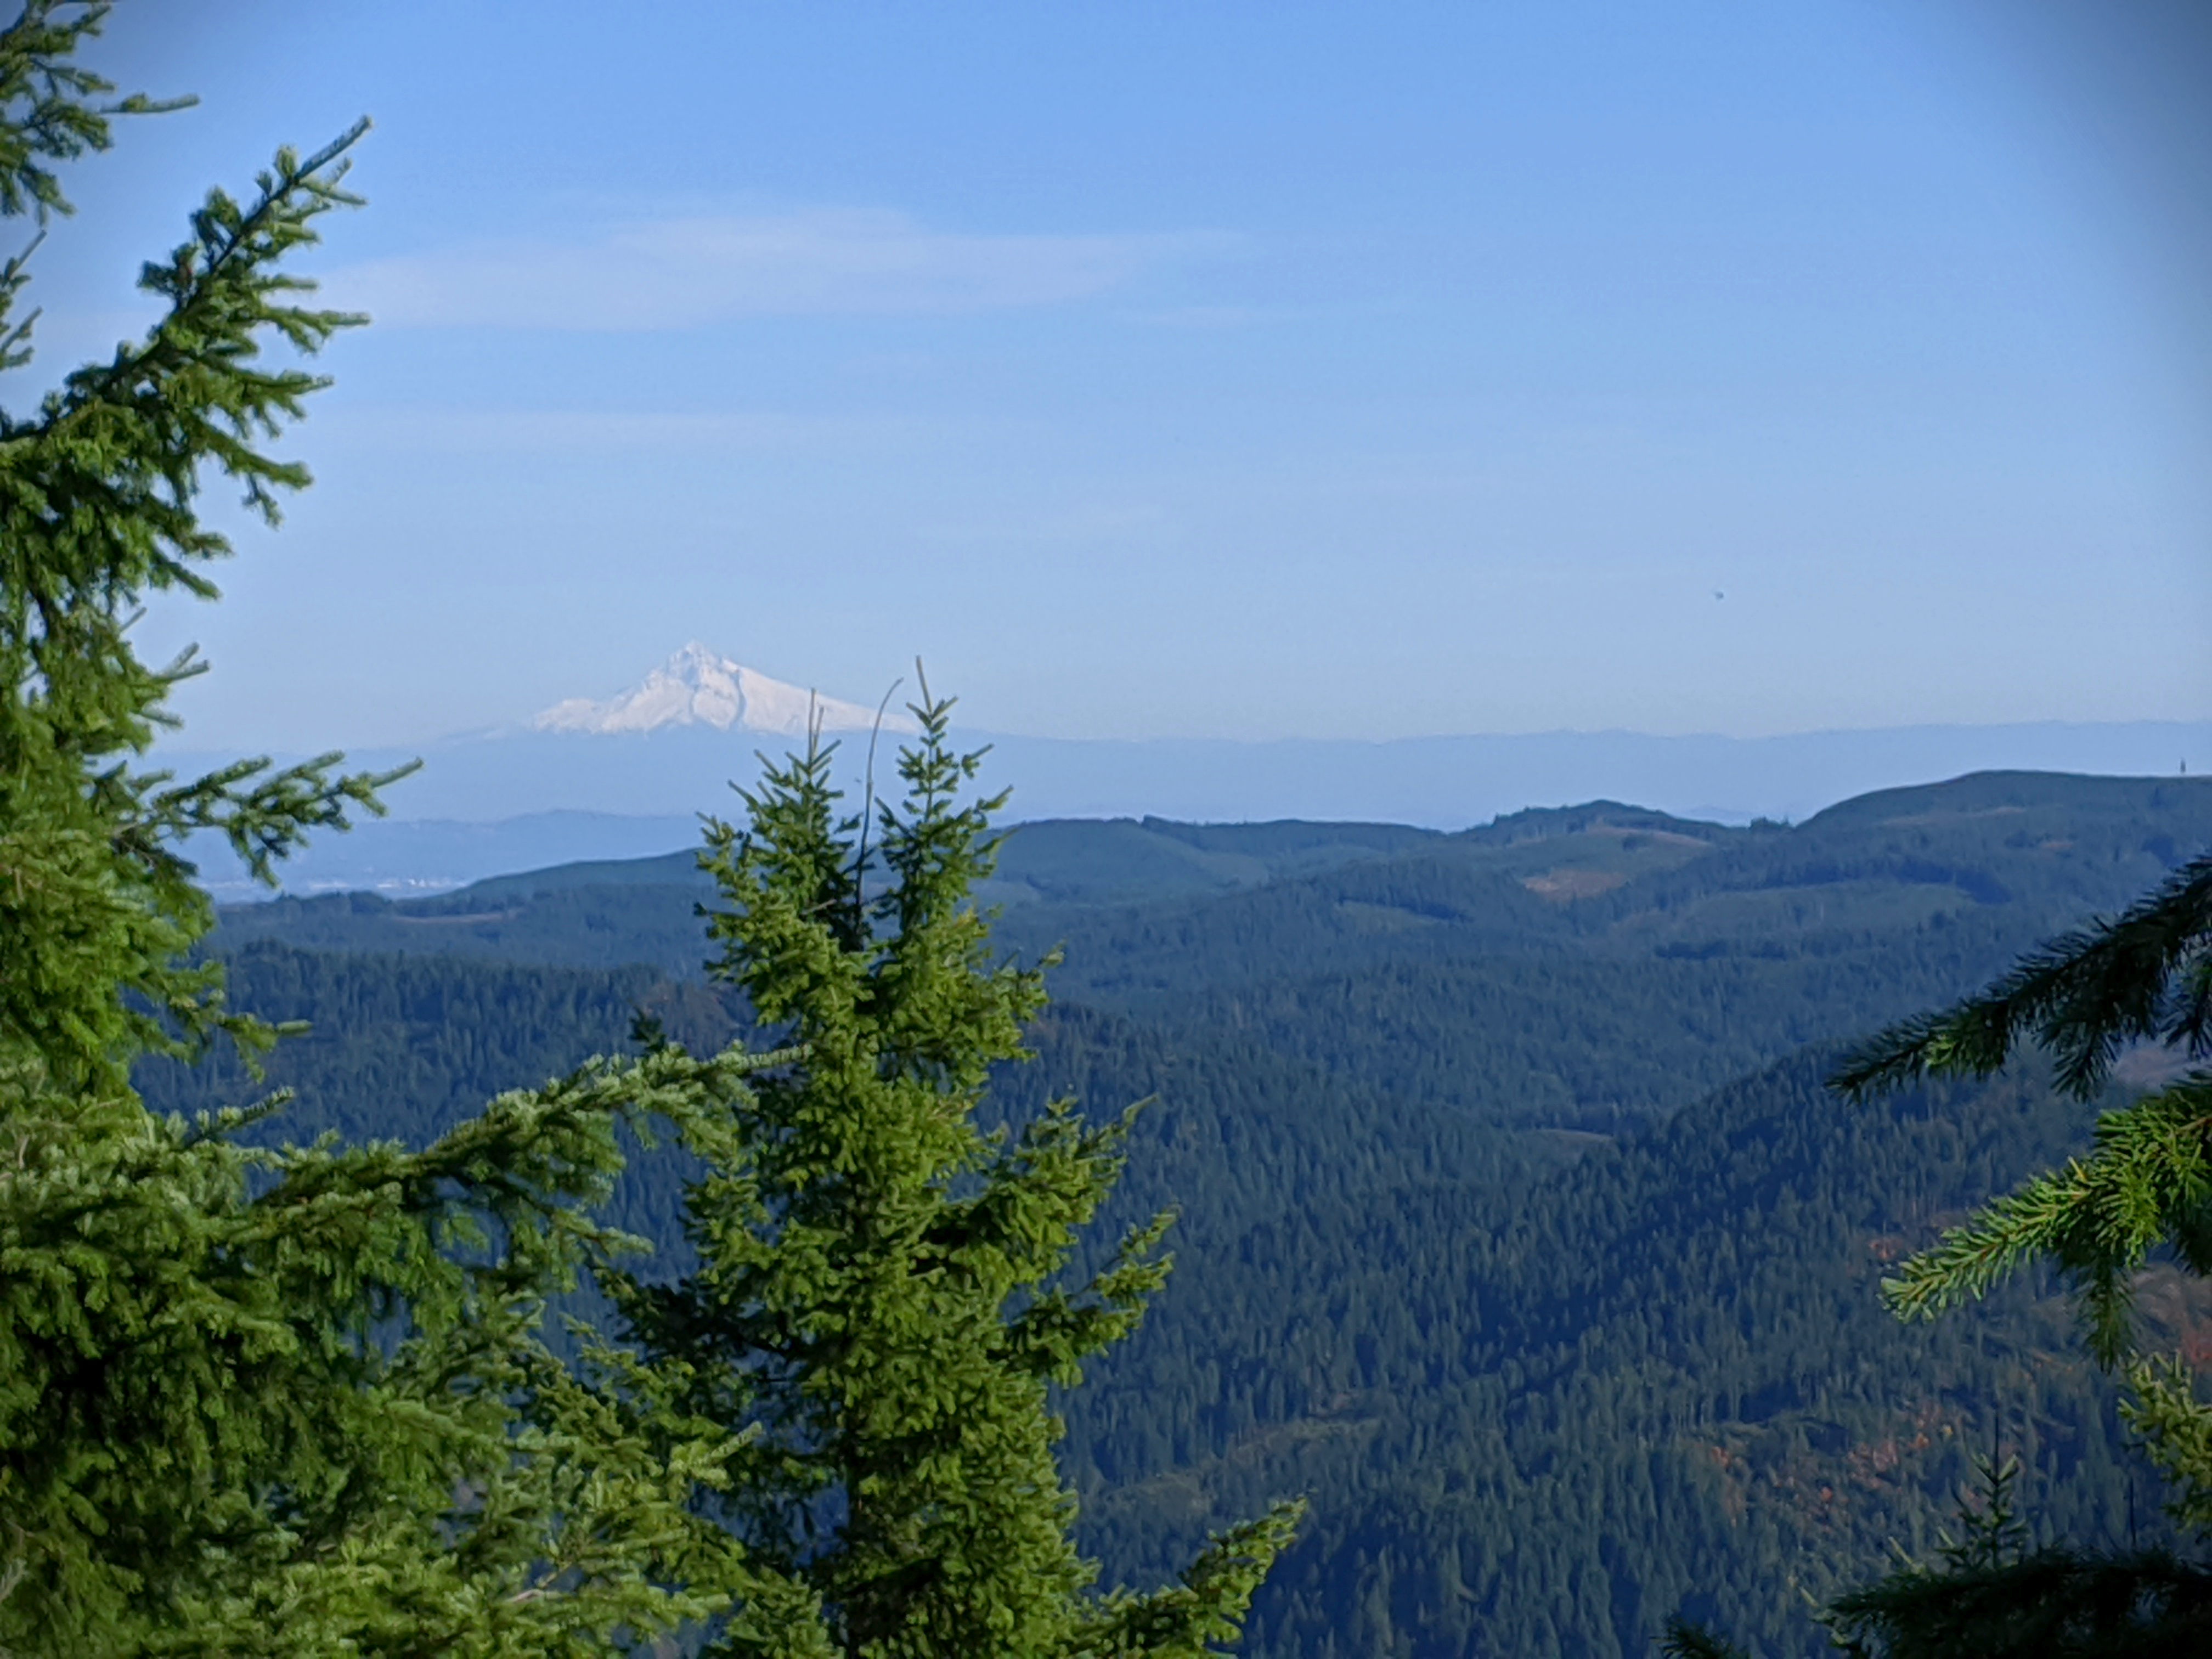
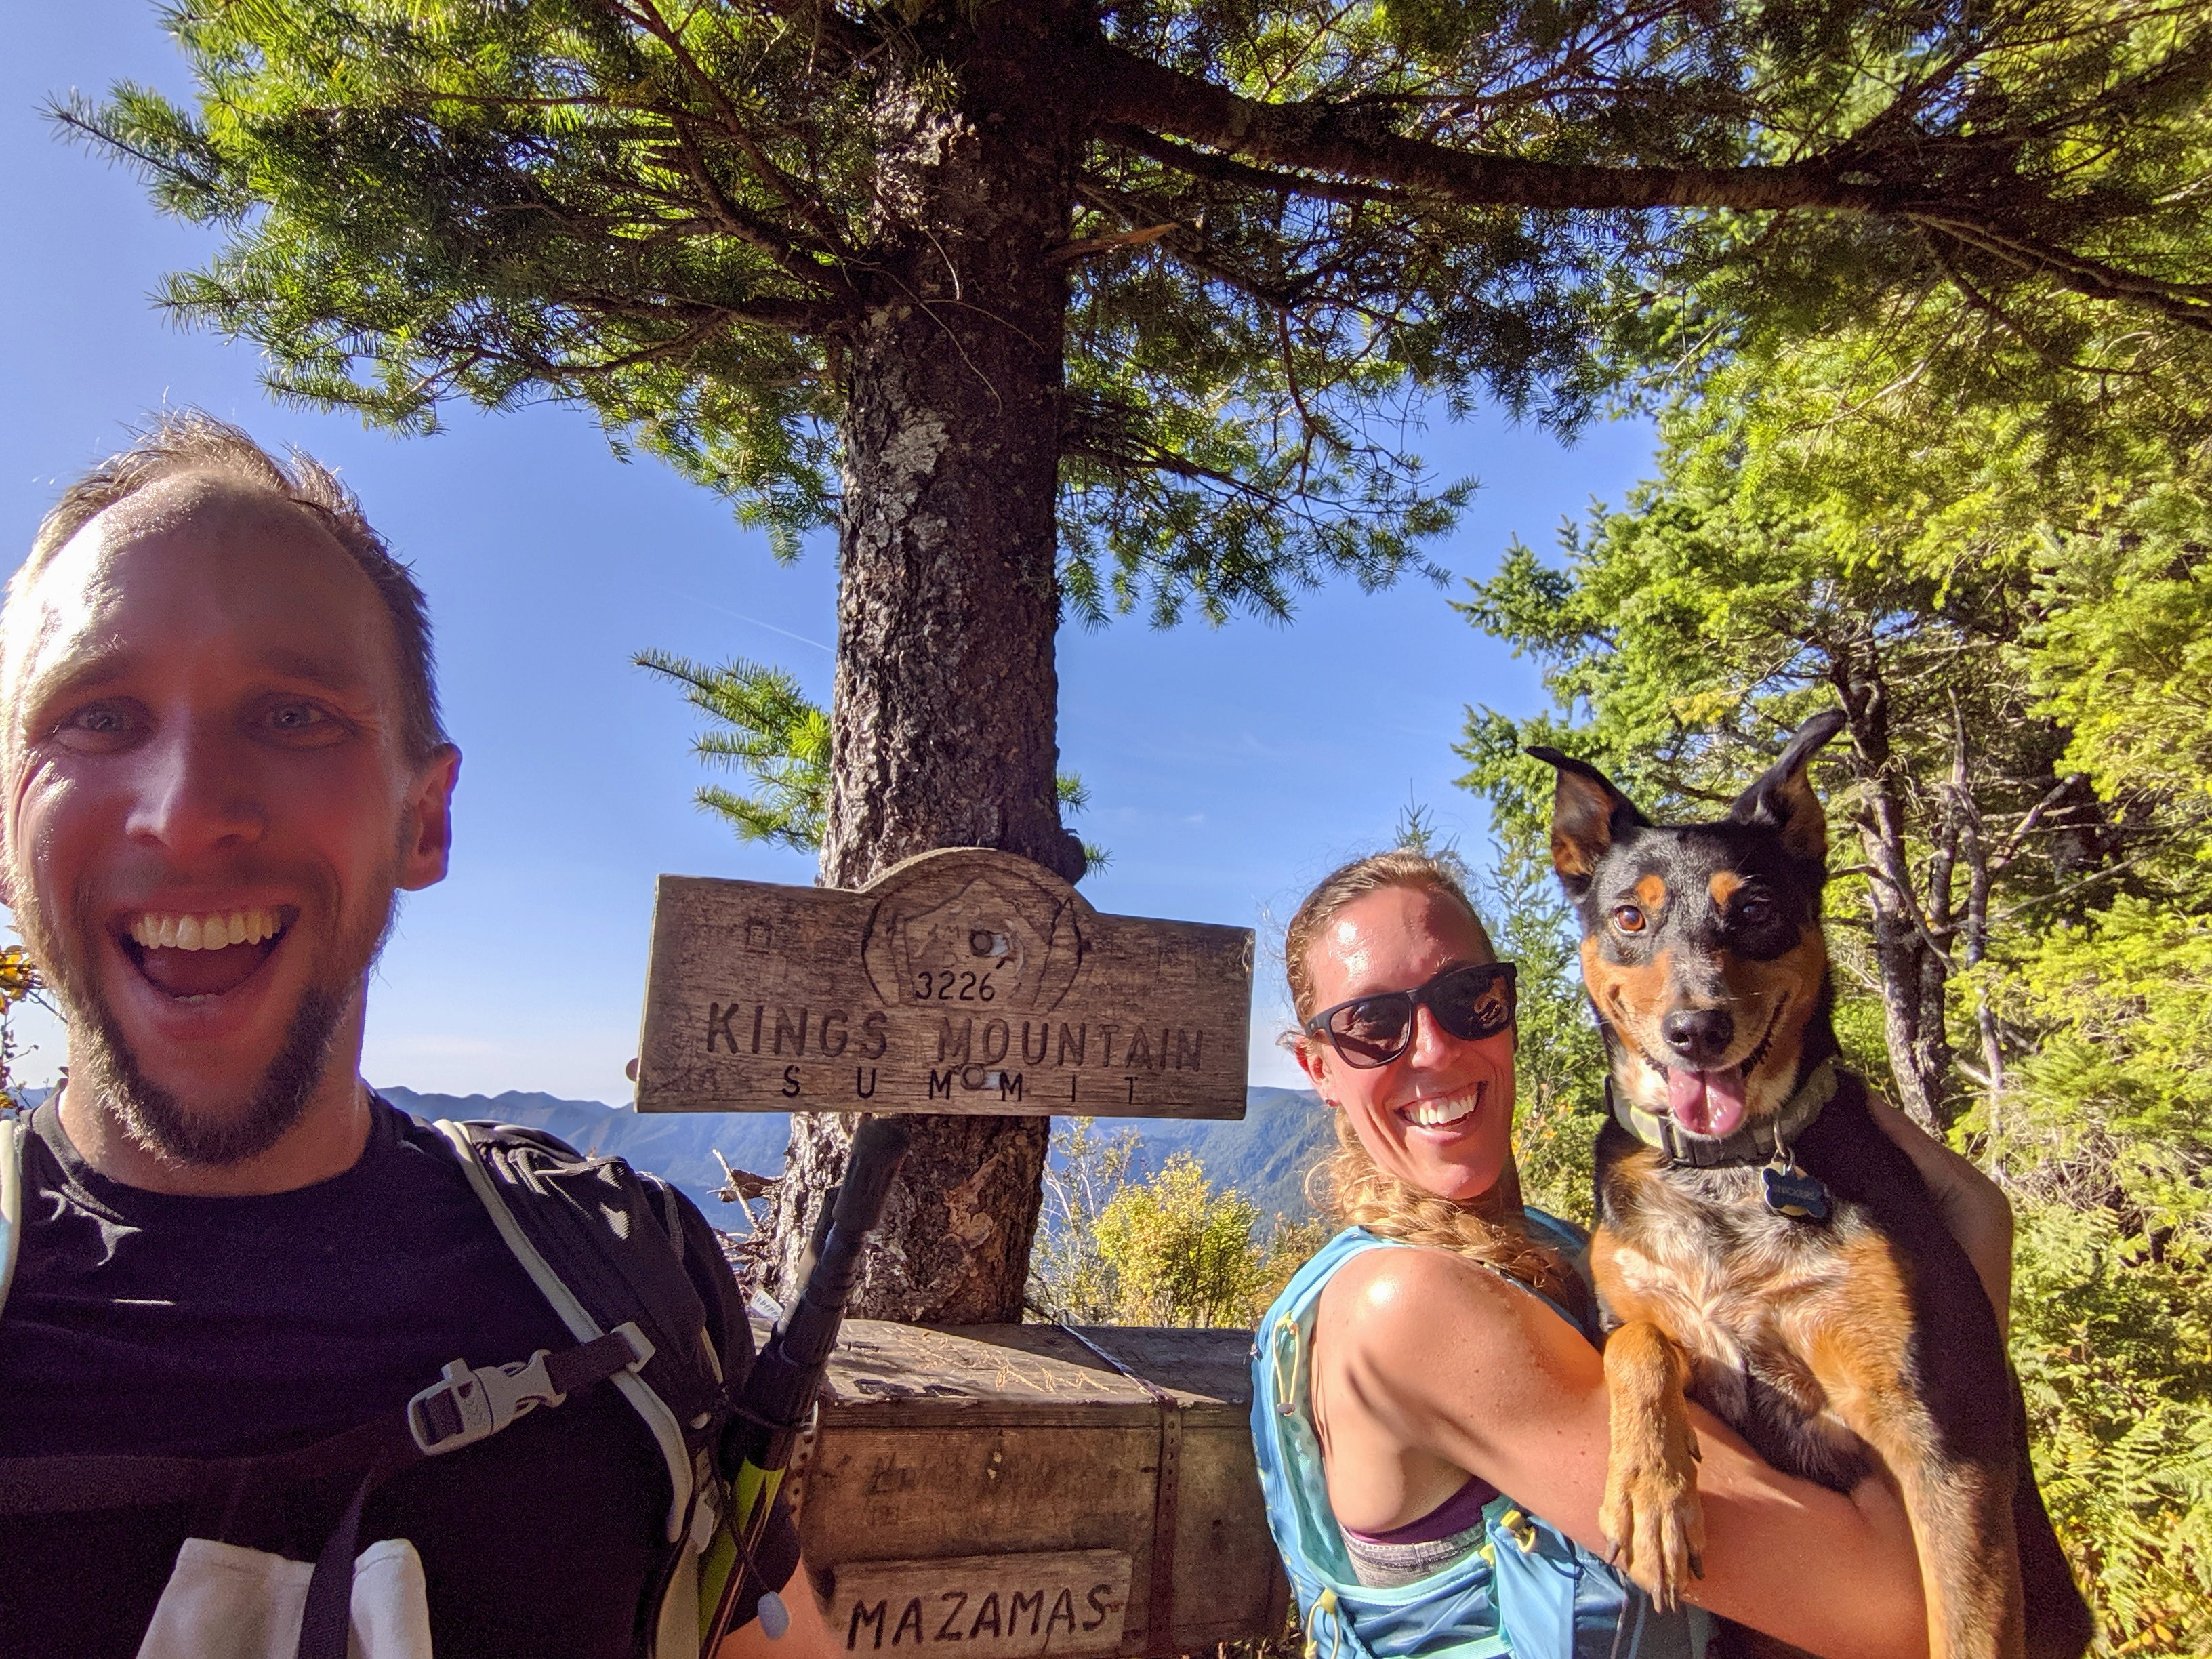
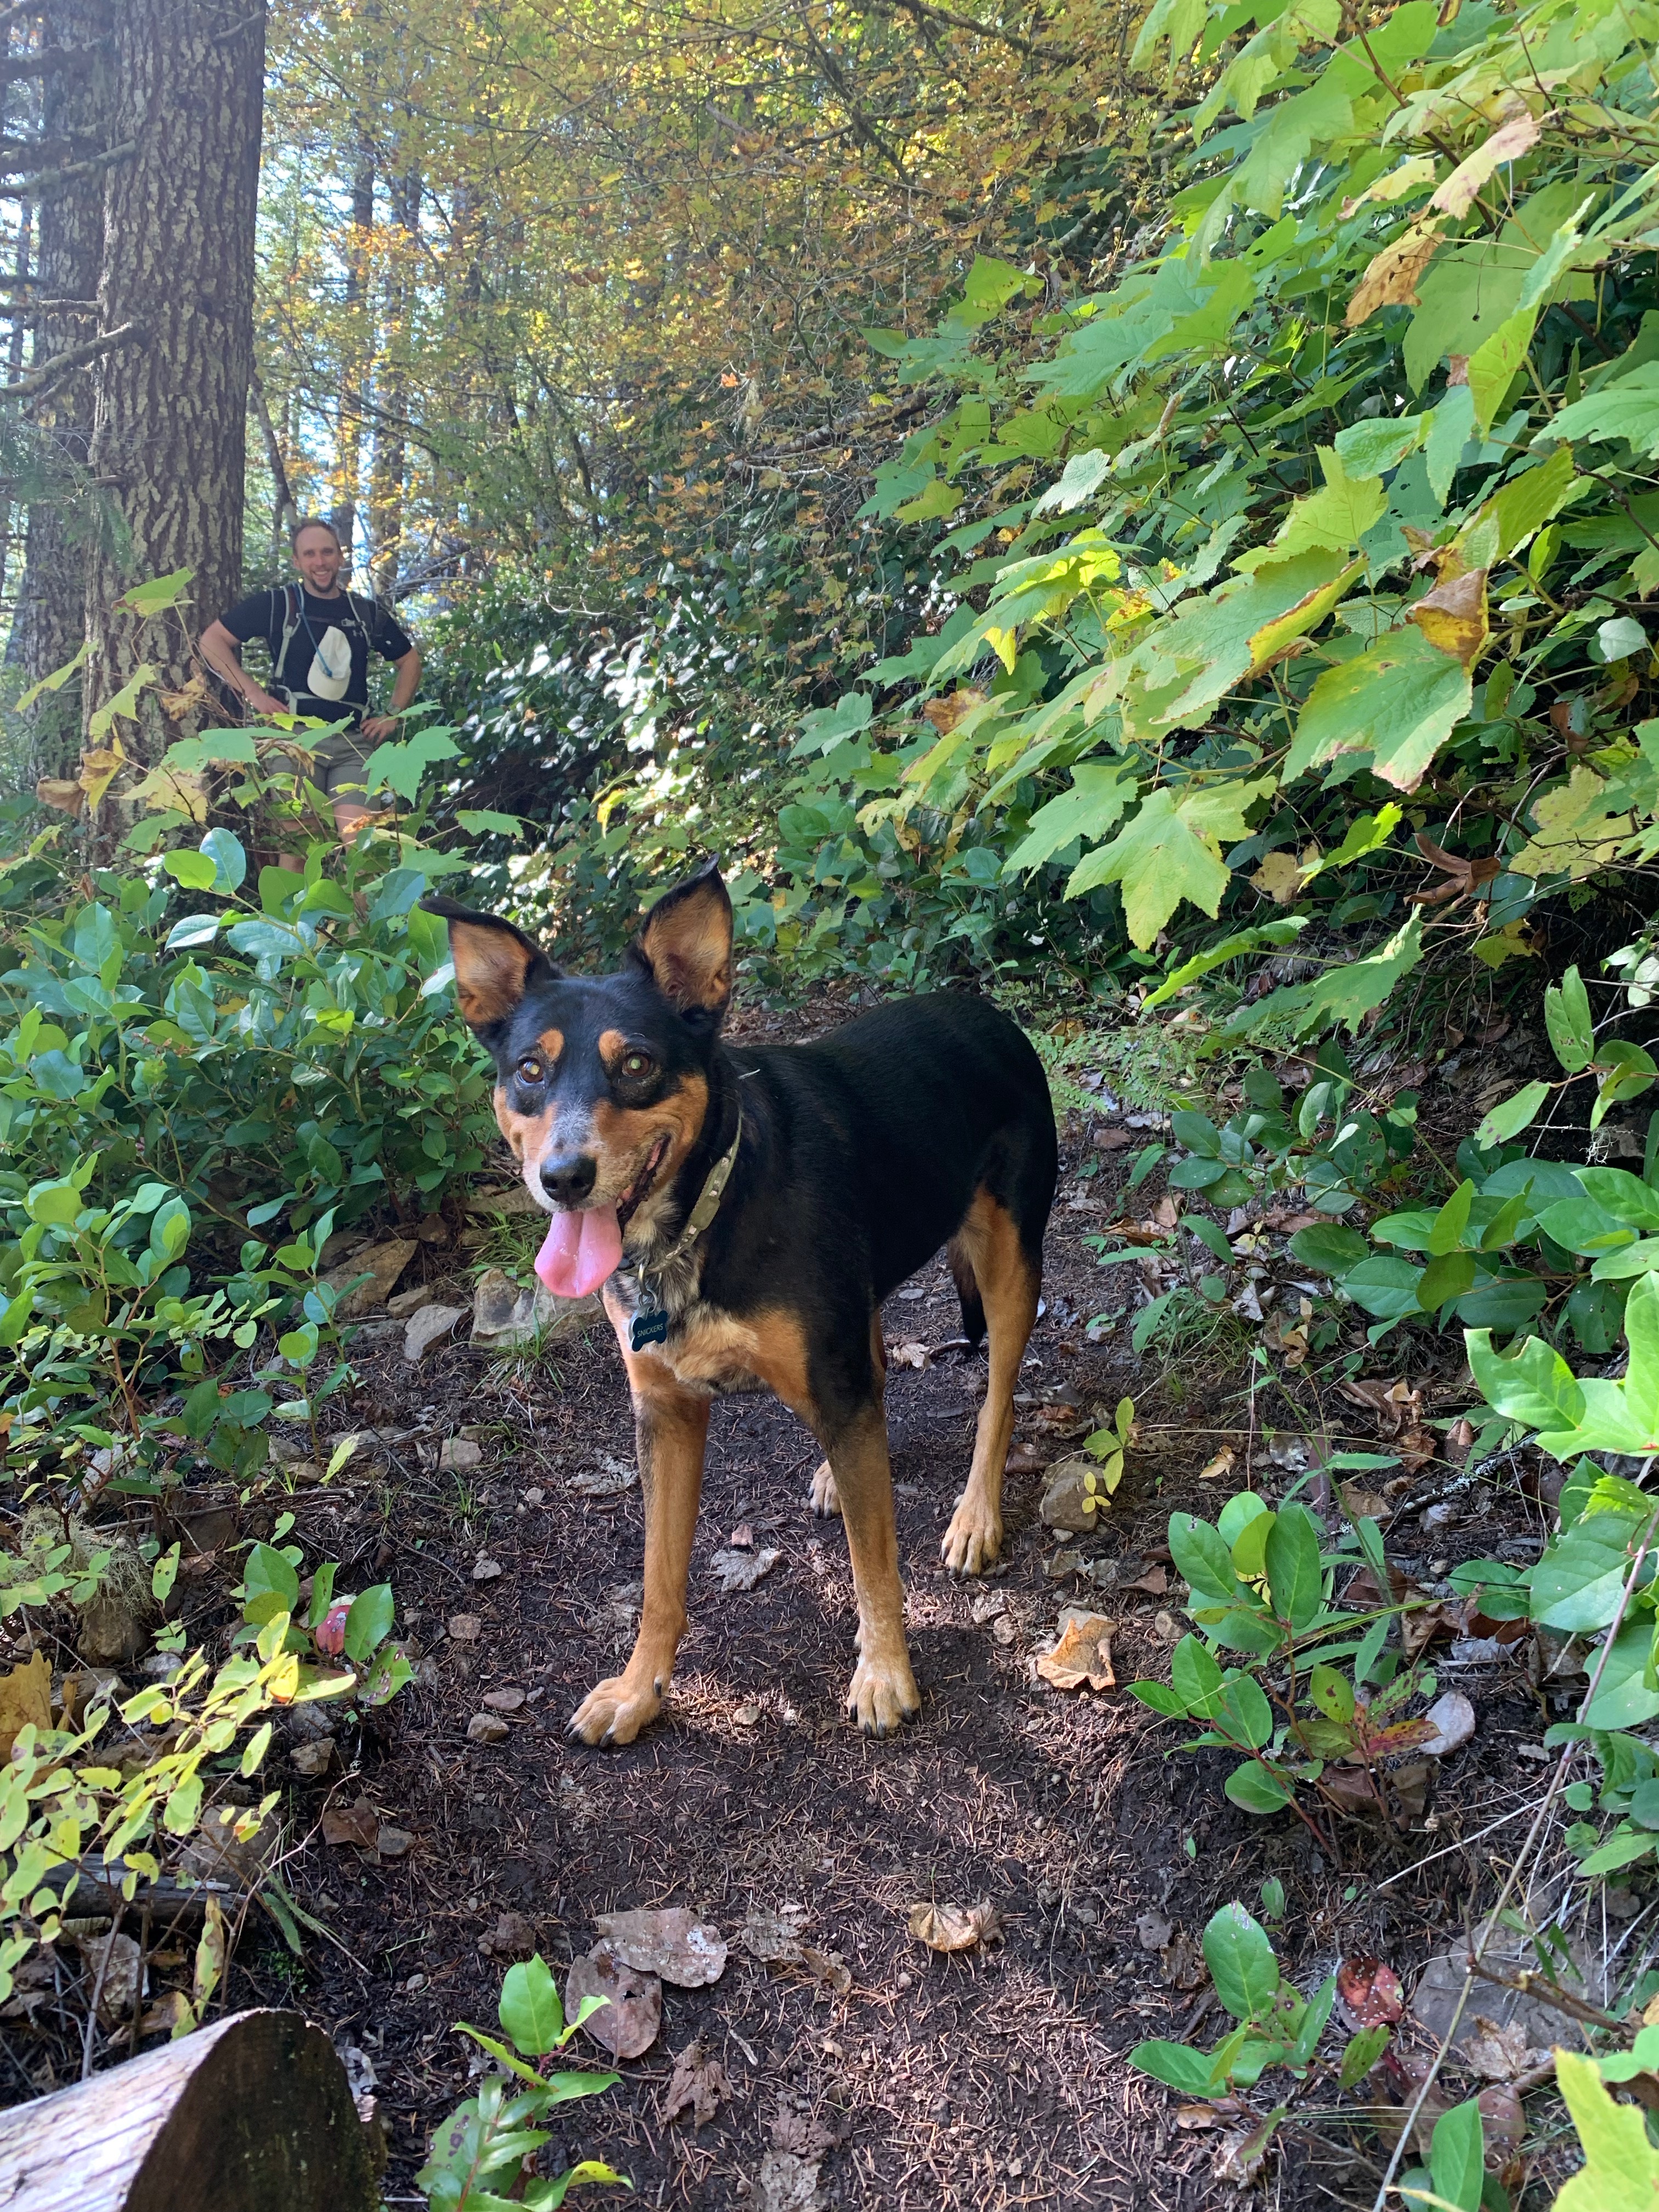
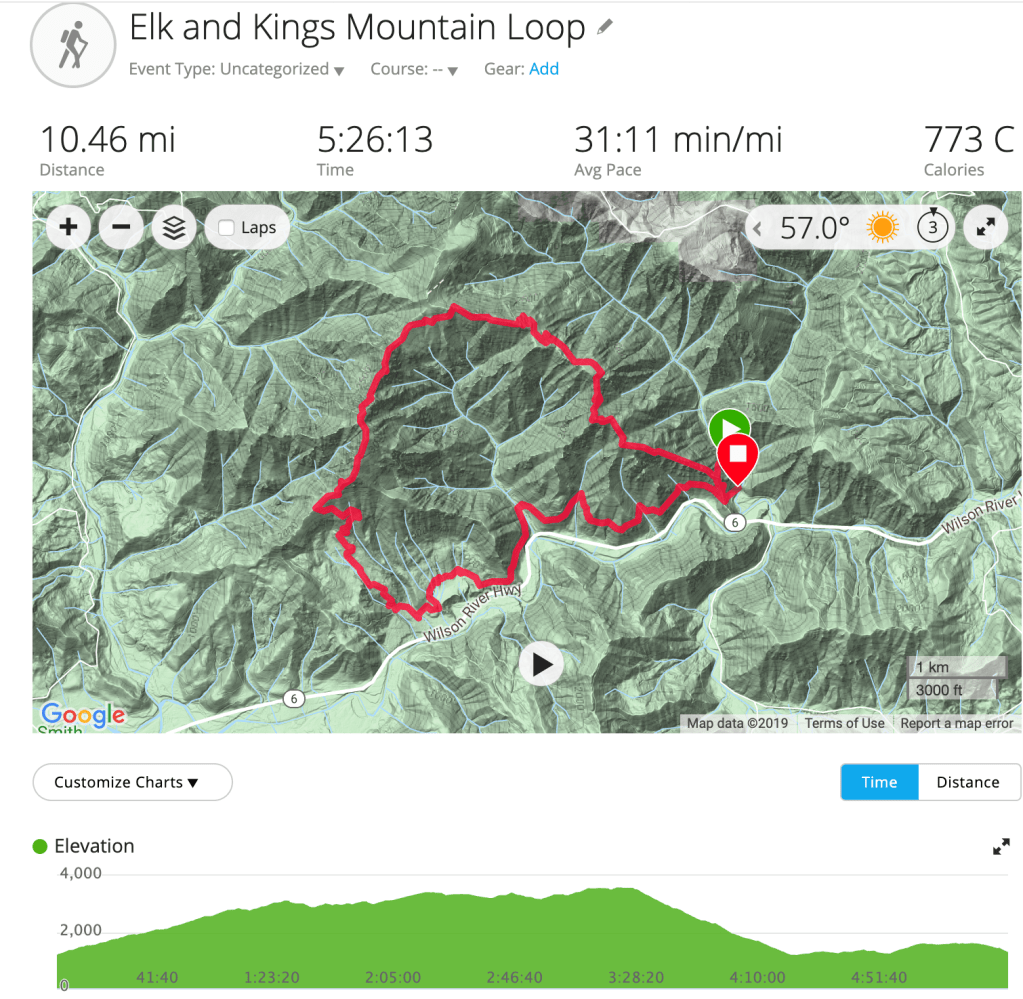
We ended our last weekend in Oregon the same way we started – with some trail time in the Tillamook Forest. The main reason we came to Oregon was so I could run the Elk-King’s 50K and ever since, we’ve been dying to come back and do this loop. We did hike just the King’s Mountain Trail back in December but hadn’t made it back for the full loop. It seemed very fitting that we made this our last adventure.
This trail was lightly trafficked and HARD. As avid hikers, we don’t use that description often and it takes a special trail to earn it. We started at the Elk Mountain Trailhead, and the trail climbed over 2,000 feet in 1.5 miles to Elk Mountain. It was brutal! The trail was steep and very rocky. At points it felt like we were just scrambling, and our hiking poles were extremely useful. After a breather at the top, we started the descent to the ridge line that would take us to King’s Mountain. It was more rocky scrambling through this portion and our legs were getting very fatigued. We finally made it to the King’s Mountain summit and the views were spectacular. The last time we were there, it was snowing and you couldn’t see across the valley. This day we had bluebird skies and perfect views of both Mt. Hood and the ocean. From there, it was an easy, gradual descent down the King’s Mountain trail and a 3 mile hike along the Wilson River Trail back to the car for a total of 10.5 miles.
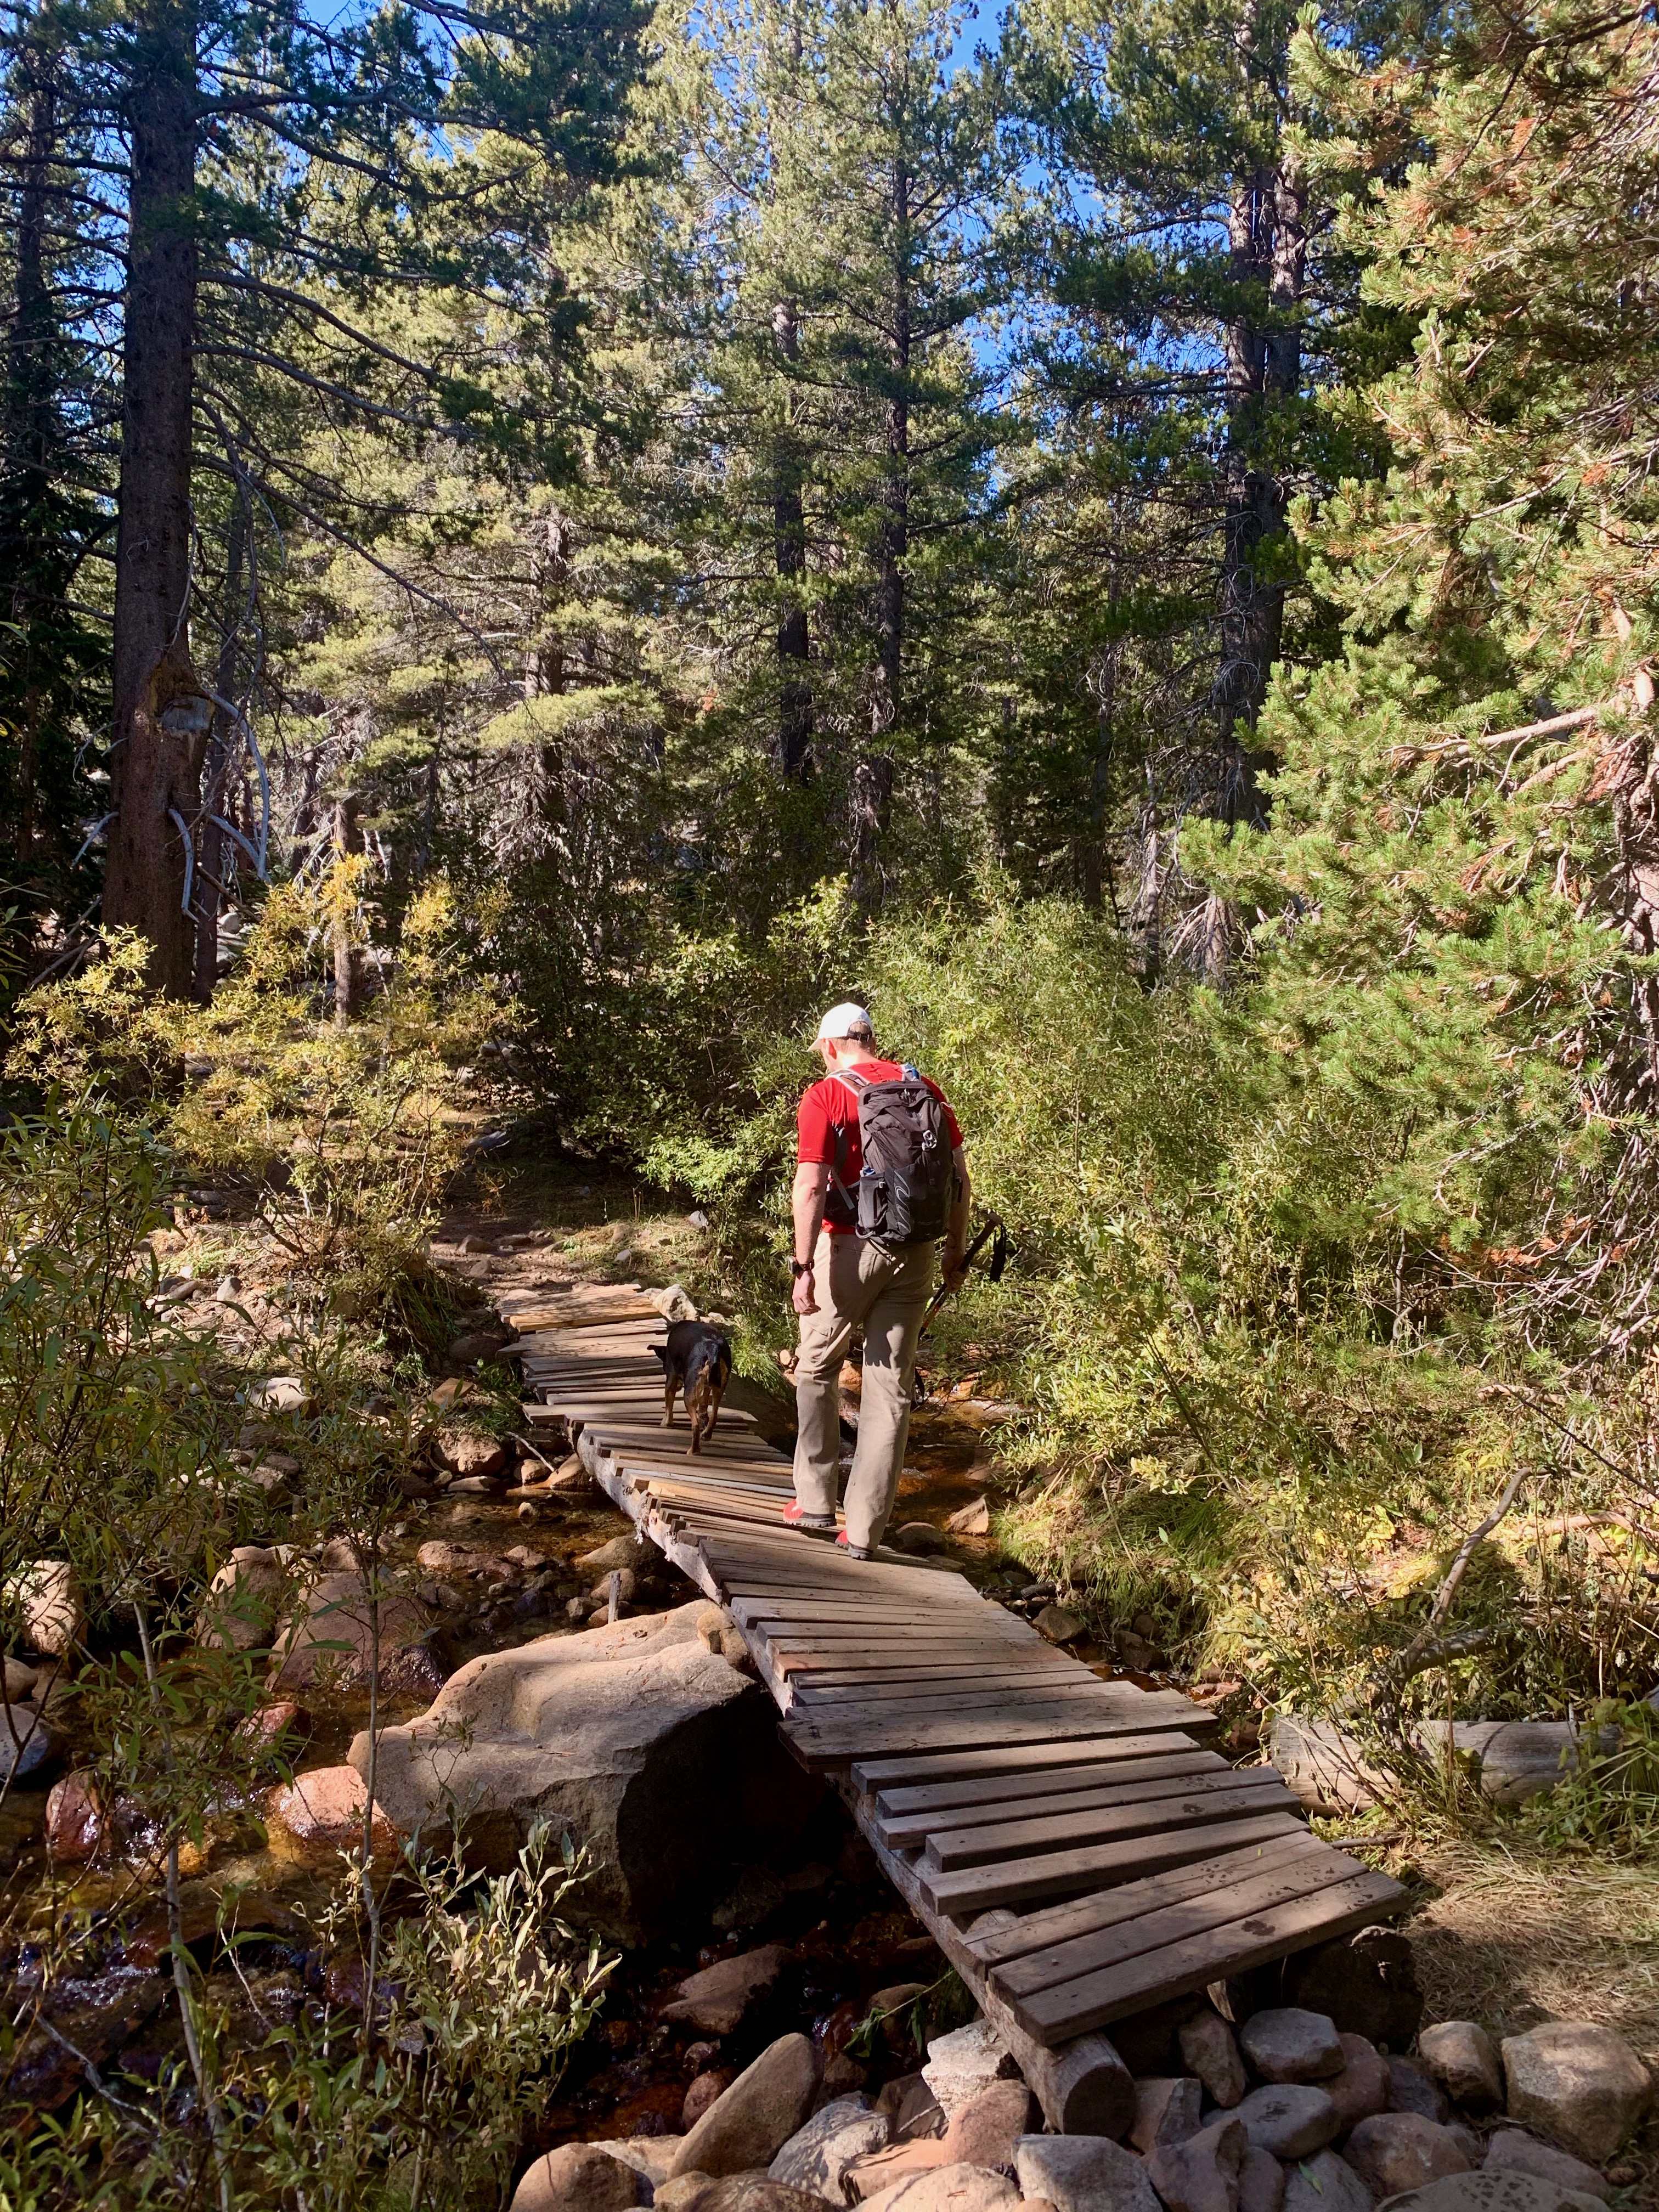
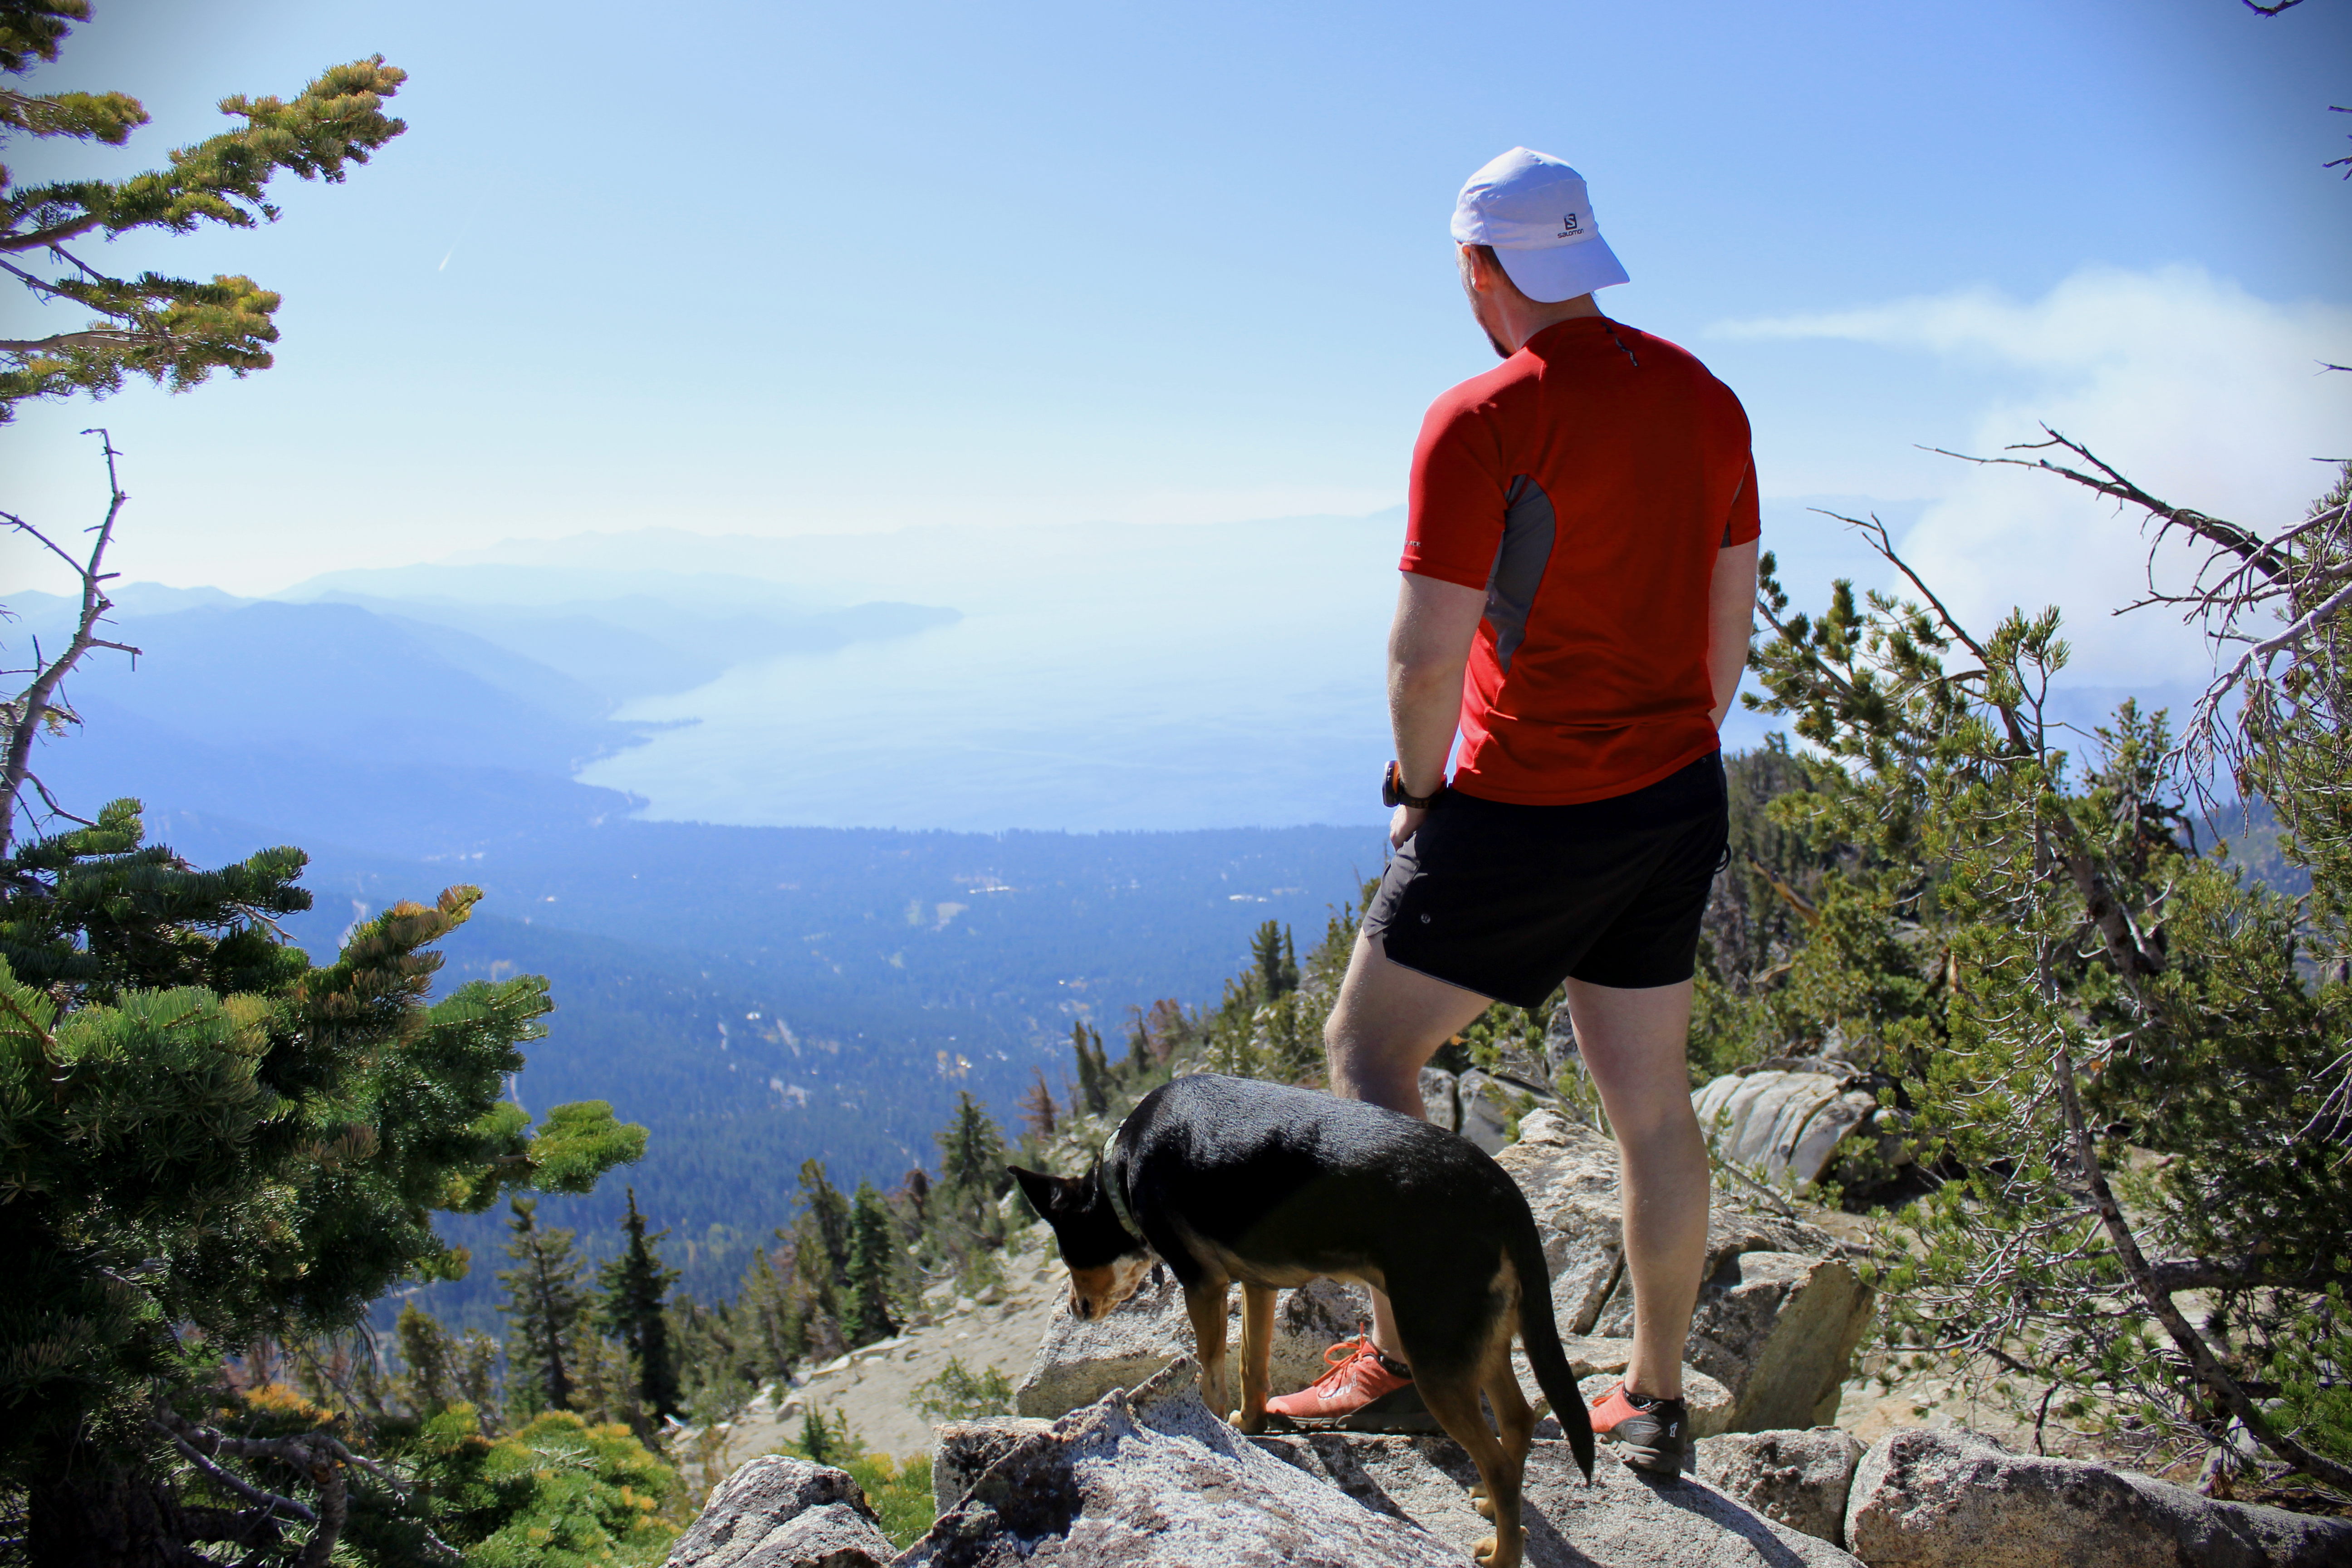
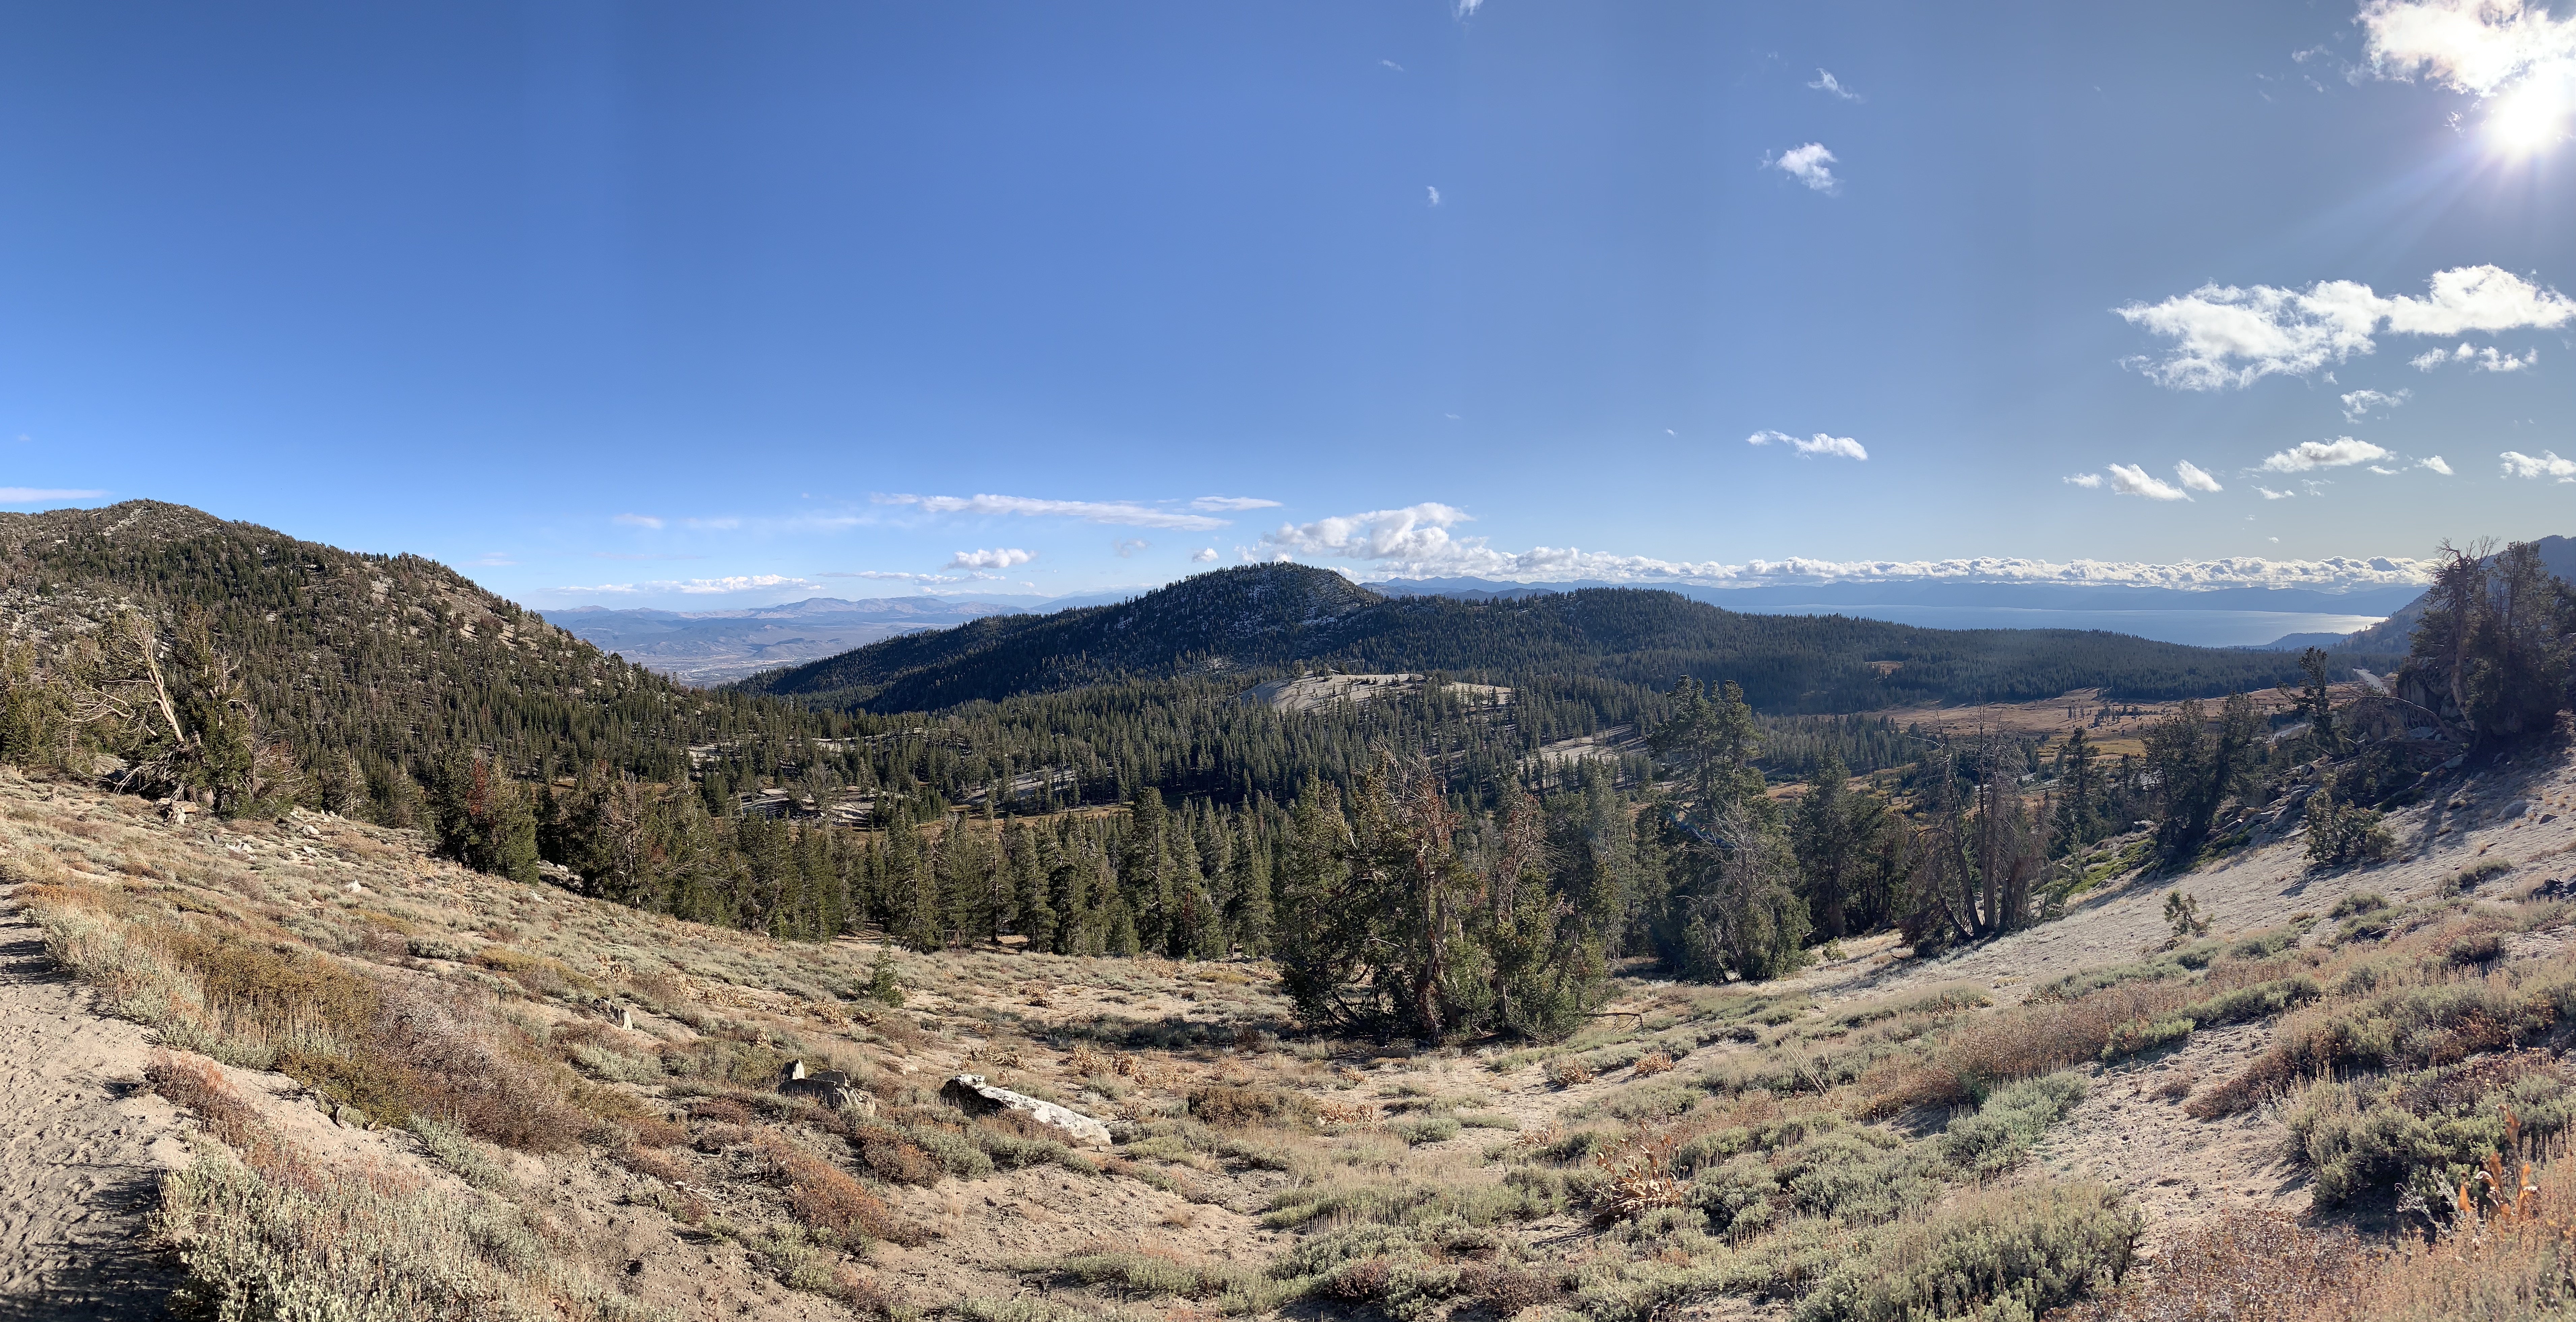
Pat’s Knob is a 4.5 mile trail near Incline Village in North Lake Tahoe. The trail is moderate, but the altitude (over 8k ft at the base) made it a bit strenuous. The trail starts on a service road for ~1/2 mile before veering off into single-track. The actual trailhead can be easy to miss, so keep an eye out. The trail is mostly loose rock, but not overly technical. At the top, there is a great lookout point over Lake Tahoe with some rocks for scrambling. We were the only ones at the top (a rarity!), so we spent a bit of time just hanging out and admiring the view. The return trip was a quick downhill through the forest.
The Secret Cove is a short, gradual trail that leads to a gorgeous cove on Lake Tahoe. The cove is clothing option, so be prepared for some nudity. The weather was in the mid-60s the day we went and, while we didn’t swim, we did enjoy sunning ourselves on the rocks. It was so quiet, and there are plenty of places to escape the other hikers.
We did this 5 mile portion of the Tahoe Rim trail in the evening after work. AllTrails says it’s heavily trafficked, but we went on a cold evening in the shoulder season and didn’t see anyone after the first half mile. There is only 550 ft. of elevation gain making it a great running trail or simply a good intro to hiking at altitude. The majority of the climb is in the first mile and then the trail is mostly flat to the falls. It runs through the forest – there are no views of Lake Tahoe – and you have views of Reno and Tamarack Lake. The trail ends at a small waterfall, which was a bit frozen the day we went. It was a cold, windy day, so we didn’t spend much time at the falls opting instead to high-tail it back to the car before dark. Overall, a very enjoyable, quick hike.
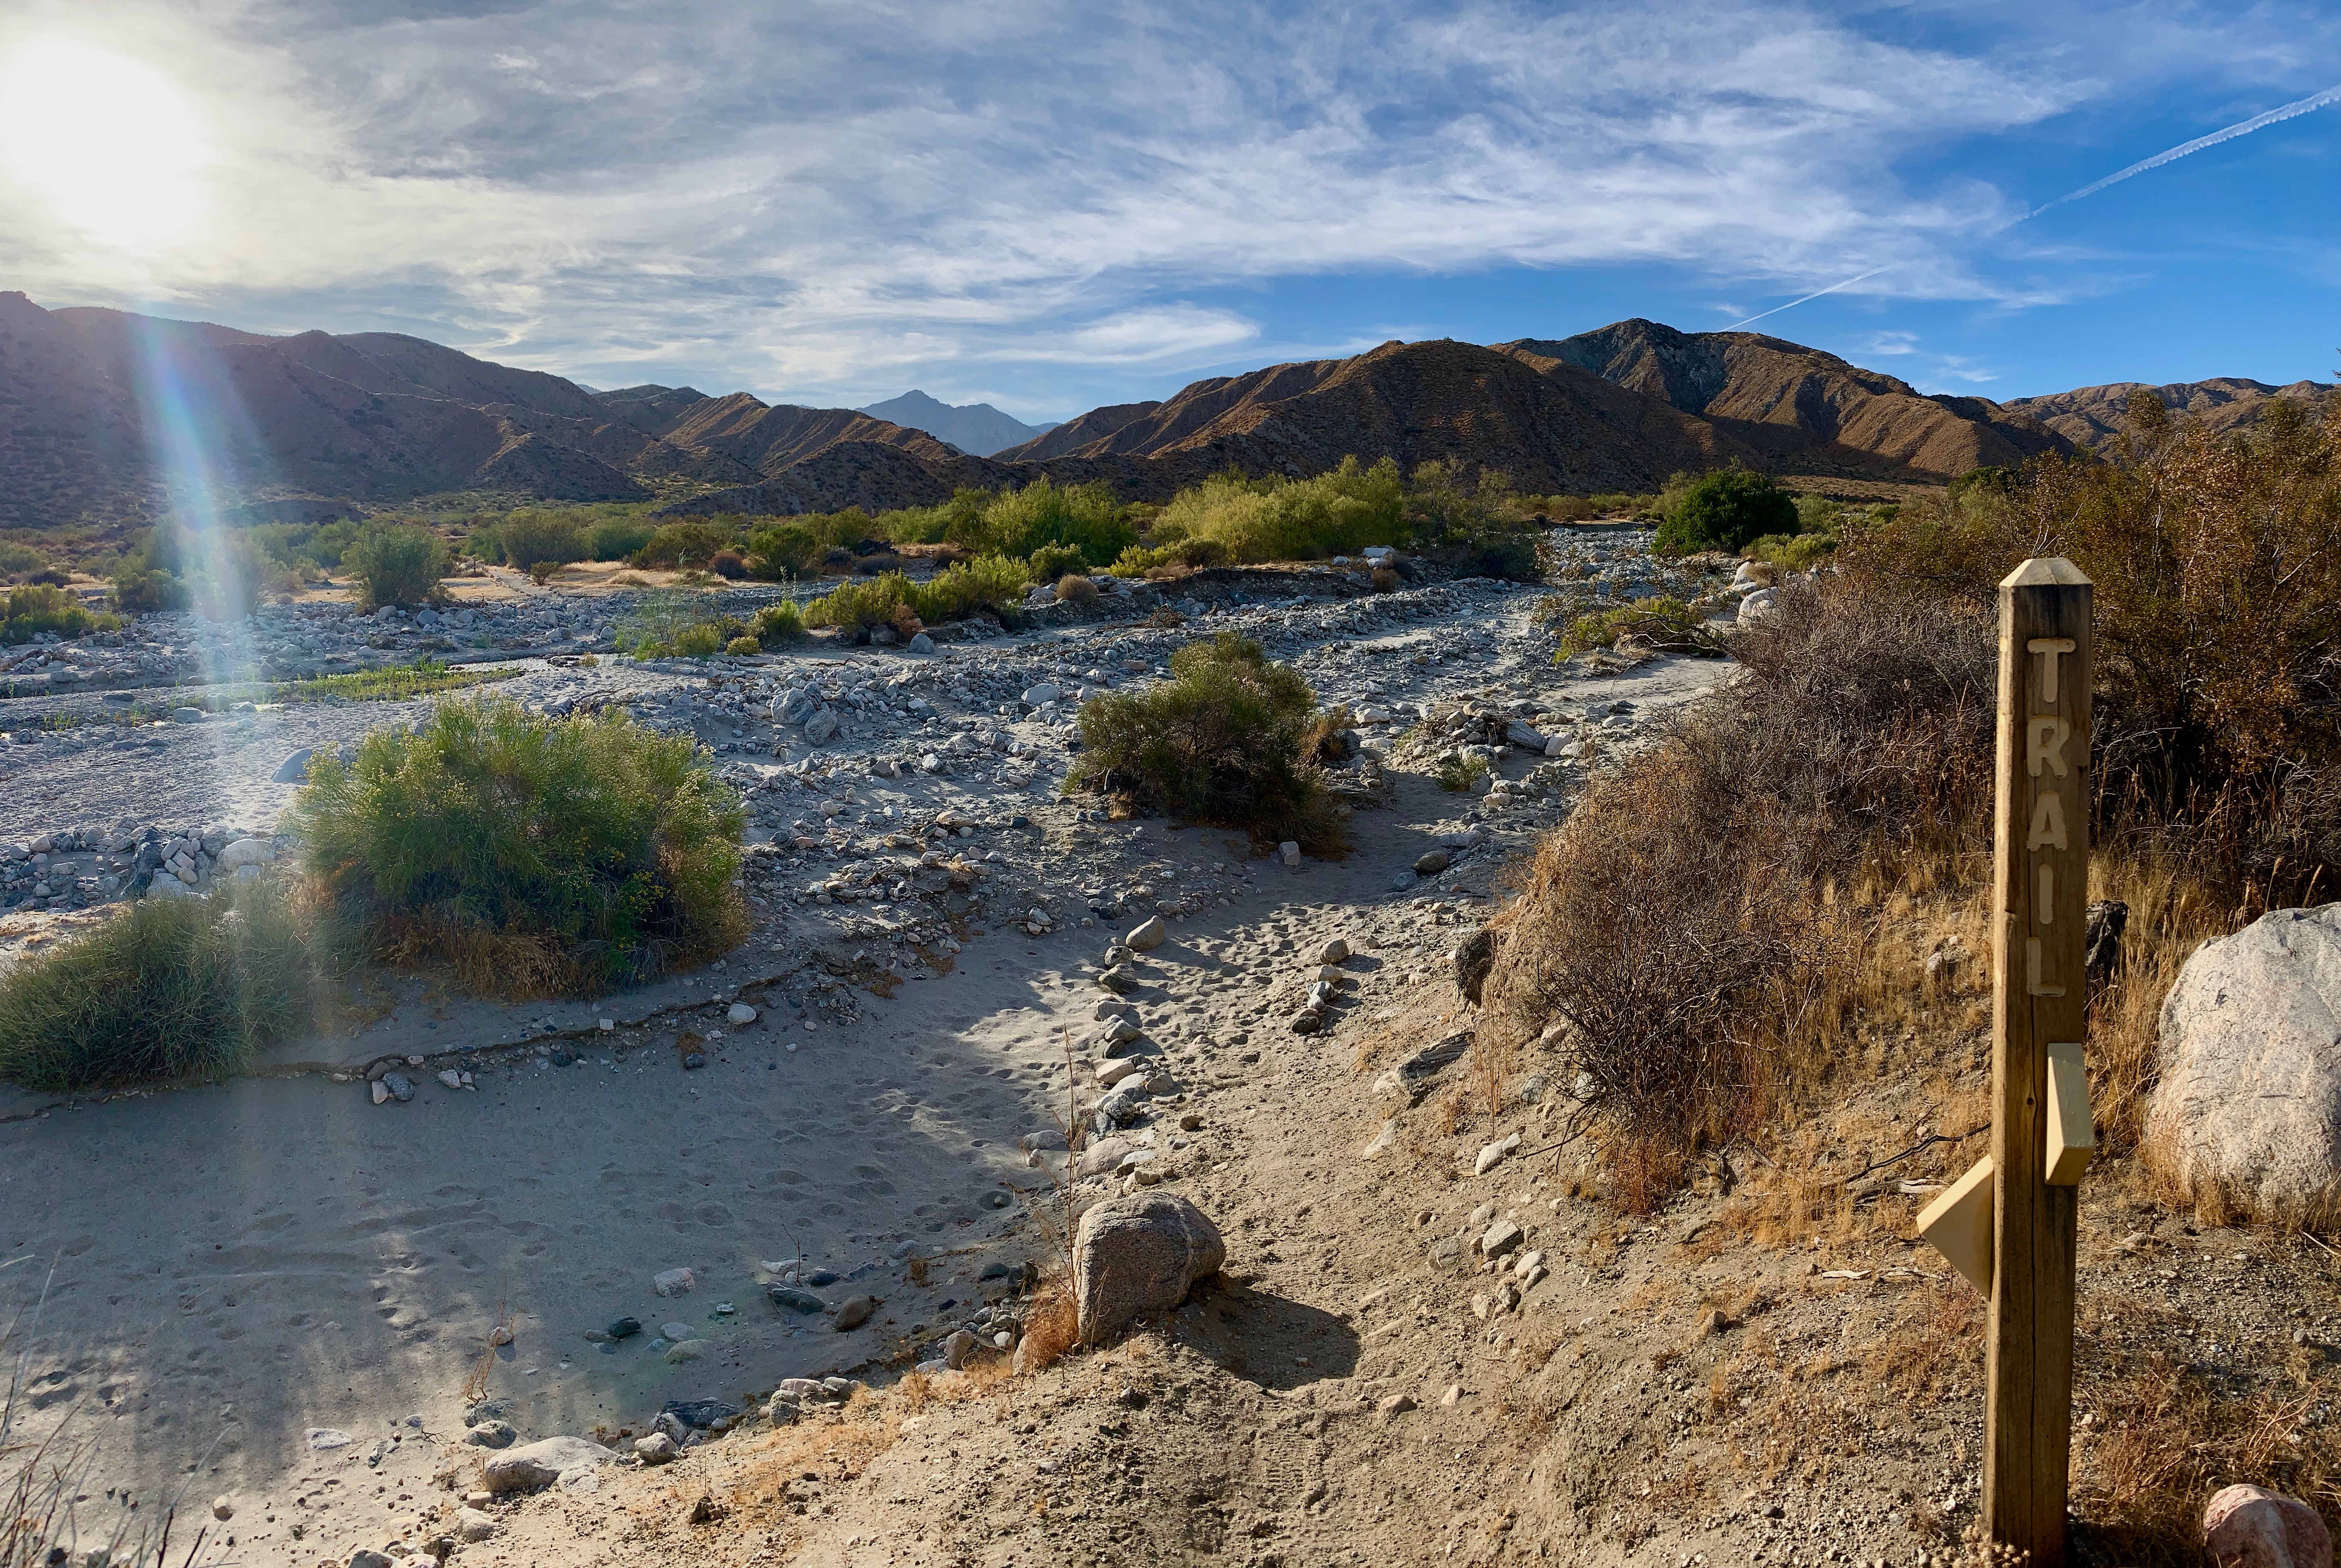
During our stay in Yucca Valley, we did the Mission Creek Preserve Trail twice. There was no shortage of trails in the area, but most of them were sand which makes for a very difficult, very unpleasant hike. This trail runs through a canyon in the Mission Creek Nature Preserve. The first 1.5 miles are on a gravel road – inaccessible to cars – and then it turns into a single-track trail. It actually serves as a connection to the Pacific Crest Trail! We did 5 miles on this trail and thoroughly enjoyed ourselves. The trail climbs very gradually through the canyon before opening up to a sweeping vista of the mountains and river. At 1.5 miles, the trail turns through the river bed and comes out on the other side to continue through the canyon. At this point it got too sandy to run, so we turned back.
This is the second part to our Alaska adventure, read the first post! Here we take you through the land-locked hikes in the Denali National Wilderness.
Discovery hike
Discovery hikes are ranger-led, off-trail hikes through the park. These hikes range from moderate to strenuous and can start from anywhere on the park road at the ranger’s discretion. You’ll start with a bus ride ranging from 1-4 hours, hike for 2-3 hours, and then take a similar bus ride back. You have to sign up in person at the visitor’s center a day or two before the hike, and make sure that you have the appropriate gear outlined on their website.
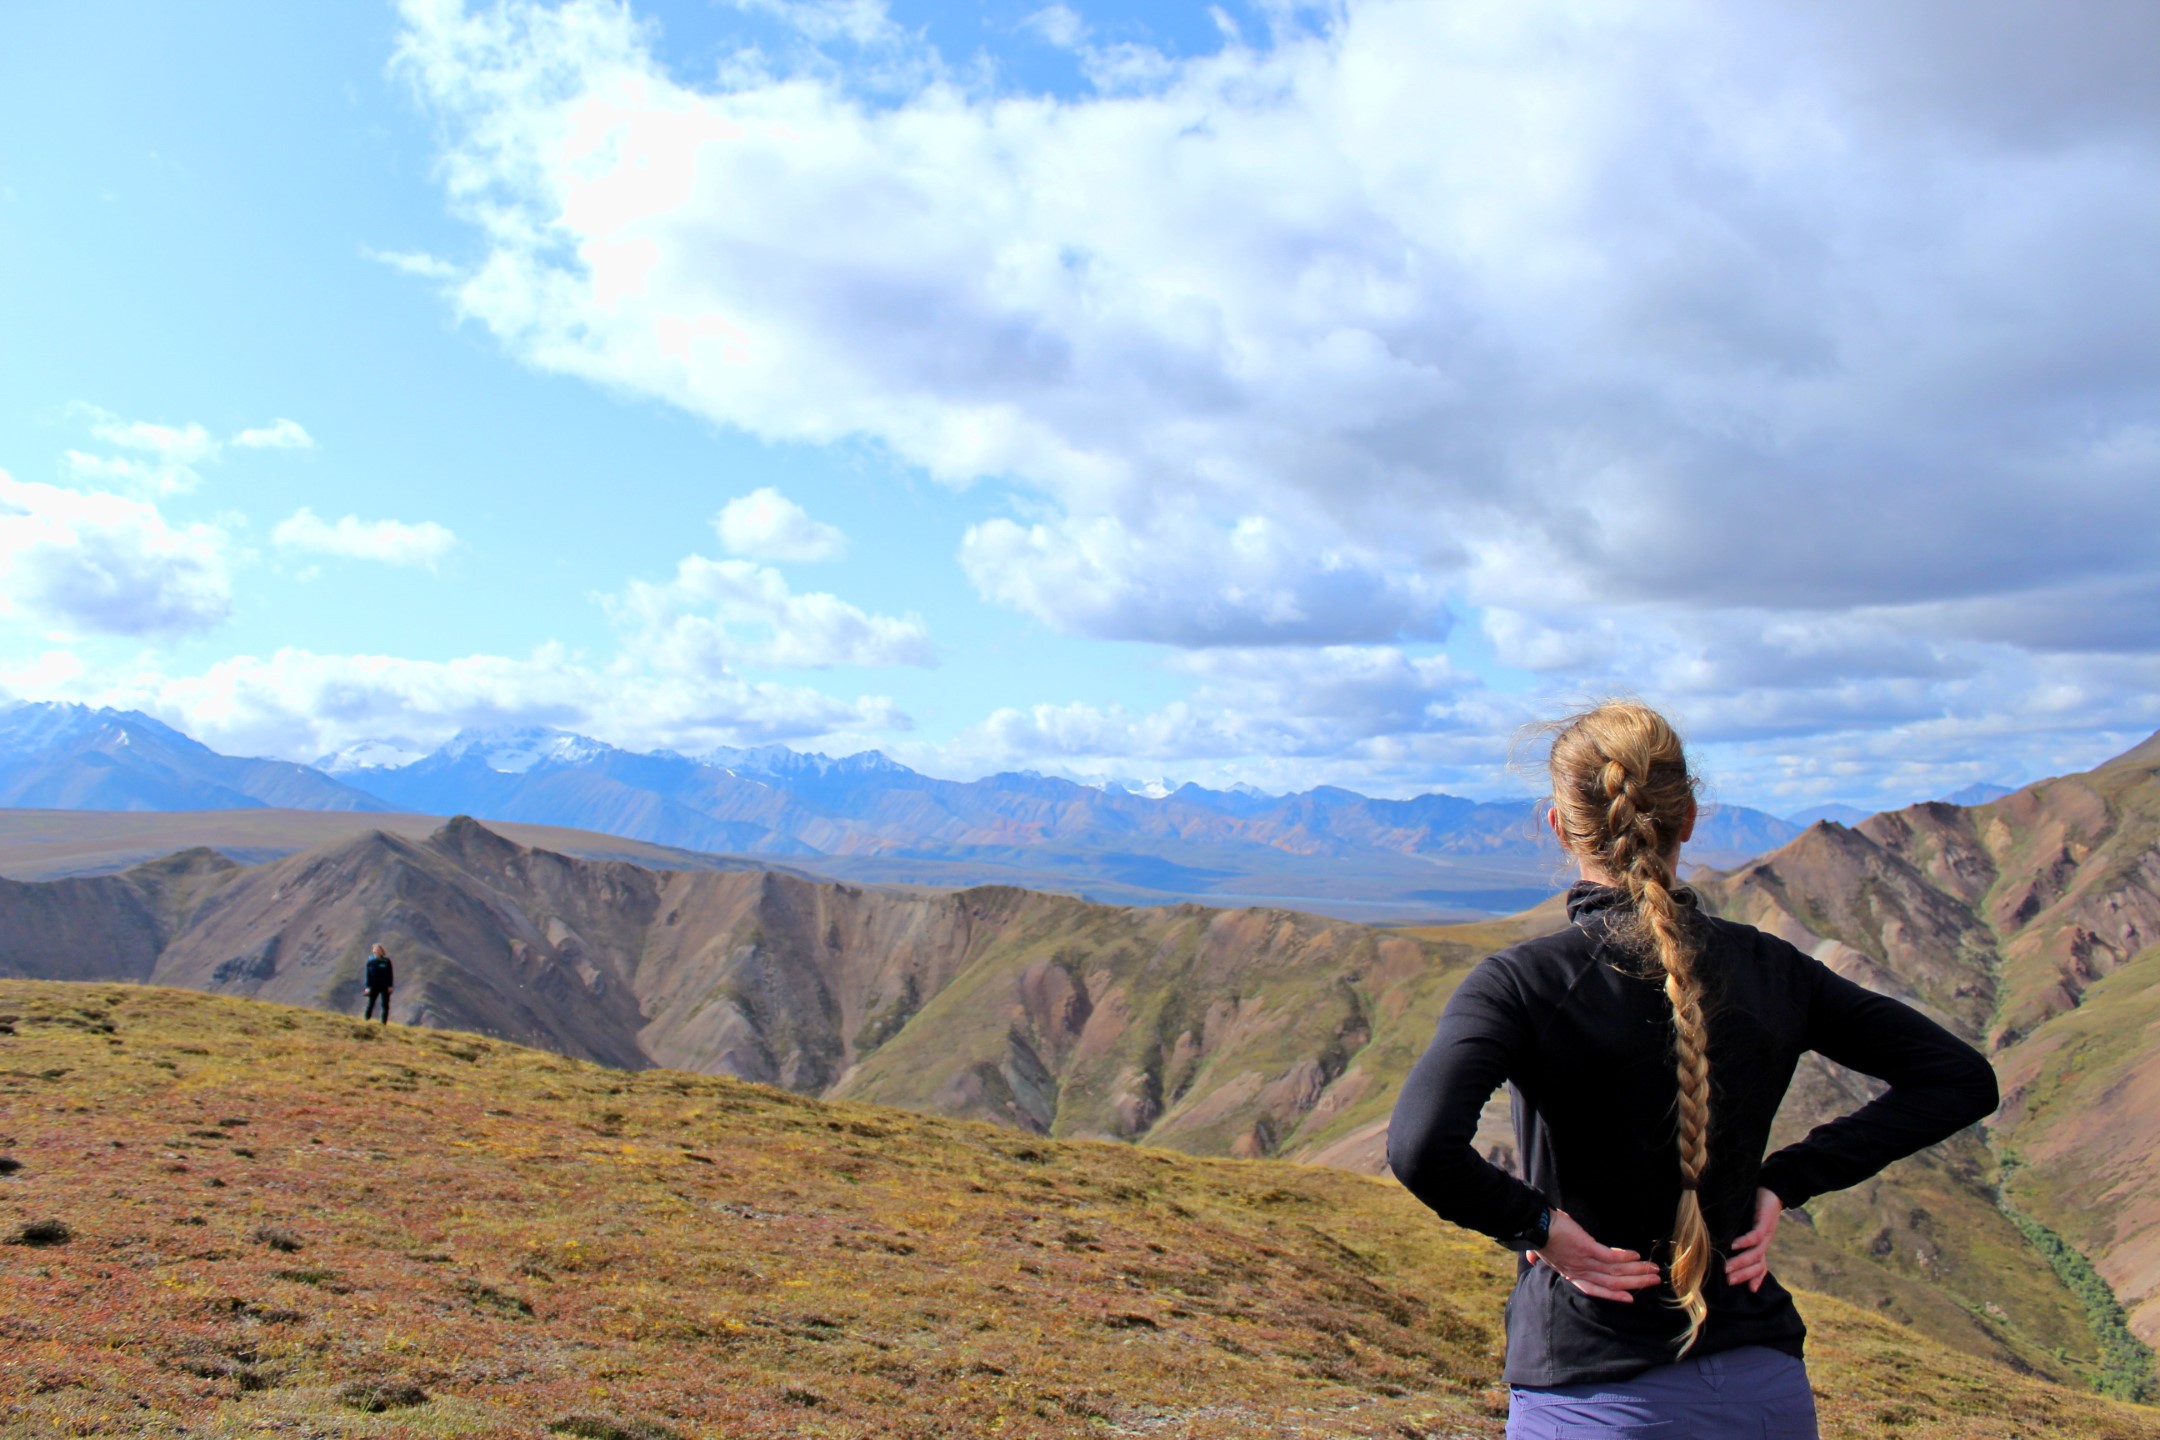
Standing on the Denali wilderness on a gorgeous day
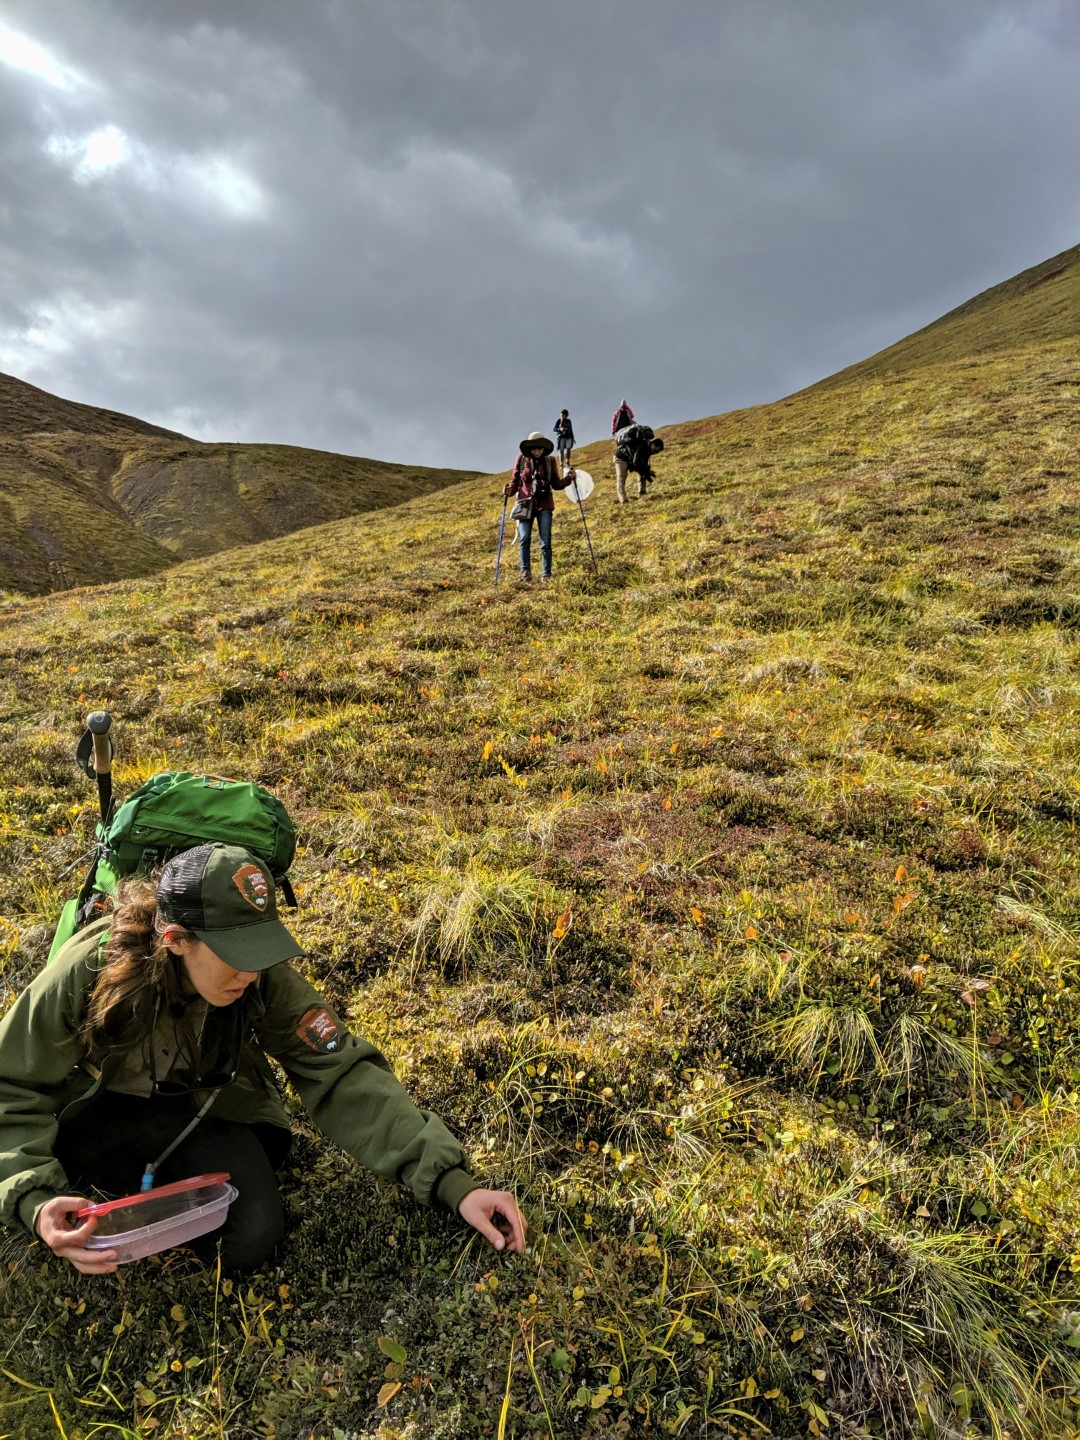
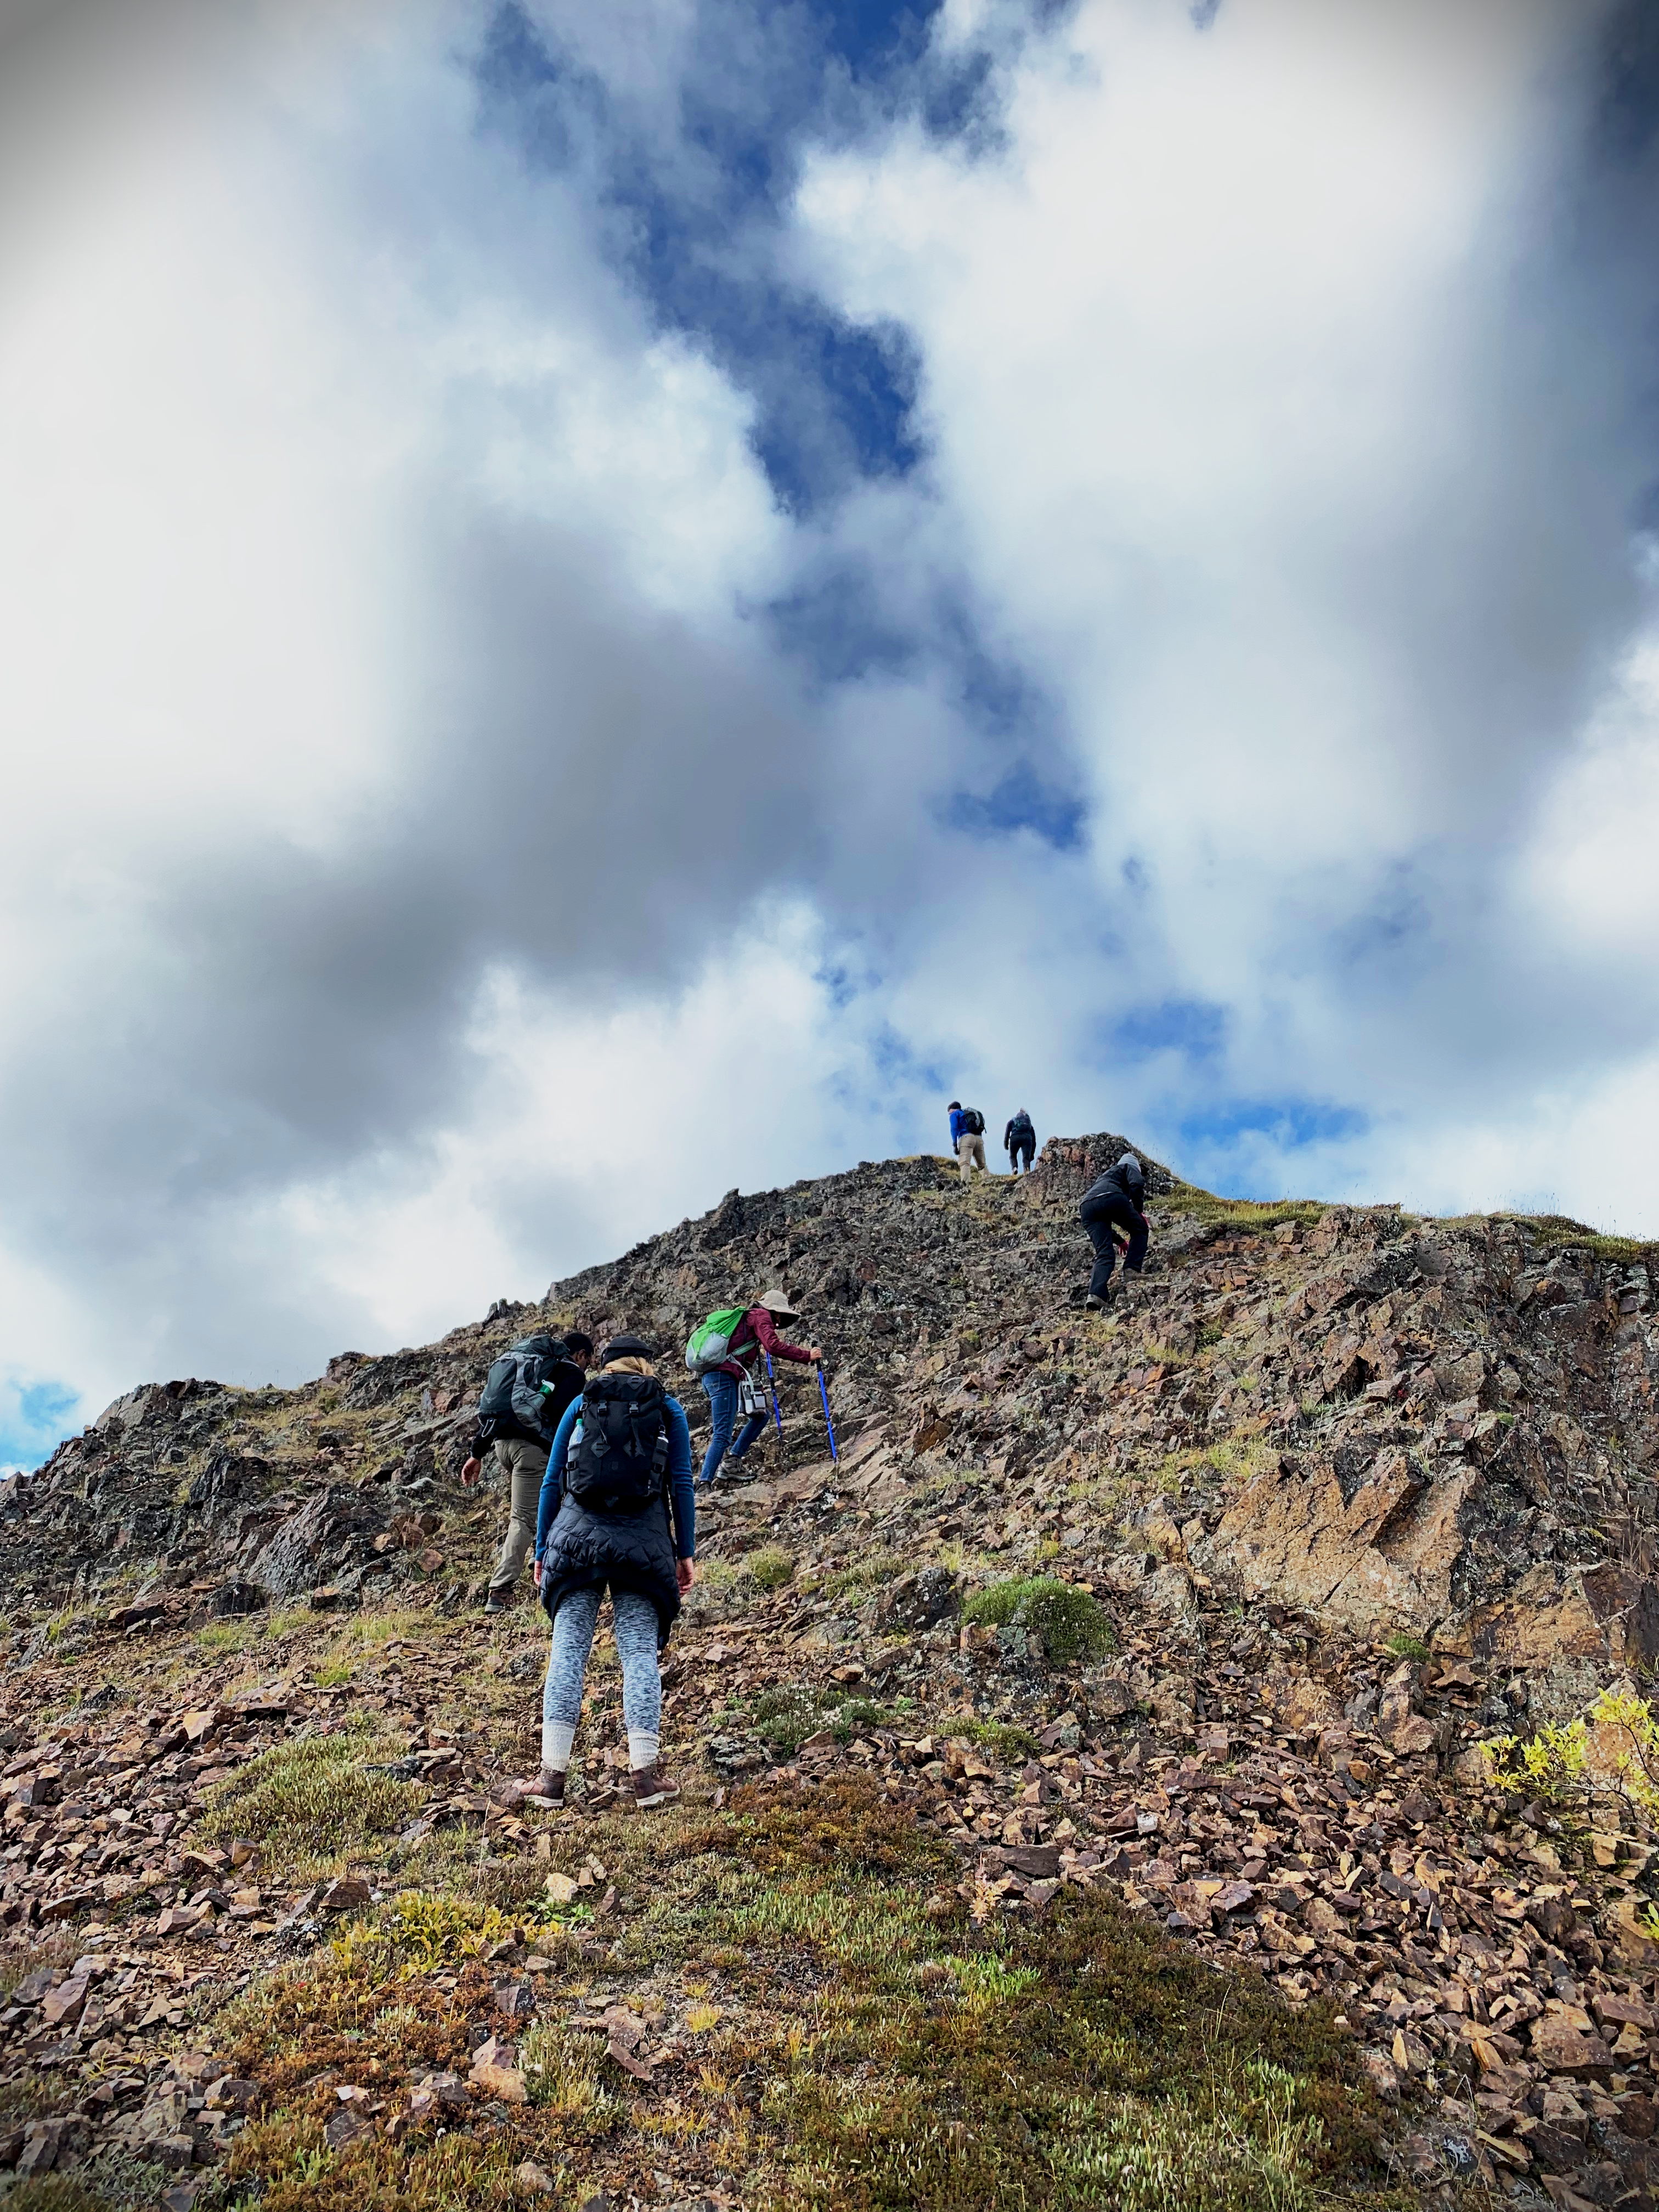
We opted for a strenuous hike with Ranger Emily that started around mile 30 on the park road. The bus dropped us off on the side of the road, we got a rundown of safety and how to hike off-trail, the ranger picked a point to meet, and we all took off on separate paths to meet there. One main takeaway about off-trail hiking is to not make new trails. Rangers encourage leave no tracepractices including not stepping in another person’s tracks to avoid creating social trails and much more.
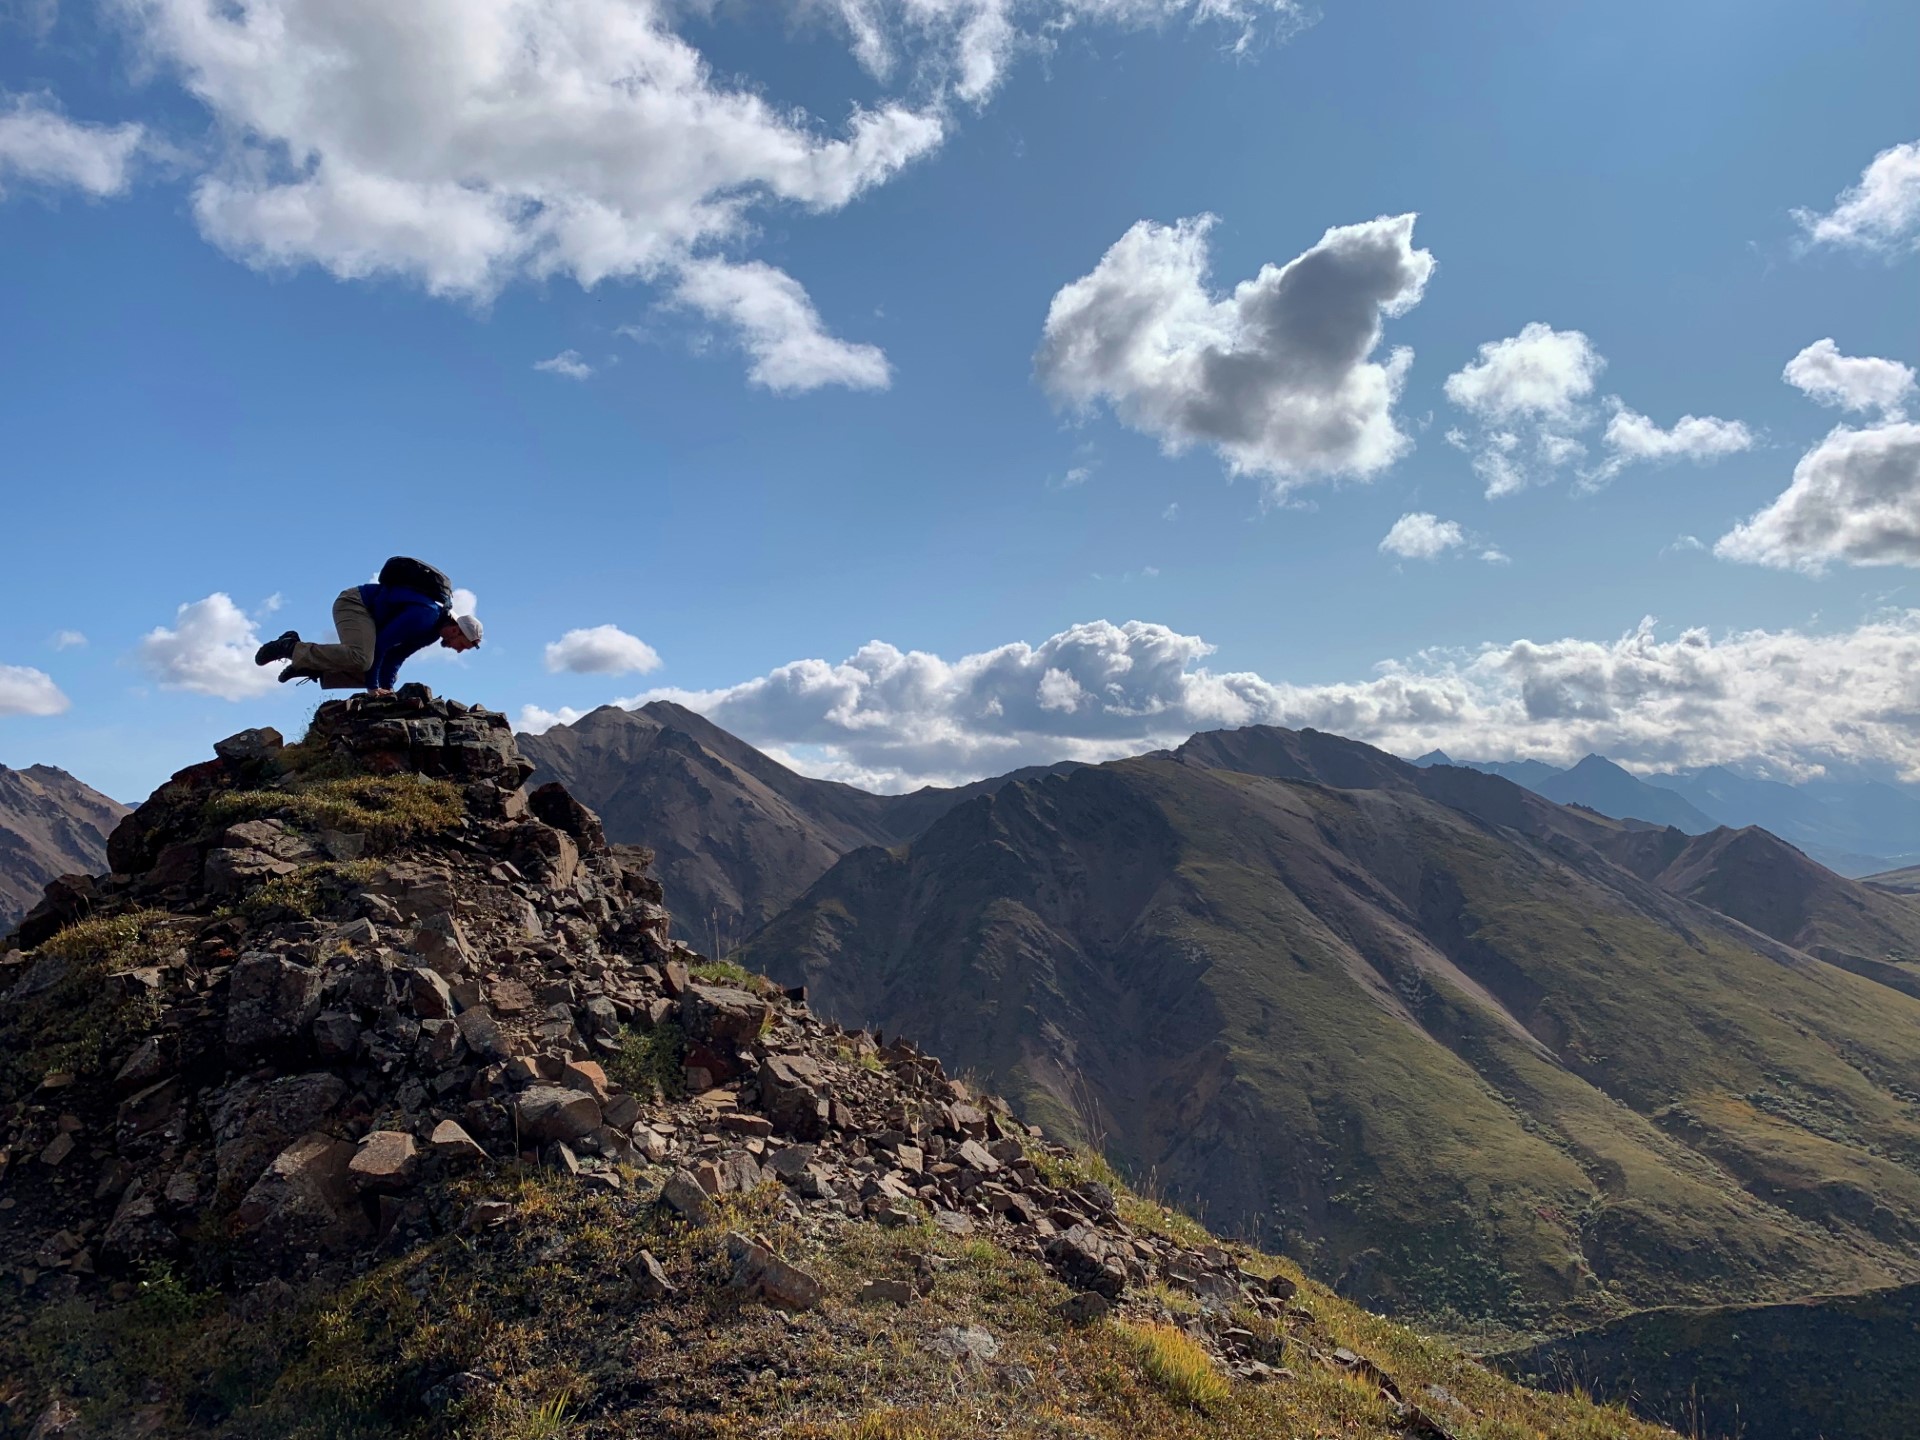
Ranger Emily had us climb to a peak on the Igloo Mountain range. We encountered various terrain including tundra and rocky scree. There were a couple of points where we ended up taking different routes after the original path appeared too steep…all part of the fun of off-trail hiking!
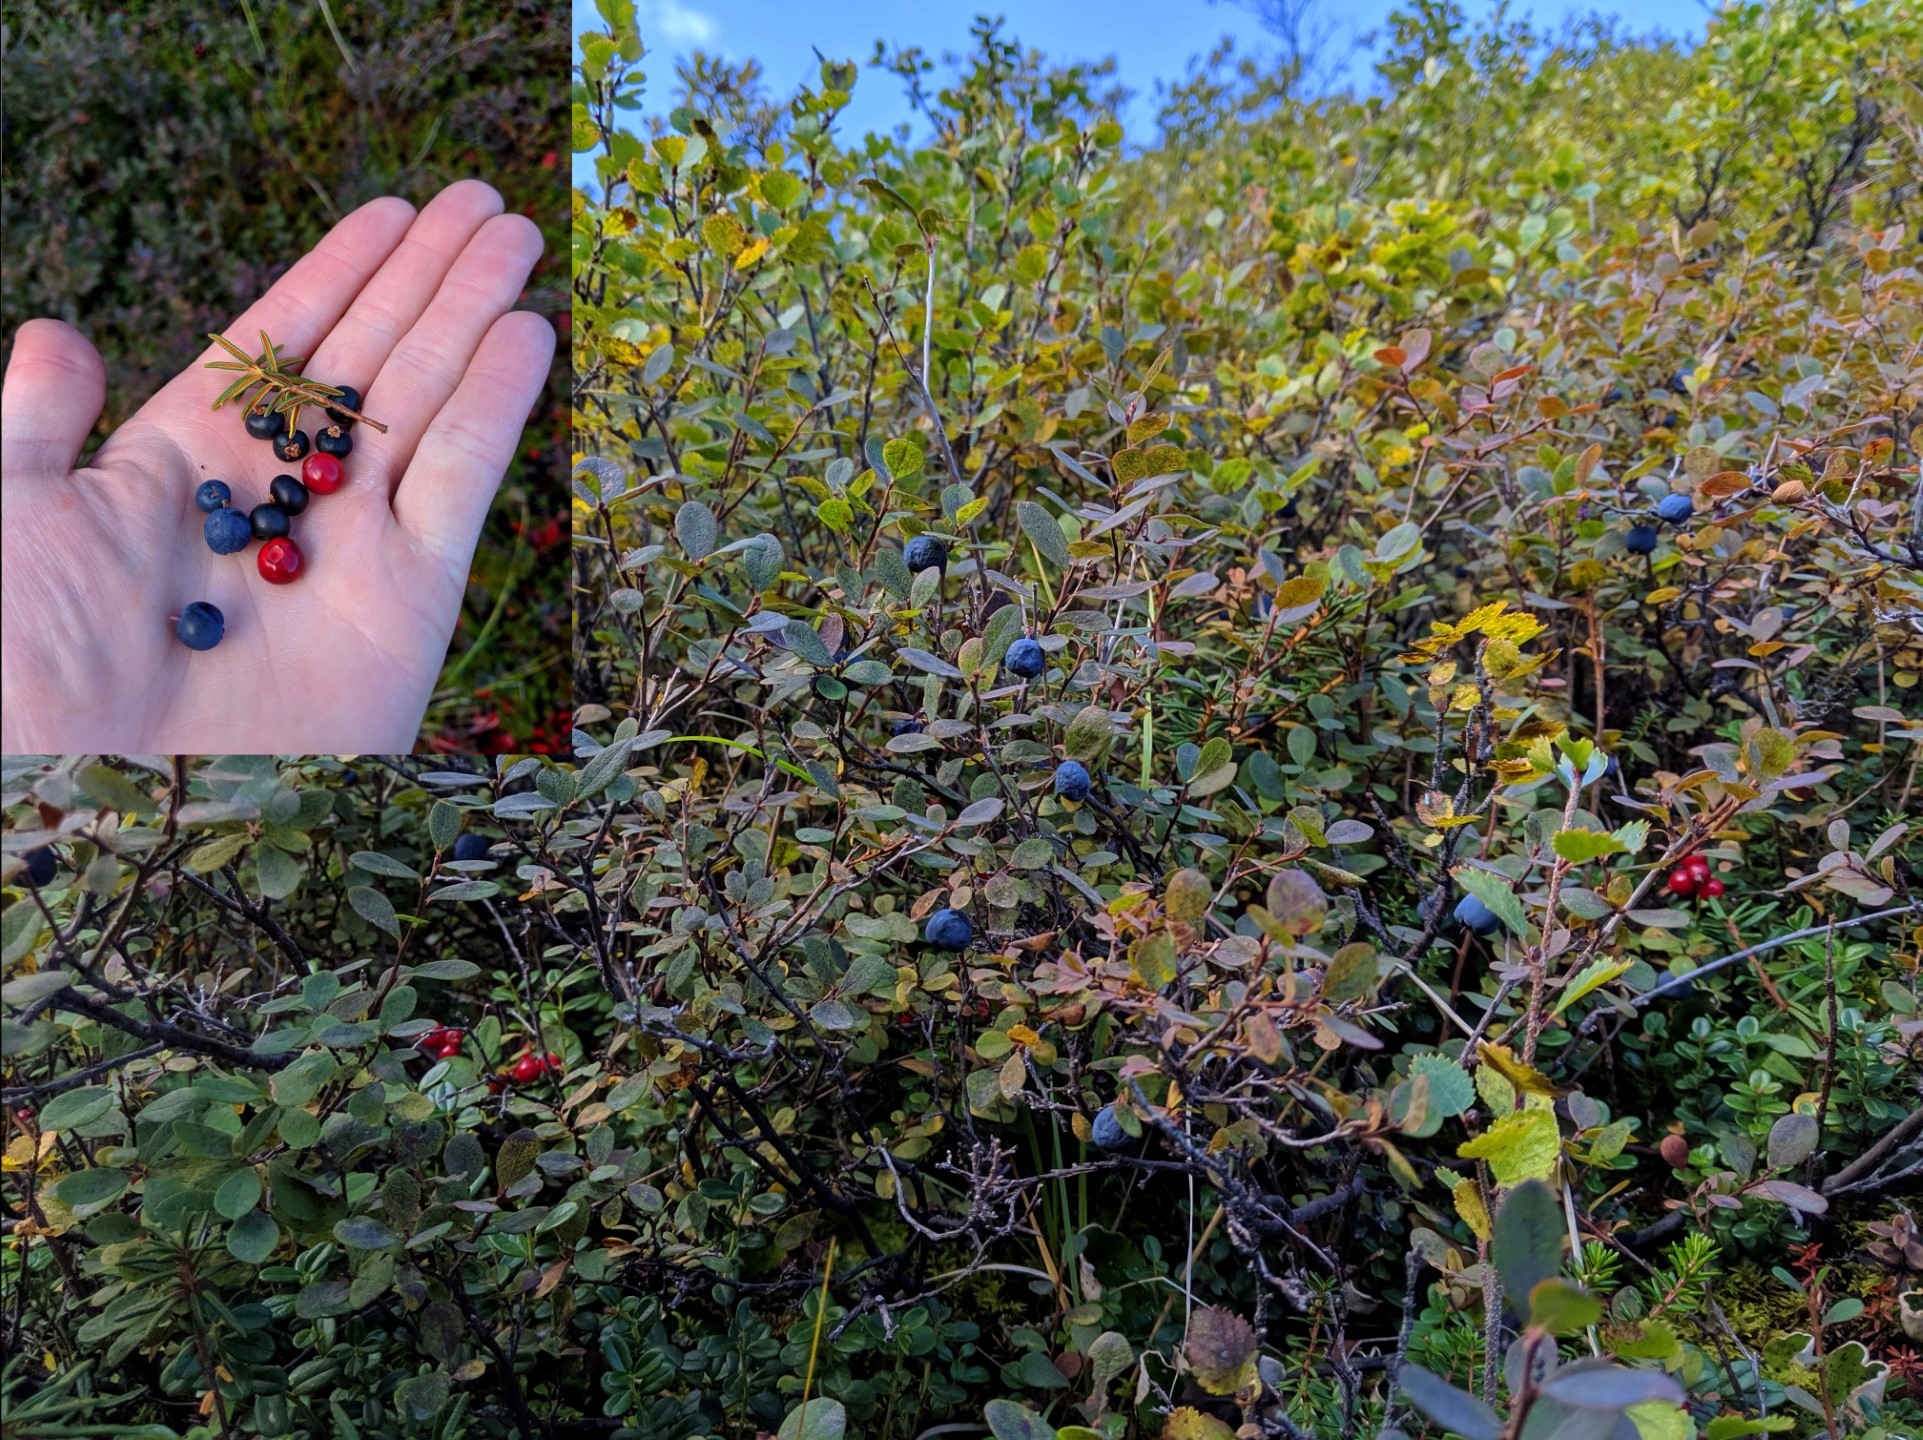
We were also able to enjoy the bounty of blueberries, cranberries, crow berries, and other tasty treats for our personal enjoyment and sustenance. In fact, we spent a good portion of the hike bent over filling our bellies. We saw plenty of recent evidence of bears doing the same…
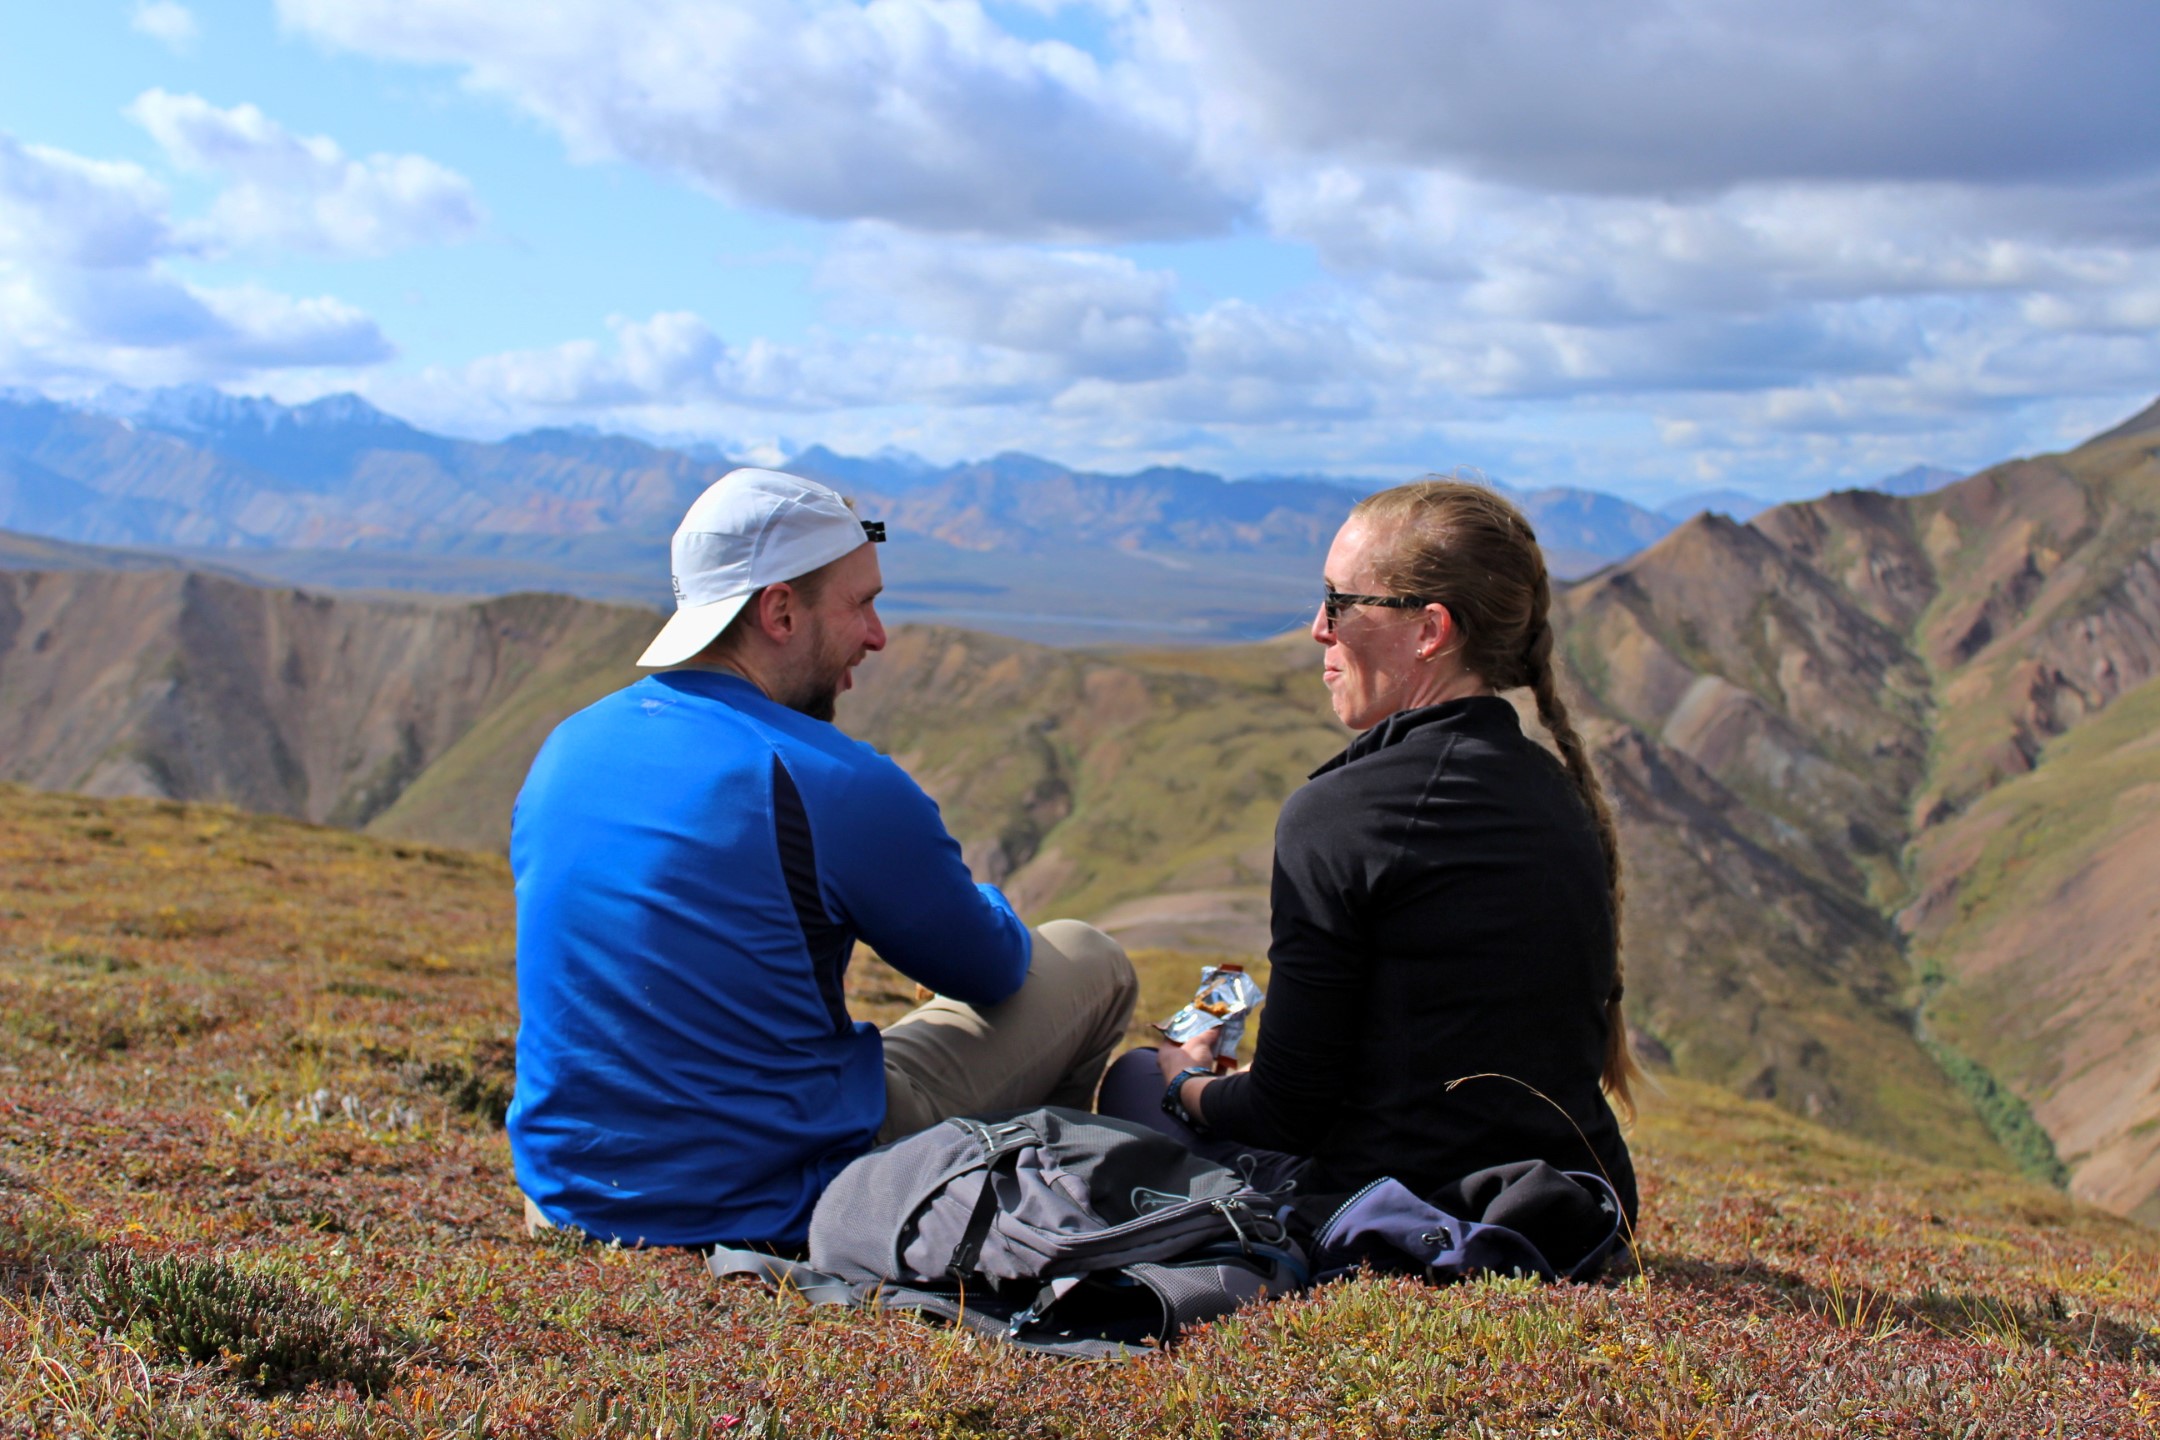
During our hike we were able to stop to enjoy some of the gorgeous scenery. Every few hundred feet we climbed, we could enjoy more of the glory around us! We hiked to a peak where we stopped for about an hour to eat lunch and just enjoy the view – we even did a little coloring while we were there. The hike down took a different route with a lot less scree and a lot more brush. We found ourselves doing a bit of bushwhacking and creek crossing to make it back to the road.
Highly, highly recommend the Discovery Hike.
Savage Alpine Trail
The Savage Alpine Trail is a strenuous, 4.5 mile trail that connects the Savage River Campground to Savage River Day Use Area in Denali National Park. Take the free shuttle bus either from the visitor’s center or the bus depot to the trailhead. We hiked this on a cool, rainy morning and there were very few people on the trail.
The trail gains 1,400 feet of elevation culminating at a lookout point over the valley. We recommend starting at the Savage River Campground since the climb is much more gradual.
The trail winds its way through alpine fields before coming to a rocky tundra. Once you get to the top, the trail descends steeply via a series of stairs to the Savage River. While a bit more grueling than some of the other on-trail hikes in the park, we loved getting up high and looking over the wilderness.
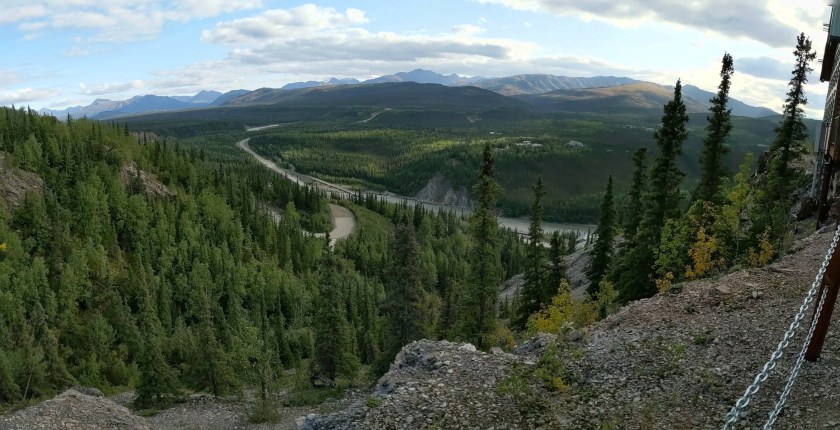
After a strenuous hike, the only thing left to do is head towards the only road in the Wilderness and wait for a bus with available seats. The scenery, even on a cloudy day, makes it a quick wait.
Need a ride in Denali? Just catch a bus!
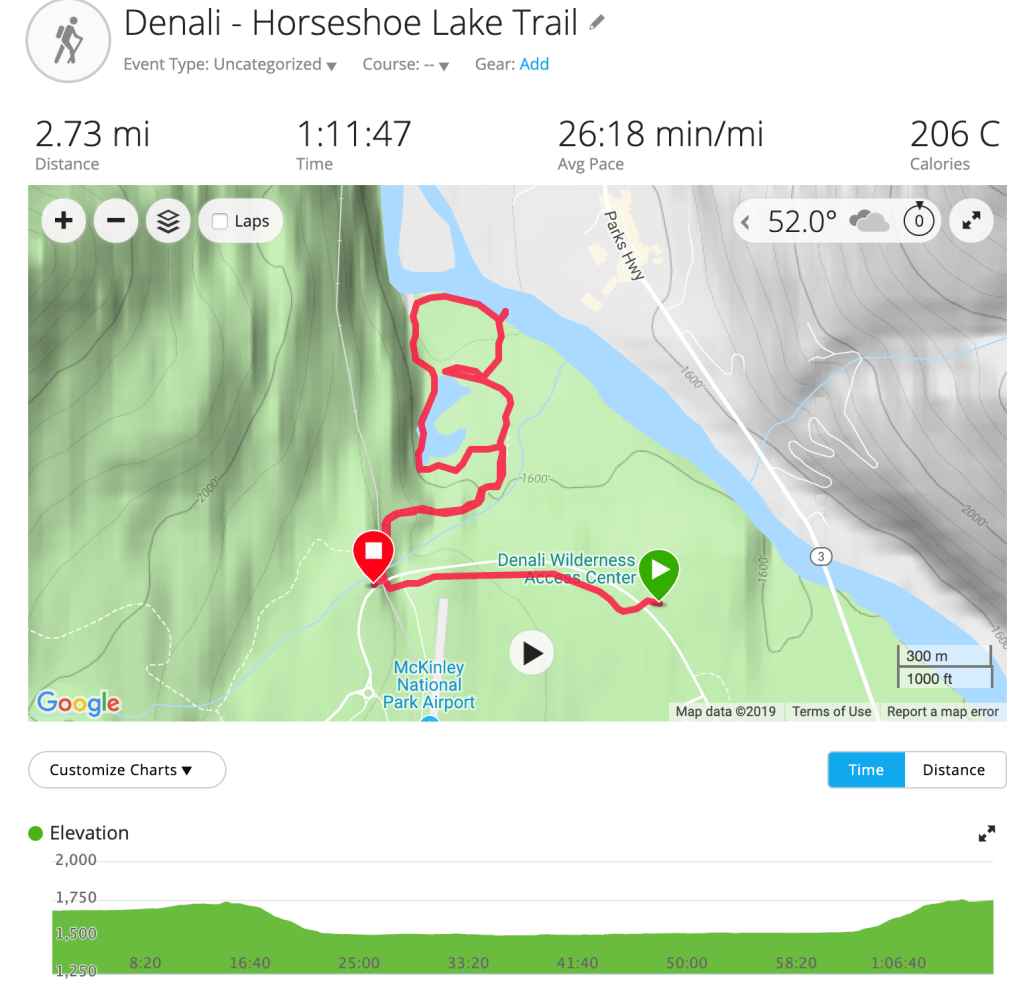
Horseshoe Lake Trail
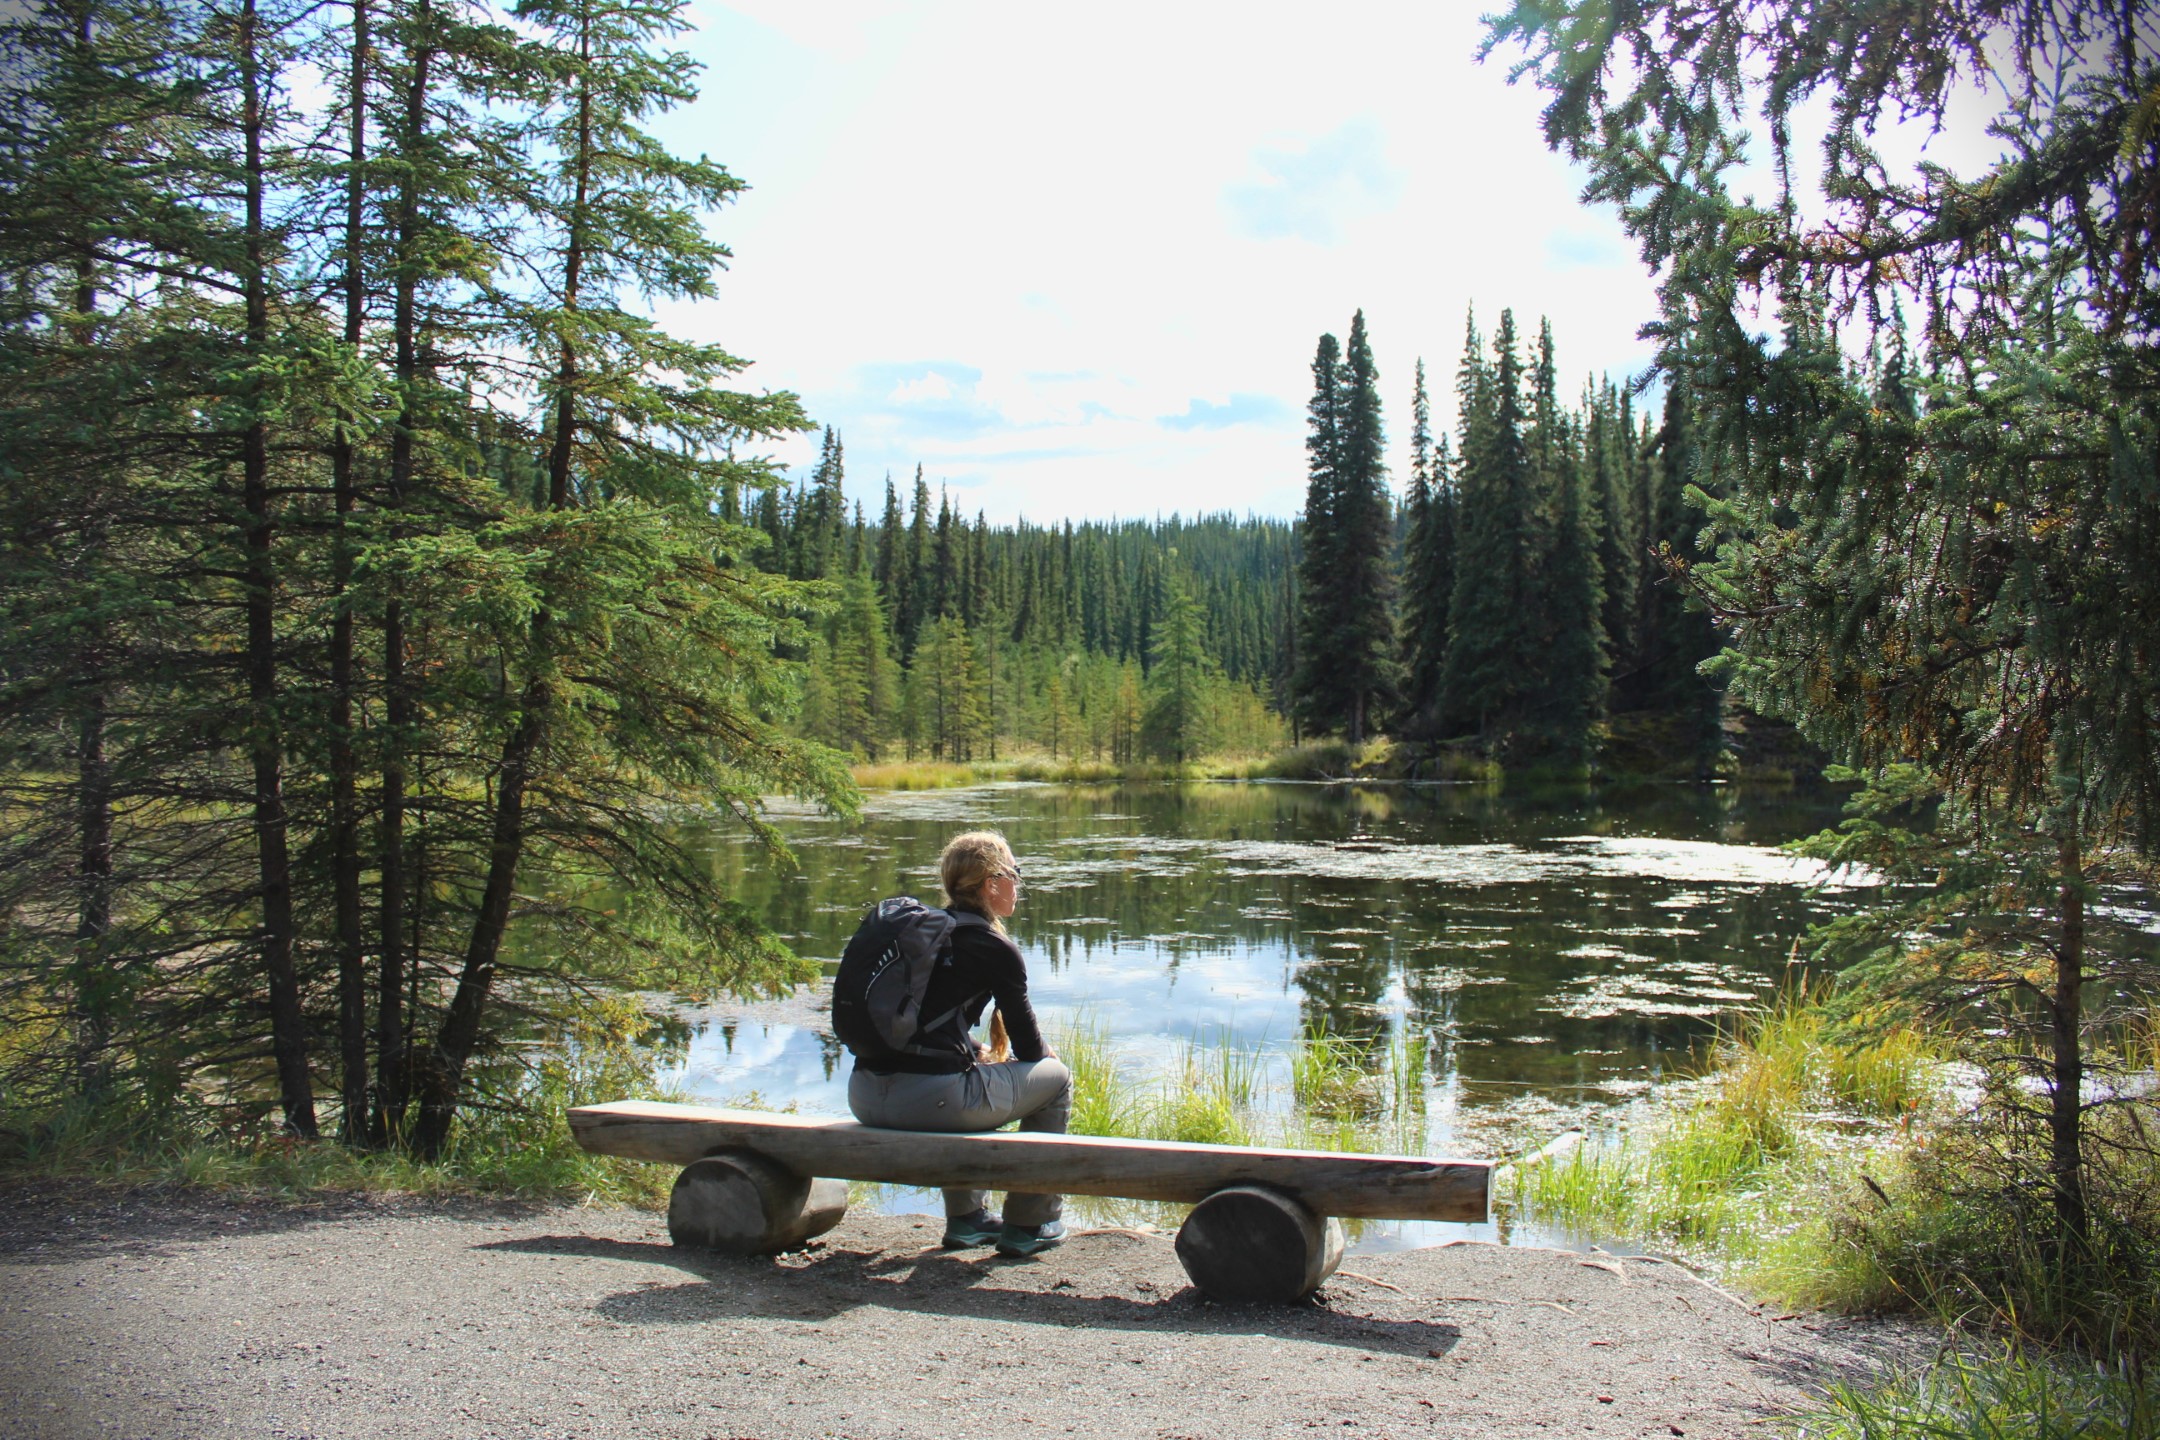
The Horseshoe Lake Trail is an easy, 2 mile loop in Denali’s front country. We started from the bus depot, which added an additional 3/4 mile along a bike trail, but the bus can drop you off right at the trailhead. The trail descends roughly 400 feet from the trailhead and then it’s an easy jaunt around the lake.
The scenery of this hike was very different than the previous two hikes we did in Denali – it was through pine forest rather than alpine tundra. The coolest thing about this hike is the beaver activity along the trail. There are active beaver dams and we heard that you can often see those busy beavers at work. We did this in the afternoon after we hiked the Savage Alpine Trail and the weather couldn’t have been better.
The sun came out and we had bluebird skies. The lake was so still it was like glass, perfectly mirroring the landscape.
Horseshoe Lake in Denali
Finally…
What is an Alaska adventure without a moose??
Moose in Denali!
We have one more Alaska post coming at this. This time we take to the water in the Kenai Fjords!
Alaska offers an abundance of wilderness experiences and a chance for us to get away from the monotonous modern business life. It is a quick, cheap flight from Portland to Anchorage, directly up the Pacific coast.
From Portland into Anchorage
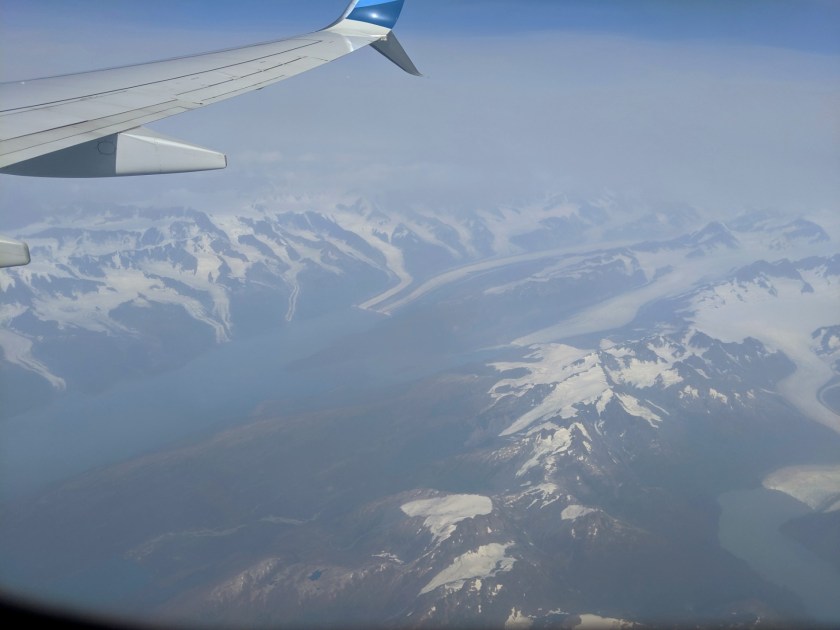
On a clear day looking East you are able to enjoy the splendor of the coastline, ancient volcanoes, islands, mountains, and once further north, glaciers. However, thick smoke hung over most our trip, caused mostly by the large Swan Lake Fire.
Glaciers from the air
Glaciers from the air melting into the ocean
Glaciers from the air melting into the ocean
Anchorage city emerging from the Eastern mountains
Coming into Anchorage by the air, with a thick smoke haze from the Swan Lake Fire
We spent the rest of our day and evening in Anchorage which was still under some gorgeous low-70 degree F weather at this time. Save the smoke in the air, it was a perfect time to walk around the city and enjoy the last bit summer. We moseyed over to a highly rated pizza joint, Moose’s Tooth Pub & Pizzeria. It definitely did the trick–good stuff!
Alaska Railroad 8-hours North from Anchorage to Denali
First thing the next morning we headed to the Alaska Railroad station to catch the 8am train. Driving a vehicle the 5+-hours to Denali is another viable option–in fact the railroad runs parallel to the highway for nearly the entire trip; however, the train does offer a hands-free and scenic perspective to the landscape that we did enjoy. A vehicle does not give you any extra capabilities in Denali anyway since the town is small and shuttles are provided to and from the hotels to the Denali Visitor Center and National Park buses inside the Wilderness area.
There are two different options when booking the train: the Goldstar Service or Adventure Class. We actually rode in both classes and would definitely recommend upgrading to Goldstar if your budget allows. The Adventure Class ticket includes spacious seats, food for purchase, and second floor open seating with domed windows. You are free to move about the train and explore other cars. The Goldstar Class is more expensive but includes amenities that were worth the upgrade for us. The ticket includes larger seats with footrests, glass domed ceilings, open air deck, two meals, two alcoholic drinks, and upgraded facilities. Either way, you can’t go wrong; riding the train was such a great experience.
Alaska Railroad train
Smokey lake north of Anchorage from the Alaska Railroad
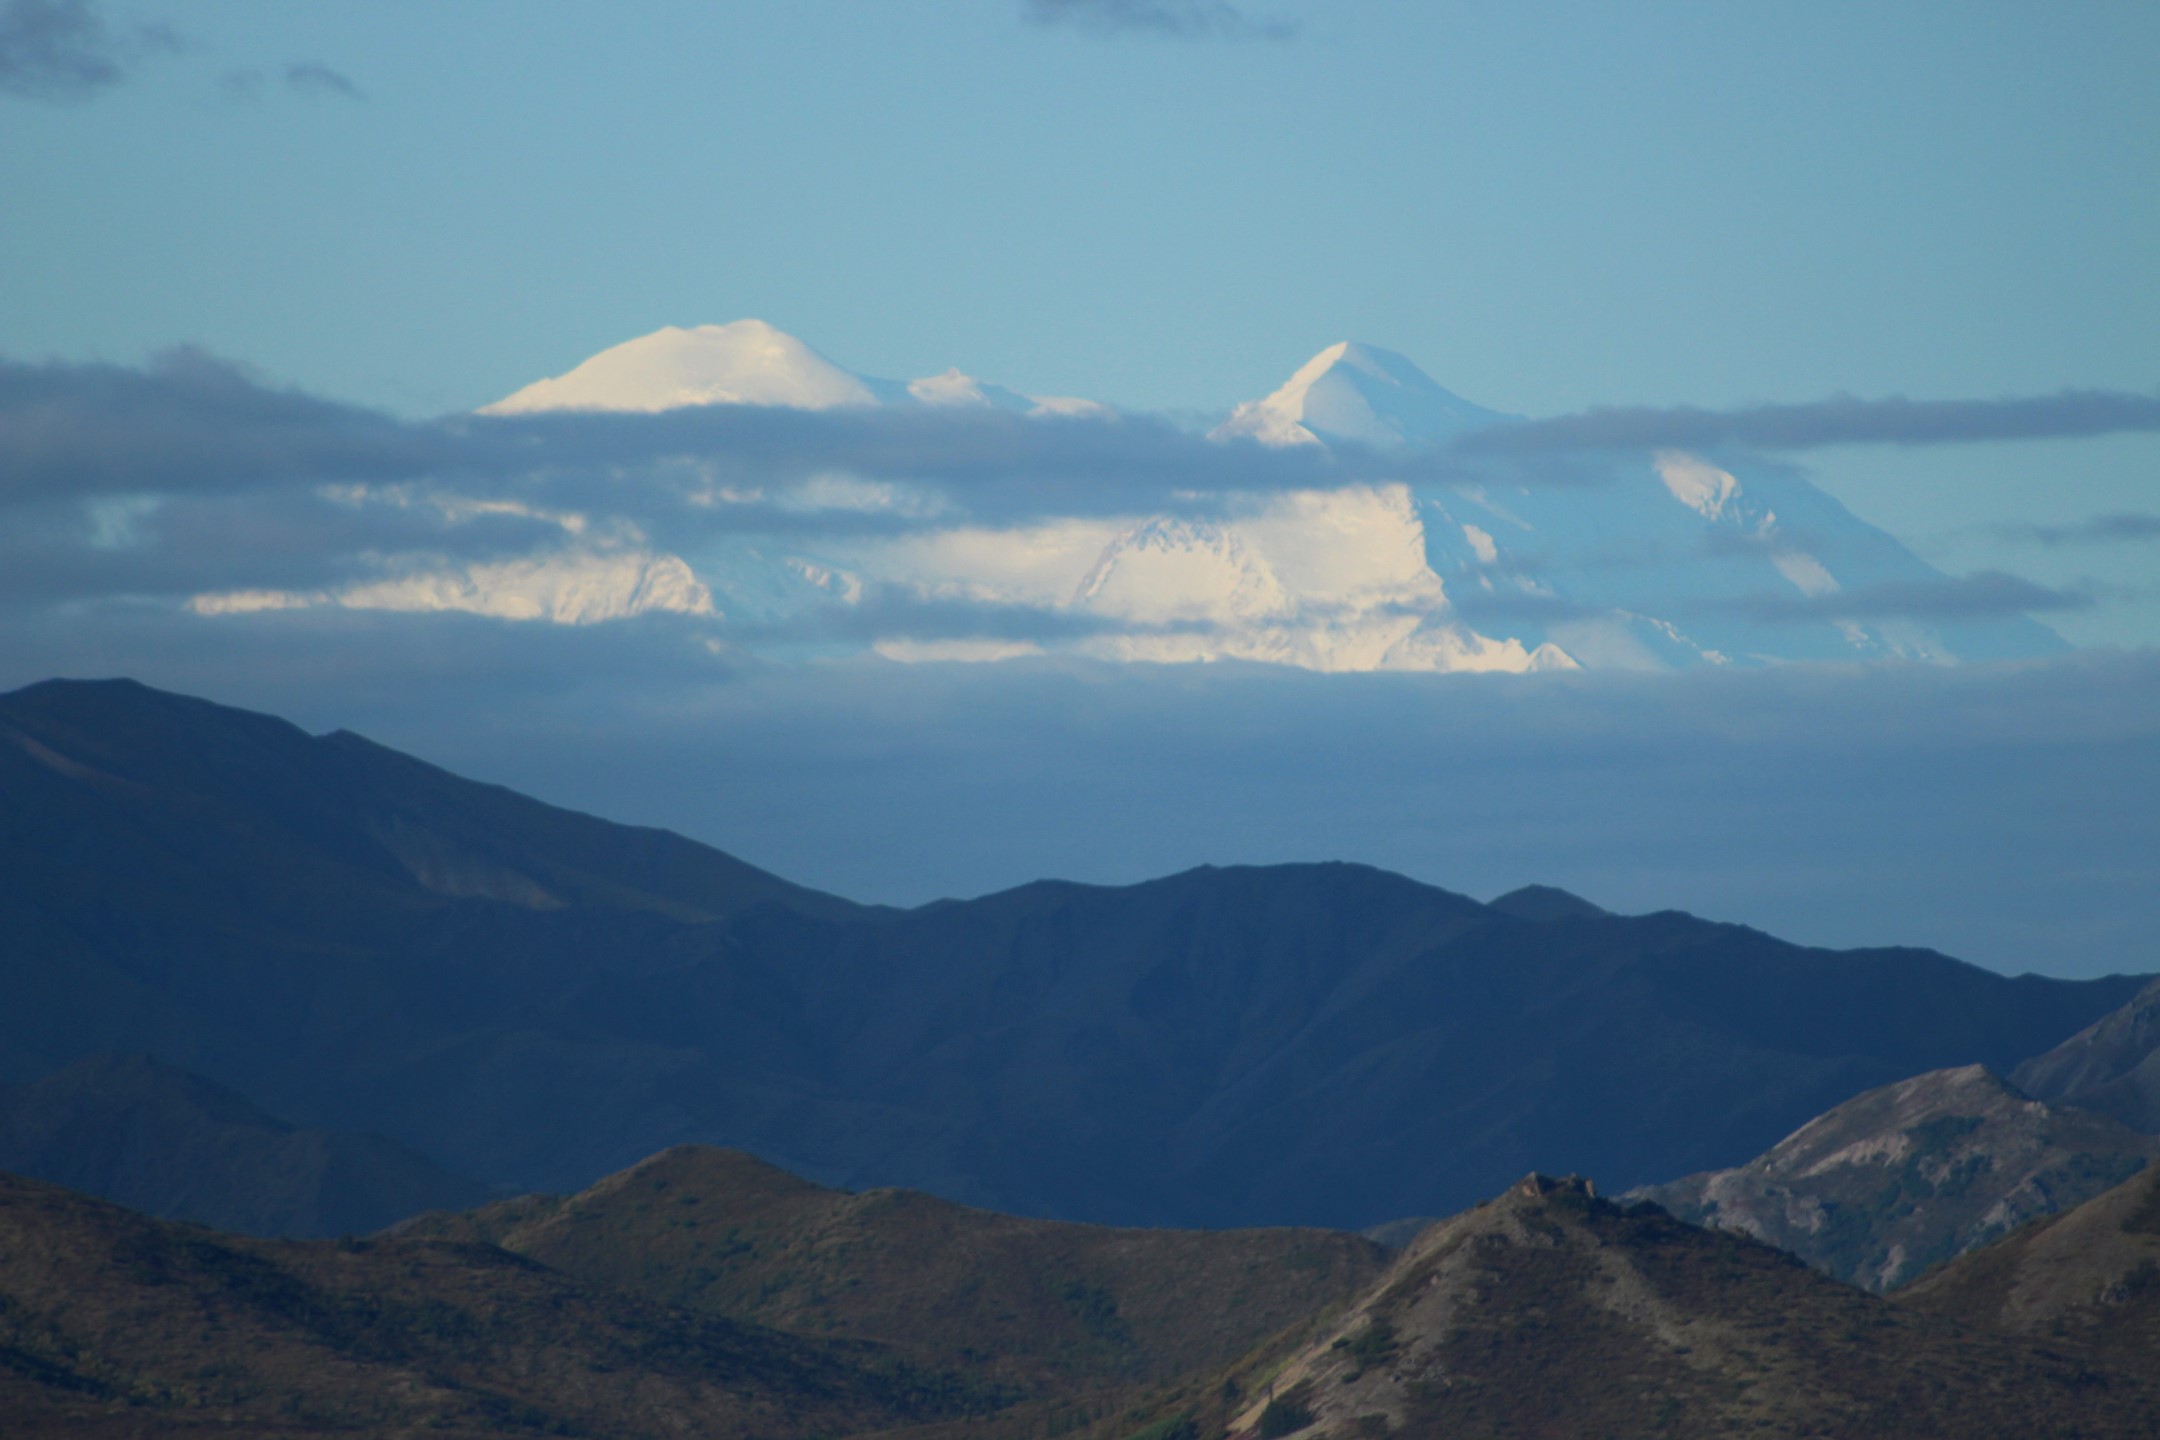
Along the route we got our first view of the great Mt. Denali peak. The mountain range is over 60 miles away and from this distance it is a rare site (visible less than 20% of the time). However, on this day it was visible in all its glory standing at over 20,000 ft above sea level, which is about 16,000 ft above surrounding base! Also visible on the left are the lower peaks of Mt. Russel and Mt. Foraker.
Mt. Denali from the Alaska Railroad, peak over 60 miles away
The smoke from the Alaska wildfires followed us everywhere. We got a very up-close experience with the 3,000 acre McKinley Fire (50 times smaller than the 160,000 acre Swan Lake Fire mentioned earlier) that ran along the Alaska Railroad for several miles. The train slowed to a crawl to give way for the forest firefighters who were containing the still-smoldering areas that we captured.
Burn area from the McKinley fire along the Alaska Railroad
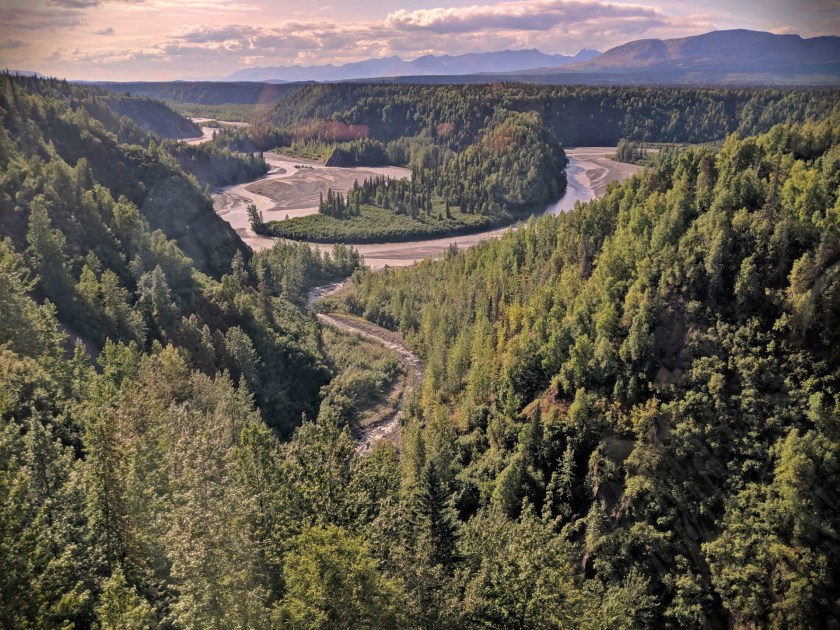
As we approached Denali National Park we come to Hurricane Gulch which spans 914 ft and stands 296 feet above the valley floor. This bridge is among the oldest in the area, built in 1921.
Hurricane Gulch from the Alaska Railroad, 300 ft above the valley floor
Denali National Park
We spent a little time near the hotels, getting to know our surroundings. There are plenty of hotel options near Denali National Park. Be aware that you may pay a bit more, especially during the summer season. We booked a hotel as part of a package with the railroad. It was a good deal, but we wouldn’t recommend that particular hotel. If you have a large budget, there are also lodges in Kantishna – the center of the park.
Getting around
If you choose to take the train, chances are you’ll need some way to get around. Luckily there are plenty of free shuttles that run to and from the park and town. “Downtown” is really just a short strip of road with a few restaurants and shops – it’s a very short walk to many hotels from there.
Even if you have a car, you’ll need to ride a bus in the park. There is one road that runs 92 miles through the park. In order to keep the land as wild as possible, vehicles have been limited on park roads since the 1970s. Personal vehicles are allowed in the first 16 miles of the National Park Road, but if you want to go further you have to purchase a ticket. There are also free shuttle buses that will go to mile 16 (Savage River) if you don’t have a car.
There are two types of buses running through the park: green Denali park buses and white tour buses. The green buses are non-narrated while the white busses are narrated. The price of a ticket varies based on whether or not you choose a narrated bus as well as the distance you want to go into the park. These trips usually range from 5.5-12 hours round-trip if you don’t get off the bus. The buses make stops every hour or two for bathroom breaks, but be sure to take your own food and water.
Visitors are encouraged to get off the buses and explore the park. Be aware of wildlife and follow the safety precautions. When you’re done hiking and ready to go back, simply flag down a green bus and hop on.
For the Ranger Discovery Hike we took the disco bus to nowhere
Denali National Park offers a boundless many activities, but most of them are centered around very wilderness-oriented activities. We opted for the Ranger-led Discovery Hike as our first introduction into the Denali Wilderness. It gave us the confidence to explore the back country with an experienced guide, so we could get our bearings.
Sightseeing on the disco bus before the hike
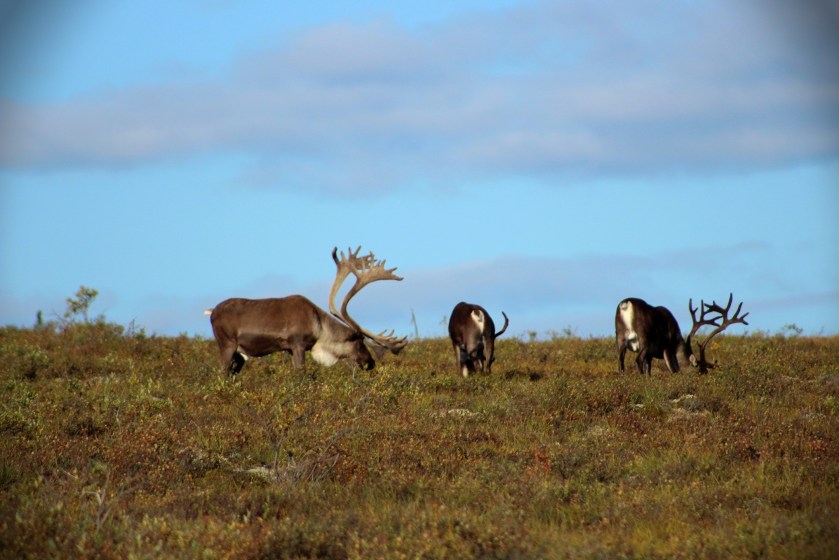
We started the trip on the disco bus, 1.5-hours (about 30 miles) into the park early in the morning. On that early trip, we were able to catch some wildlife along the way. There are over 150 species of birds in the park as well as plenty of mammals and even one amphibian (it literally freezes solid in the winter!). These caribou are a common site, but these large males had particularly impressive racks. We were also able to spot some brown bears (grizzly bears), from a safe distance. They were digging for roots along a river bed. It was moose rutting season while we were there, and we got to see quite a few moose.
Caribou in Denali NP, foraging on the tundra
Brown bears digging for roots in the river bed
Young brown bear in the river bed
Further up the road we were able to get some fantastic shots of Mt. Denali. This for the second time in 2 days–a rare treat!! Even near the end of summer those peaks are completely snow-covered and frigid. So many people visit Denali and never get off the bus. The scenery and wildlife is so amazing that you don’t have to, but we highly recommend hopping off the bus for some hiking.
There is so much to do in Denali and Alaska; this was just the start of our adventure. Our favorite part in Denali had to be the off-trail hike we did – stay tuned for a recap of that! And in Part 2 (?) we venture south to Seward and the Kenai Fjords.
Hamilton Mountain trail is a 5.5 mile hike located in Stevenson, Washington. It’s a moderately trafficked trail and the parking lot can fill up fast. We went in the afternoon around 3pm when crowds had died down. The trail is mostly uphill for the first mile when it comes across a waterfall. There were plenty of people playing in the water to cool off on the hot, August afternoon. From that point, the trail levels off for the next 0.5-1 mile and meanders through the forest with a few gorgeous vistas of the Gorge. Around mile 2 you come to a lookout point where most people stop. If you’ve got it in you, I highly recommend gutting it out for the last mile to the top. The trail is a bit unrelenting as it climbs ~1k feet through countless switchbacks but the reward is worth the pain. At the top there are sweeping views of the Gorge, Mt. Adams, and Mt. Hood. Be sure to take plenty of water; most of the trail is shaded, but the last mile has a lot of exposure and can get very hot.