Javelina Jundred 2022 live updates

Welcome to the big show! The Javelina Jundred. This is 100 miles of ultramarathon trail running party in the desert at McDowell Mountain Regional Park north of Fountain Hills, Arizona. The 5-loop course features moderate elevation gain.

I will be live capturing our run-up to and event to update all those following along!

Race is complete!

  • Race Results (Beth is bib # 397) – go to Results > Split Times 100M near the bottom
  • Live stream – start/finish line from the race organizers

Race Day

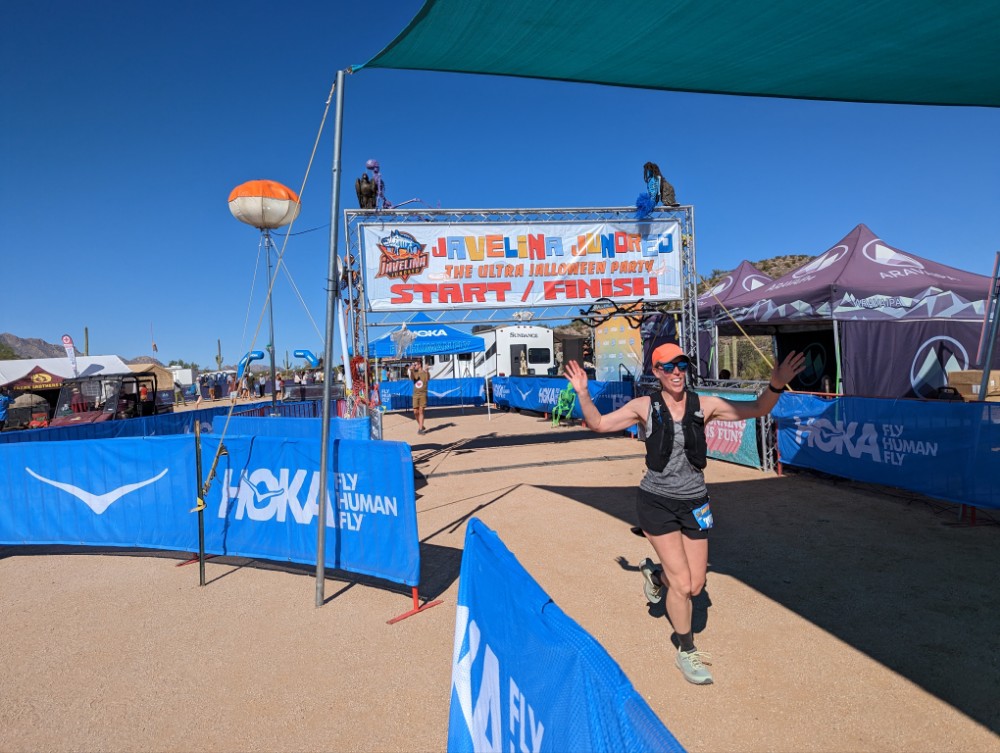
2022-10-30, 0349 – it is done. After 5 loops, 2 in complete darkness, the finish time was 21-hours and 49-minutes!

2022-10-29, 2230 – time for me to gear up! Beth is almost on the last lap. Its as dark as it gets.

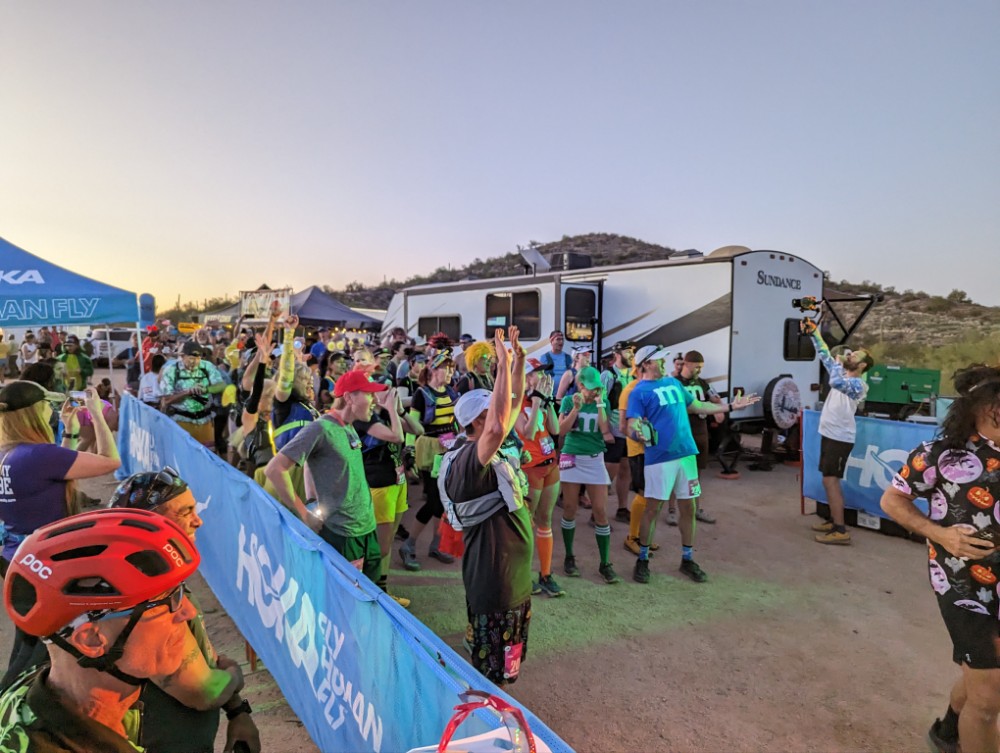
2022-10-29, 1850 – beth just left for lap 4 at 61.7 mi and is back on pace! Next lap I join her as she paces me I pace her to 100! And its a party here.

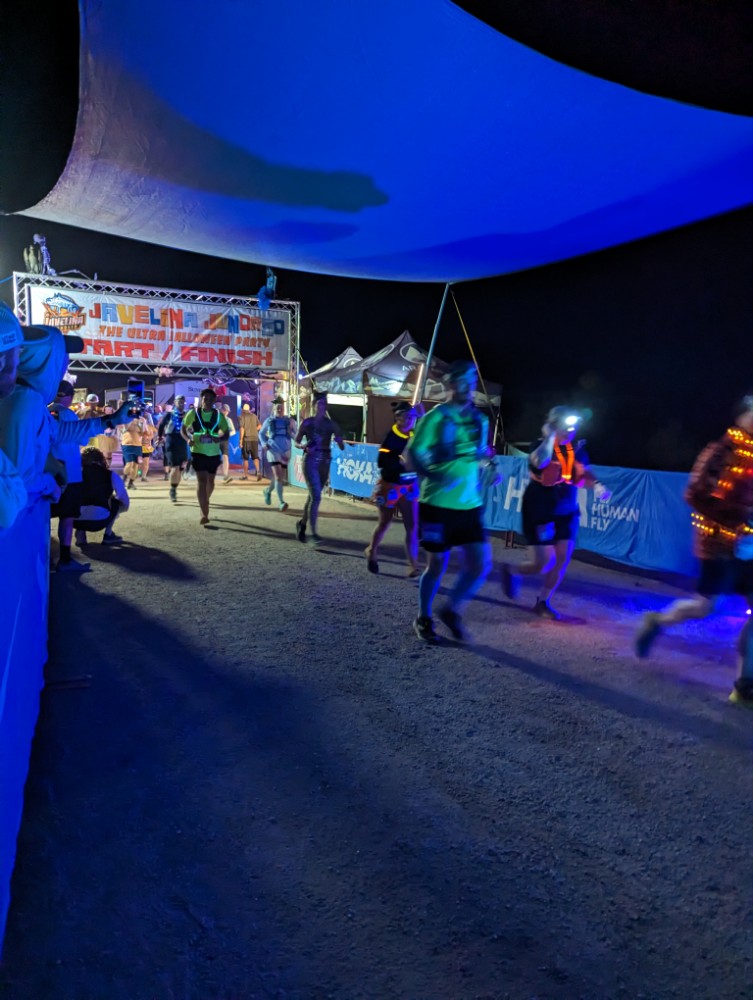
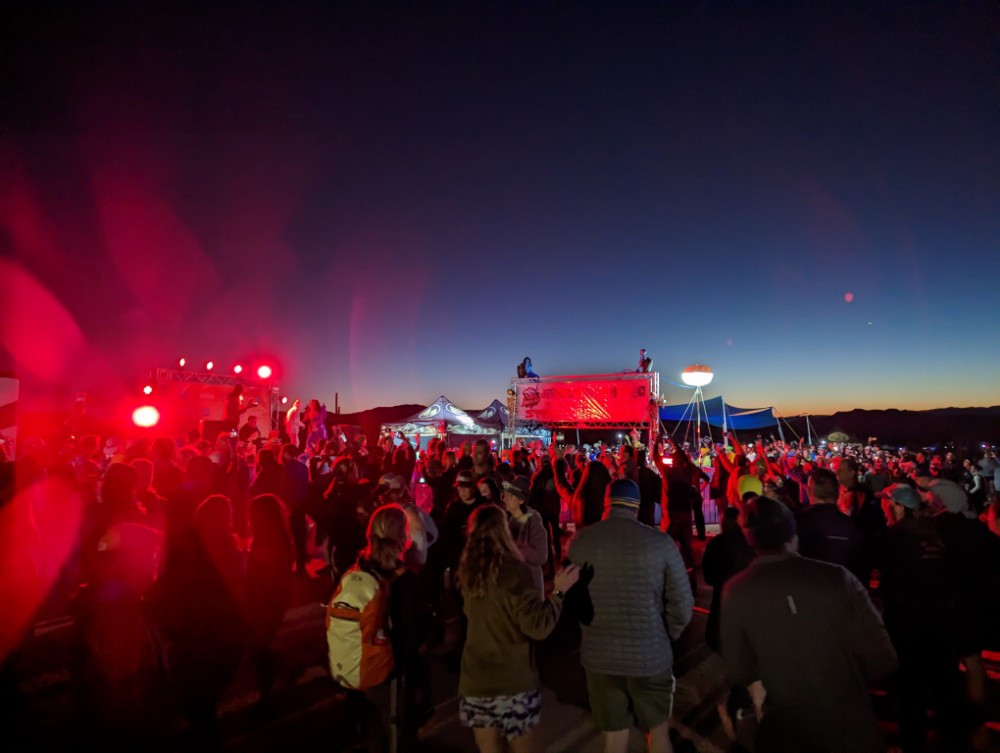
2022-10-29, 1800 – the jackass 31k night run just started. What a sight!

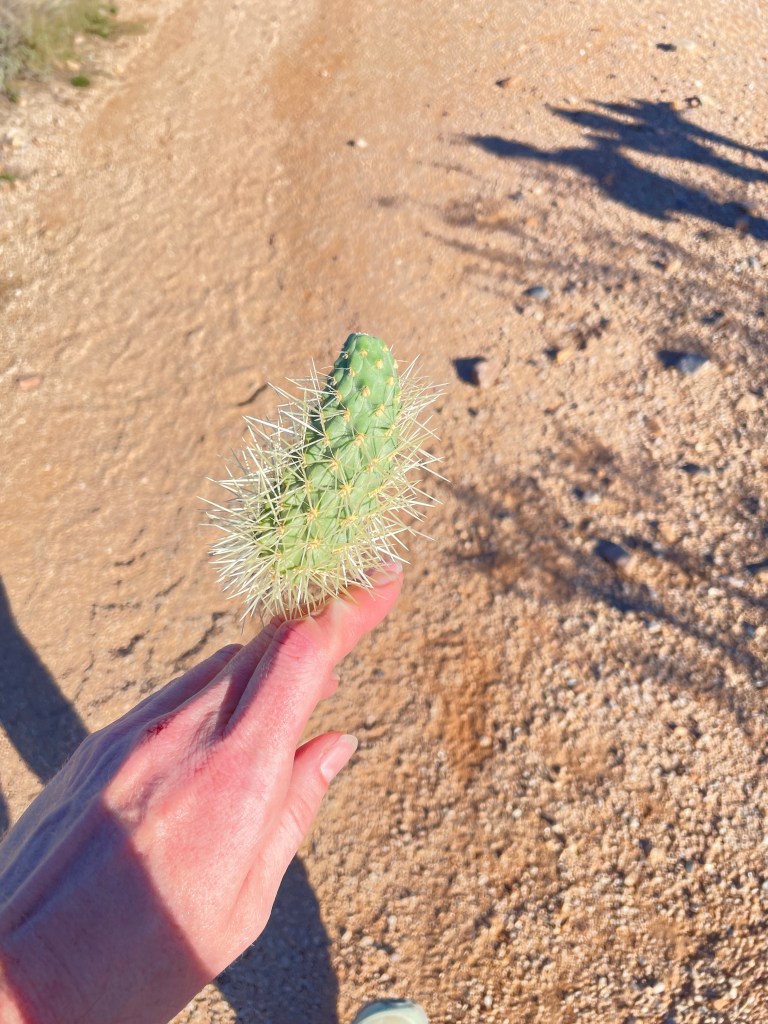
2022-10-29, 1630 – Beth just hit 50 miles in 10.5 hours!! That’s just under pace. She lost some time due to a run in with a cactus and medic visit, but she’s back on.

2022-10-29, 1420 – beth is on pace, done with Lap 2, thats 41 miles!! Updates are slow due to congested network.

2022-10-29, 1310 – I will be pacing beth from mile 80-100, the last loop!! I should start running sometime around midnight.

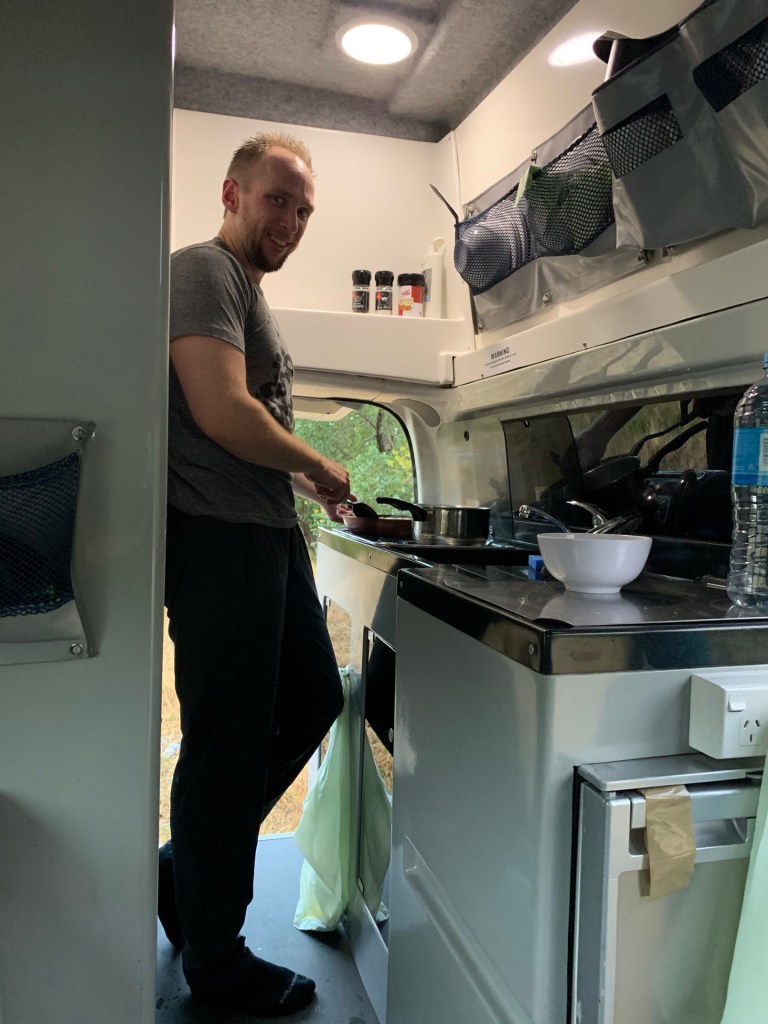
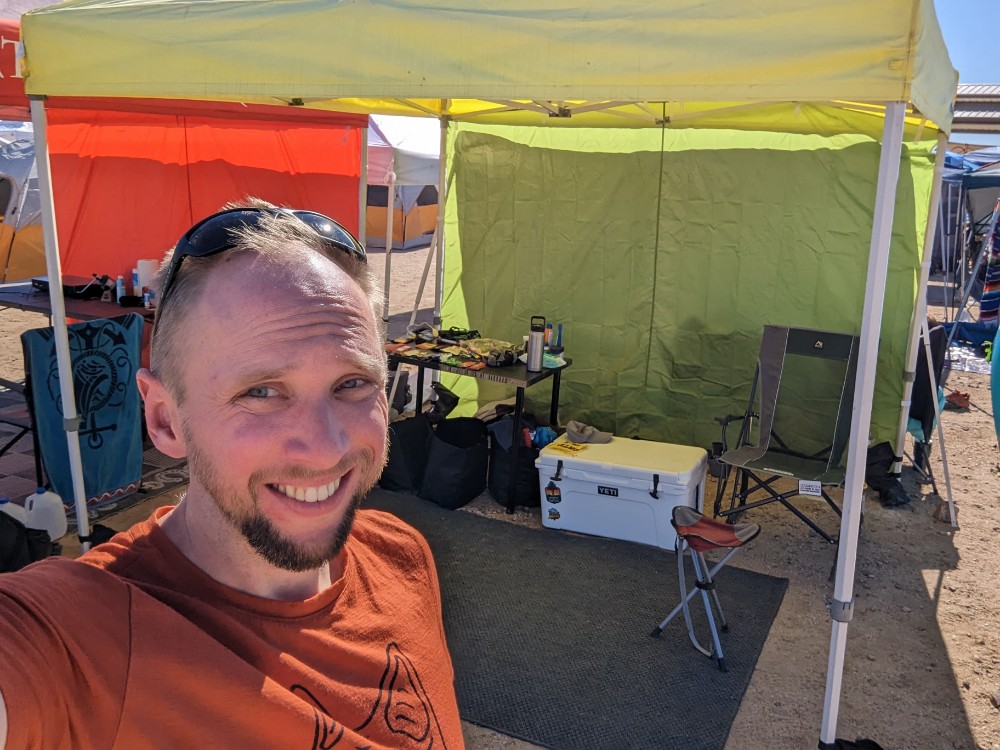
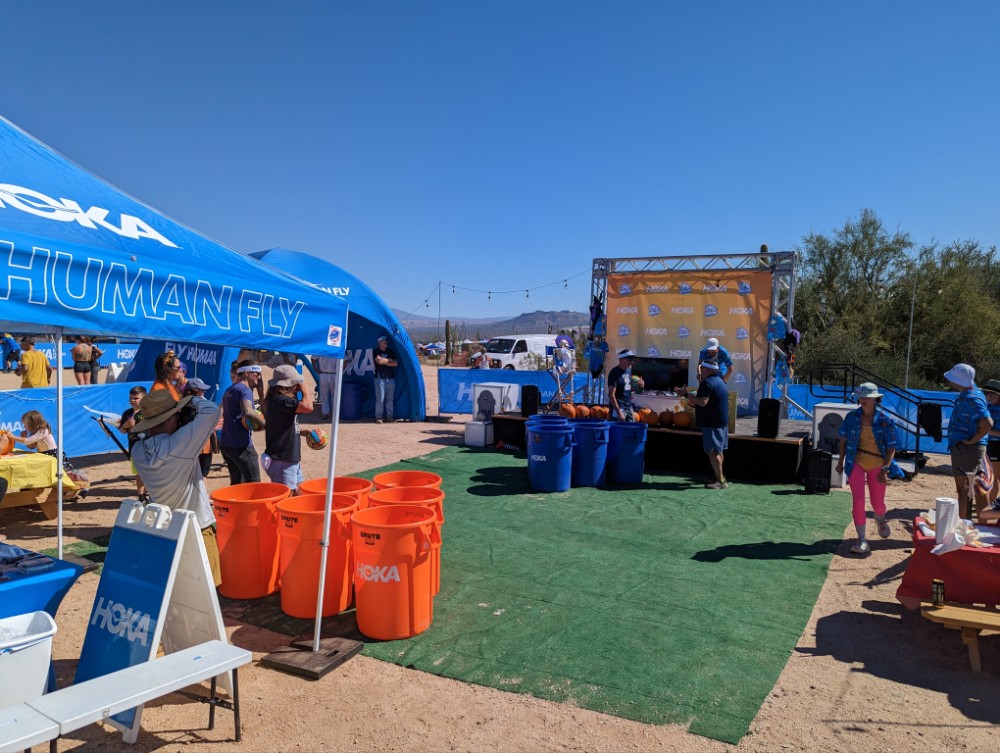
So, what do I do while I’m waiting? 1) crewing, my first responsibility is to make sure the table is set to fuel up and refill water! 2) I also get to interact with the other pacers and crews! I played giant pong and lost, but got all kinds of swag out of the deal

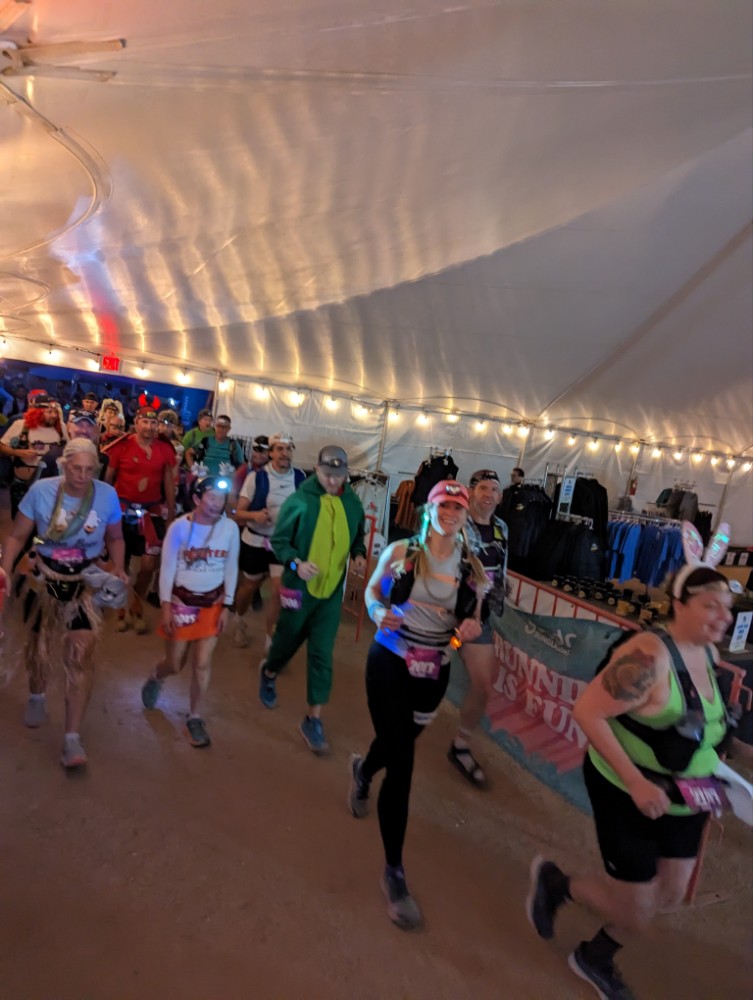
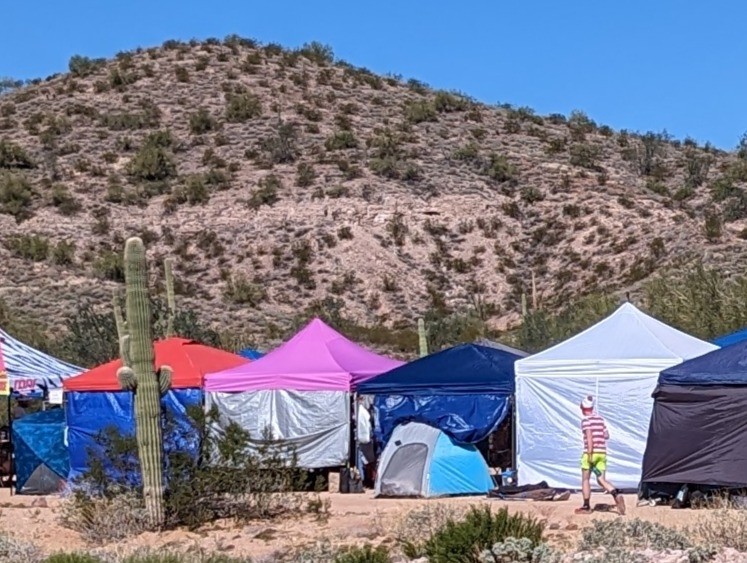
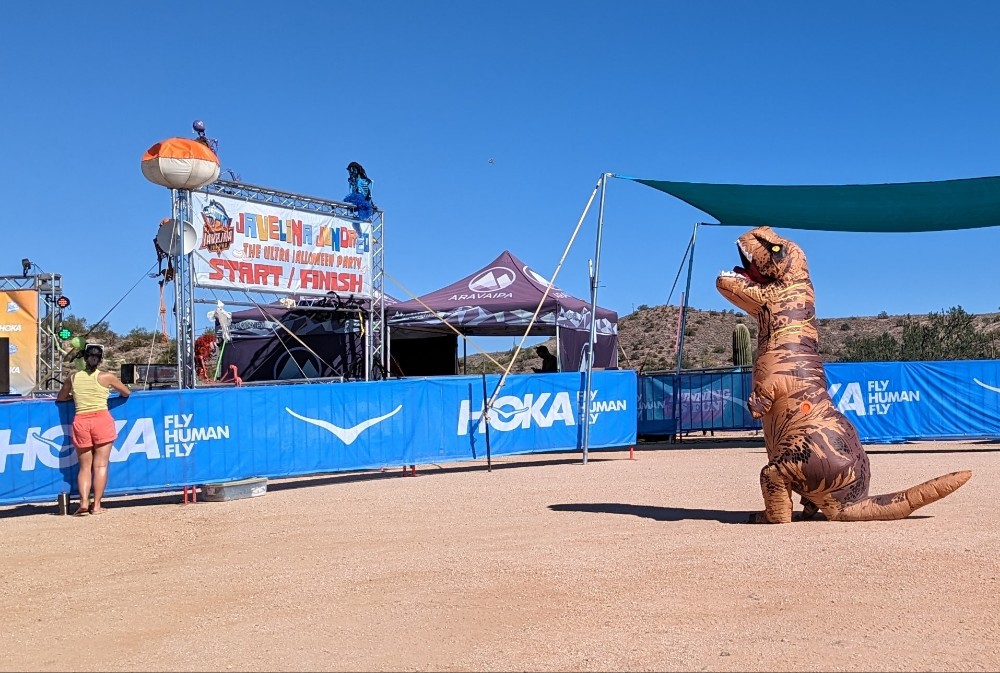
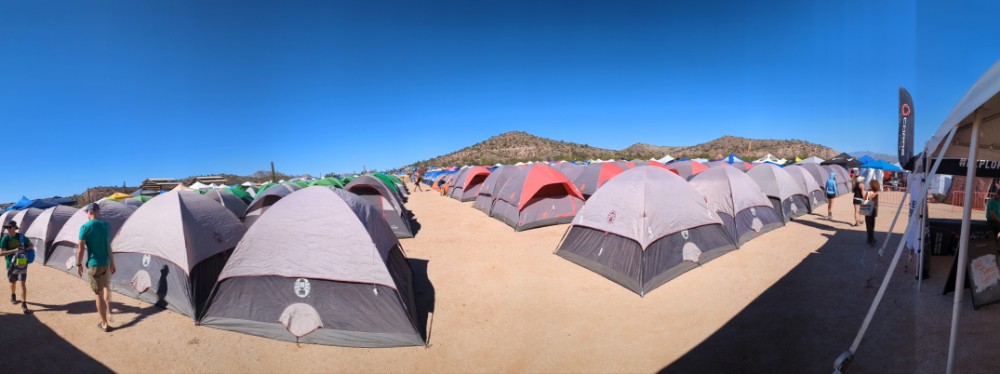
2022-10-29, 1120 – camp photos. Unleashed dinos, where’s Waldo, and acid wash jeans ARE ultrarunning gear.

2022-10-29, 1020 – on pace after lap 1 and doing great!

2022-10-29, 0600 – it’s headlamp city at the start line as the sun comes up!

Estimated timing

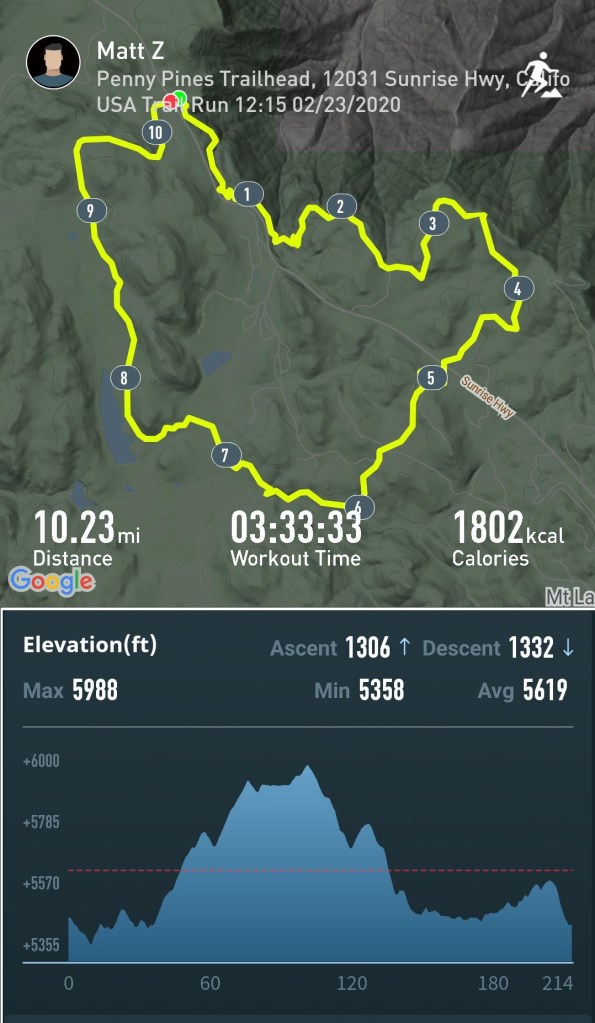
2022-10-28, 1300 – based on Beth’s pace for the Latest Not Fastest 2022 she should be able to maintain a 12-minute per mile pace at least through 80 miles. Here is the expected breakdown for each of the 5 loops:

Distance (miles)
Start/finish line
Estimated Total Time (hours:min) @ 12 min/mile
+ 15-min for aid stations
Estimated Time of Day
(+3-h for EDT)
0 (start)0:000600 PDT Sat
22.34-h 28-min1028 PDT Sat
41.88-h 36-min1436 PDT Sat
61.212-h 44-min1844 PDT Sat
80.716-h 54-min2254 PDT Sat
100.1 (finish!)21-h 1-min0301 PDT Sunday

These times are when you should watch the Live stream to see Beth!

Pre-race

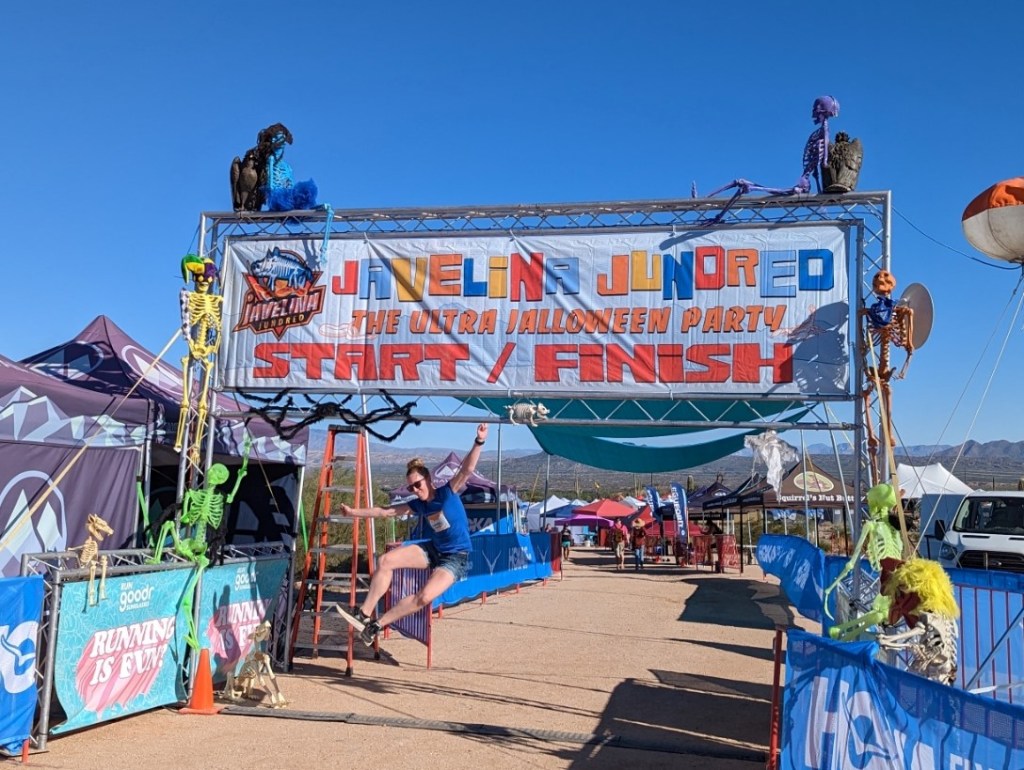
2022-10-28, 1600 – the race expo and race info session is making it feel real! There will be five laps through here tomorrow.

2022-10-28, 1100 – race day weather high 78, low 52 with a light breeze. That might be as good as it gets out there!

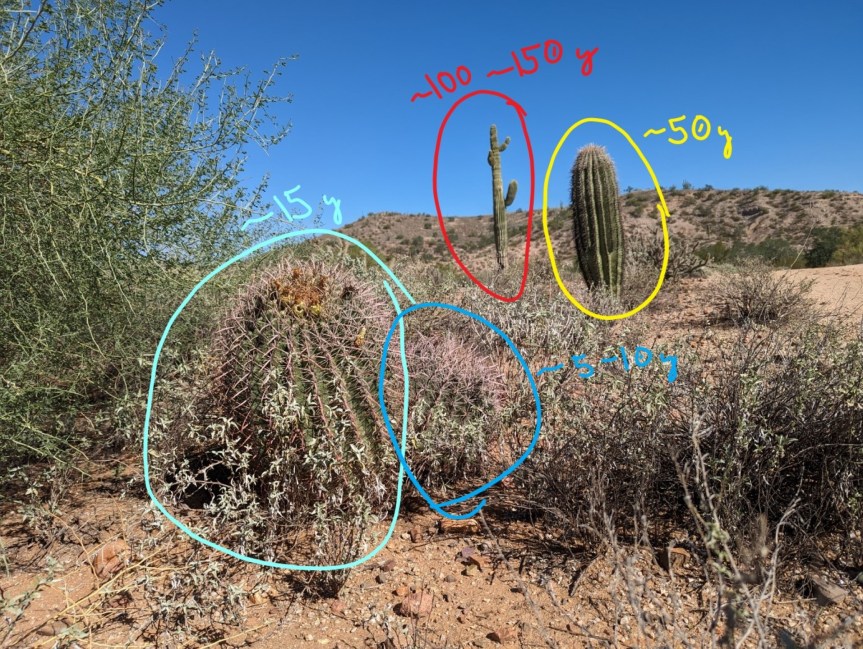
2022-10-28, 0900 – saguaro cacti are unmistakably unique! These things are also _old_ when they are big. It can take them 75-100 years to grow their first arm. I found a spot where you can see the progression of growth, from the 1 meter tall 15 year old cactus in the front to the potentially 150 year old monster in the back of the photo. Beth will be dodging around these all day tomorrow.

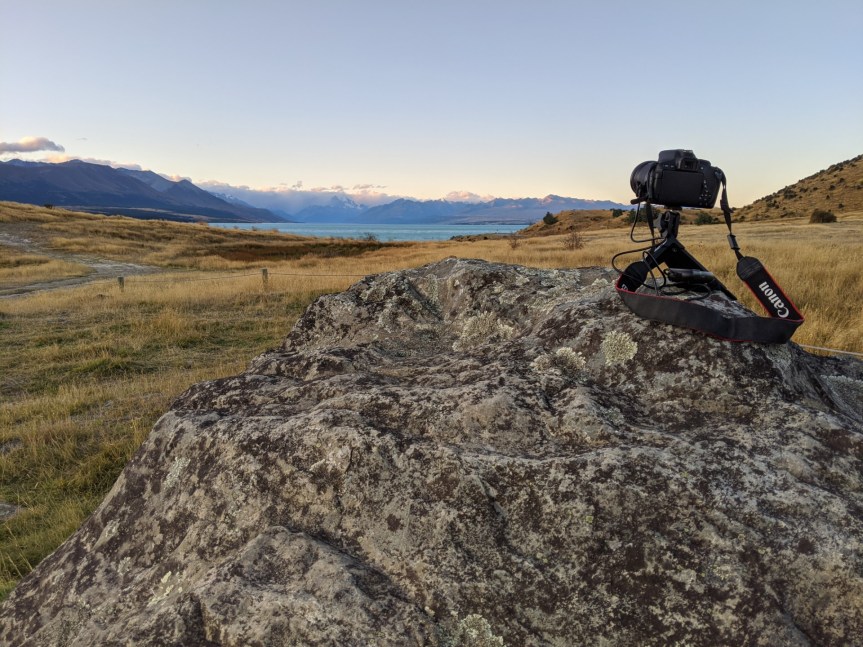
2022-10-27, 2100 – astrophotography of the night sky with a saguaro cactus in the foreground. The bright line might be a satellite that reflected the sun! Fountain hills dark sky association.

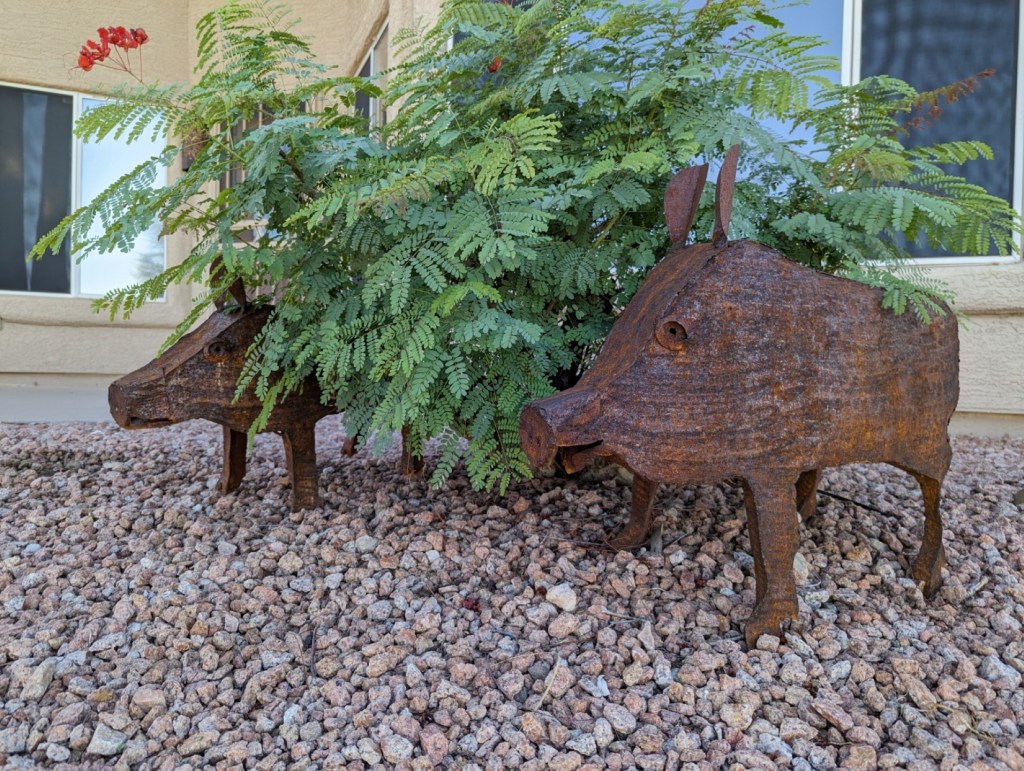
2022-10-27, 1600 – What is a javelina?? Apparently it is a peccary (a New World pig) found in Southwest North America, among other places. Maybe we’ll see a live one out in the Park?

2022-10-27, 1030 – This time on Saturday Beth should be done with 20 of 100 miles. Track her at Javelina Jundred. (Beth is out on a quick 3-mile run testing out the course, so she’s not in this pic!)

March and April 2020 Hikes

With COVID-19 ramping up this spring, we followed California’s stay at home orders and didn’t leave our house or neighborhood much at all. However, there were two days where we were all feeling a little too cooped up, so we ventured East into the desert to stretch our legs away from people.

Domelands Trail

The Domelands Trail is a 7 mile trail in the Coyote Mountain Wilderness. It was a 1.5 hour drive East of San Diego, which was a little longer than we typically go for a hike. The trail is in the desert and can be difficult to find at times, but it offers some amazing landscapes. There are wind caves and slot canyons throughout the area and it is a perfect spot for exploring. Be aware that there is no shade and it can get very hot very quickly. The day we went was in the mid-70s, but the sun made it way too hot for the dog. Without her, we would’ve made the entire loop, but, even with plenty of water, pets can overheat very quickly in the desert. We wandered around for 3.5 miles before calling it a day. This was a very neat hike with very few people (the day we went) but not worth the 3 hours in the car if that’s your only destination.

Pacific Crest Trail

The Pacific Crest Trail runs 2,650 miles from Mexico to Canada. We’ve hiked portions of this trail in California, Oregon, and Washington, but this time we started at the southern terminus (well, technically 2 miles from Mexico). The day we went, we didn’t pass a single person on the trail and ended up hiking 7 miles. It was an overcast and cool day, which made it perfectly enjoyable as there is minimal shade. We did an out and back, and would call this section on the moderate end of easy. There was <900 ft. of elevation gain and the trail was very even; it would be a great trail to run. There was one stream crossing along the way and a couple of vantage points looking out over the valley to Mexico. This was a great day hike not too far from the city.

New Zealand – Milford Sound and Queenstown

Last part in our New Zealand trip series.

Our last planned stop on the drive across the southern island of New Zealand was Milford Sound. However, the week before we went, there were some serious storms that caused rock slides and made the road very dangerous. The Department of Conservation closed the road to vehicles, only allowing a few convoys of tour buses a day. While not something we would typically do, we opted in for the chartered tour of Milford Sound. This included a bus ride from Te Anau and a boat ride around the Sound. We booked directly with Jucy – the company we rented the van from – but there were plenty of options for guided tours.

Into Milford Sound

The 3 hour drive from Te Anau into Milford Sound was beautiful. Perhaps it was due to the lack of cars due to recent rock slides, but it was a very enjoyable, scenic ride. There were so many amazing vistas of fields buffered by soaring mountains. We stopped a few times at Mirror Lakes and Hollyford Valley on the way out to stretch our legs and allow people to take photos – many scenes from Lord of the Rings were filmed in this area.

Once we got closer to Milford Sound, there was an amazing tunnel straight through the Darran Mountain Range. The Homer tunnel runs 1.2km at a 1:10 gradient down into Milford Sound. It is a single-lane road and the inside of the tunnel remains unlined granite. To dig out the tunnel, two crews worked from either side of the mountain, meeting in the middle. The crew on the Eastern side was paid more due to the extra work it took to haul the granite up and out of the hole…it’s hard working against gravity!

Boat ride around the sound

Once we made it to Milford Sound, we took a 1.5 hour boat trip. Milford Sound is a fjord on the Western coast of New Zealand, created by glaciation over millions of years. It is one of a few fjords that still sees glacial activity. It was a beautiful, sunny day and we took a million photos. Every direction has an amazing view, including moss-covered rock walls and waterfalls. We never got to the ocean, but it was a nice trip around the sound.

Queenstown

After 6 nights in the campervan, we were more than ready for a proper hotel in Queenstown. After a long, hot bath and shower, we found the closest brewery for some food and beer. Afterwards, we enjoyed the evening sunshine with a leisurely walk along Lake Wakatipu. The atmosphere was laid back and there were plenty of people hanging out along the shores.

We ended up grabbing some cocktails after dark (who are we?!) at a couple of fun cocktail bars tucked into the alleys around town. The town is very quaint with plenty of pedestrian-only streets that make it easy to explore on foot. We had such a great evening, we would have loved to stay another day and tramp around Queenstown.

It was hard to leave, but our vacation was over and we had to head back to reality. We took a quick flight to Auckland and then hopped a red eye back to Los Angeles. New Zealand is a trip we won’t soon forget and encourage anyone with an appreciation of the outdoors to get out and explore its beauty.

New Zealand Hiking, Post 2

We wanted to provide a light-hearted and photo-filled read to get your mind off of everything life is bringing to us all. This is part 2 to a multi-part post about our trip. Enjoy!

We enjoyed quite a few hikes in our short time in New Zealand. It was the perfect way to move around and take in the spectacular scenery. One fun thing about New Zealand is that trails are called tracks and hiking is referred to as tramping 🙂

Mt. John Walkway – Tekapo Lake

Before we get to the hike: Tekapo Lake features an amazingly photogenic church. We were hoping to get some great night shots of the church, but it was a full moon and the pictures look like daylight with long exposures.

Mt. John Walkway at Tekapo Lake is a moderately strenuous hike that takes you up to the NZ Dark Skies observatory overlooking this turquoise lake. If you choose to do the full loop, it’s an easy descent and finishes on a flat portion along the lake.

Sealy Tarns Track to Mueller Hut – Mt. Cook/Aoraki National Park

The road to Aroki National Park is an amazing 45 minute drive from the bottom of Lake Pukaki to the foothills of several glacier-covered mountains.

Oh man, where to start with the Sealy Tarns Track. This trail is located in the Aoraki/Mt. Cook National Park, and it was HARD! We had intentions of going to the Mt. Olivier peak – a 7 mile round trip hike – but called it once we got to a glacier field roughly 2.7 miles up. We ended up only doing 5.5 miles, but it was more than enough. The track climbs 3,000 feet straight up the mountain; the first 1.75 miles are narrow stairs and the last mile is a rock scramble. We definitely felt the elevation on this hike, which was 2,700 feet at the base and just under 6,000 at the highest point. Despite our slow pace, we were constantly in awe of the vistas.

It was a brutal scramble to the summit after the Sealy Tarns halfway viewpoint. It was a combination of large boulders and loose gravel for a hands-and-knees scramble. The high altitude and cold breezes made the activity that much harder. However, Summit offered some amazing views into a glacier-worn valley–the pictures don’t do it justice.

Sealy Tarns trail at Aoraki mountain

At the end of the day we stayed in the Lake Pukaki Overnight Parking area that has some great views of the mountains over the lake.

Views of Aoraki / Mt. Cook across Lake Pukaki from the overnight camping area

Kepler Track – Te Anau

When we got to Te Anau, we immediately hit the trails. We headed to the Kepler Track, which is a 60km loop in the Fiordland National Park that is normally done as a 4-day, 3-night hike with developed campsite areas along the way. We obviously did not do the entire loop, but we did a 7 mile out-and-back tramp starting at the Te Anau Lake Control Gates and heading south. It’s a flat, tree-covered route that would be easily runnable for a 2-day fast pack if you have your legs on you!

The track ran along the Waiau River through lush, dense forest. It reminded us a lot of the PNW. The section of trail we completed was mostly flat – we only gained 500 ft over 7 miles – and was an easy walk in the woods. It was lightly trafficked the day we went, and while there were no vistas through the forest, it was very serene… if you like rainforests. 🙂

Camping in New Zealand, Post 1

We wanted to provide a light-hearted and photo-filled read to get your mind off of everything life is bringing to us all. This is part 1 to a multi-part post about our trip. Enjoy!

We recently returned from a whirlwind, 10 day holiday in New Zealand. There is so much that we want to share from our trip that we can’t fit it in a single post. Here we’re going to dive into some of the nitty-gritty around camping.

It’s worth noting that aside from 24 hours in Auckland we spent our time exploring the South Island. The logistics would still apply to those visiting the North Island, but we can’t speak to places to visit in that area.

Going into this trip we knew we were going to be camping. While we’re not normally big campers, we had read and heard that is the best way to experience the country. In fact, many locals also prefer this method of travel. Thankfully it is so common, and the country is set up in such a way that camping was a total breeze.

Itinerary

Day 1 – Auckland

Day 2 – fly Auckland to Christchurch, pick up campervan, camp in Whitecliffs Domain

Day 3 – Tekapo Lake hike, camp at Patterson Ponds

Day 4 – Mt. Cook hike, camp at Lake Pukaki

Day 5 – spend day in Wanaka, camp in Kingston (south Lake Wakatipu)

Day 6 – Te Anau hike, camp in Te Anau

Day 7 – Milford Sound boat ride, camp at Mavora Lake

Day 8 – Mavora Lake hike, spend night in Queenstown

Day 9 – Queenstown

Day 10 – Fly back to USA

Getting Around

There are many ways to get around New Zealand, but we would highly recommend driving. We chose to rent a campervan for our time, but there are plenty of Hotels and BnBs around if you’d prefer not to camp. We saw a lot of No Vacancy signs, so if you go that route be sure to make arrangements ahead of time.

We rented our van through Jucy and had a few options to choose from. We went with the Jucy Chaser because it had a toilet and shower. We found plenty of public toilets around so didn’t have much use for that, but the shower was very nice to have after a long day. Overall, we were very pleased with the setup. The van had a bench seat that converted to a bed as well as a lofted bed. We chose to use the lofted bed since it was more comfortable for us, but we did use that space to store our luggage during the day. There was a small kitchen in the back with a two burner stove and a sink. We were able to cook most of our meals from the comfort of our van, including a delicious chicken curry :). The main downside for us was that the beds weren’t all that comfortable. We never really got a restful night’s sleep, but it was still lightyears better than tent camping.

We chose Jucy because it was a middle-of-the-road option that was small enough for us to be comfortable driving while also having the amenities we wanted. There are plenty of other companies out there offering different size vehicles at a price point for any budget. The main ones we saw on the road were: Britz, Maui (these two were typically larger campers), Travellers Autobarn, Mad Campers, and Escape. This post on TwoWanderingSoles has great information on how to select a campervan that meets your specific needs.

Lake Pukaki overnight Campervan area near Mount Cook

Camping

There are a few things to know before you plan to camp in New Zealand. The country encourages camping and many campsites have vault toilets, but all of the campsites we stayed at required your vehicle to be self-contained. At a basic level this means that you must be able to function without outside resources – you will need to ensure you have a toilet and a container to hold grey water. Rentals in New Zealand meeting these requirements will come with a sticker indicating they are self-contained.

We heard a lot about “freedom camping” prior to our trip, and (wrongfully) assumed this meant you could park and camp anywhere. While you technically can camp on public lands, it’s difficult to know exactly where those begin and end. At the risk of incurring a hefty fine, we opted to utilize the Campermate App which was beyond useful. This app aggregates data not only on available campsites (free, low cost, and holiday parks) but also on potable water, dumping stations, showers, toilets, etc. Not all, but many free campsites have vault toilets and running water (not potable!).

We stayed at free campsites for 4 of the nights, a holiday park for one, and a low-cost campground operated by the Department of Conservation for one. By far our favorites were the free sites, but we can’t deny how nice it was to have a regular sized shower and full kitchen the night we stayed at a holiday park. Do take into consideration that most paid campsites charge per person not per vehicle so they can add a large expense on top of what you’ve already paid for the van.

Taking a rest along a stream with the campervan

We loved the flexibility that the campervan offered – we didn’t have to rush to a new hotel and could just pick a campsite based on how far we wanted to drive. It was also really nice to hop directly in the shower after a hike or pull over and brew up a cup of coffee. Overall, we highly recommend this mode of travel in New Zealand.

Coconut Pineapple Cake

A delicious, tropical cake to welcome the start of Spring.

This week has been a bit strange. The weather in San Diego is cold and rainy. Coupled with the post-vacation blues and COVID-19, a springtime cake sounded like the perfect escape. I whipped up some coconut cake, filled the layers with frosting, pineapple curd, and a toasted coconut-walnut crumble, and topped the whole thing with a toasted coconut cream cheese frosting. While the cake was good, the real star of the show is the pineapple curd.

To be honest, the recipe I used resulted in a cake that was a little too dense for my liking and it lacked the punch of coconut flavor I was going for. Maybe my coconut flakes were old, but even when I toasted them for the frosting the flavor still wasn’t quite there. Next time I would add some coconut milk (we were out and so was the grocery store) and maybe some coconut extract. That said, I’m not going to share the cake or icing recipe, but scroll down for the curd recipe. It will not disappoint.

Pineapple Curd

  • Difficulty: easy
  • Print

  • 1 C pineapple puree – ~1/2 large pineapple blended and strained
  • 2 T sugar
  • 2 T cornstarch
  • 2 egg yolks
  • 2 T unsalted butter

Mix pineapple puree, sugar, cornstarch, and egg yolks in a small saucepan. Heat on medium-high, mixing constantly, until mixture begins to thicken. This will happen right before it starts to boil and should take about 5 minutes. Immediate remove from heat and stir in butter. Mixture will continue to thicken as it cools.

February 2020 Hikes

The greater San Diego area has not given us a glory-of-nature feel with the sprawling suburban landscape. However, when it’s 70 and sunny in the middle of winter and we get out for some tank top-friendly hikes, it’s easy to enjoy wherever we go!

Daley Ranch

Beth’s parents joined us from their Florida retreat for a long weekend in the dry San Diego landscape. For a traditional weekend hike with them, we traveled north to Escondido into the Daley Ranch conservation area. In addition to the diverse biological habitat the area preserves, it also offers many paved and dirt trails for people to enjoy.

Daley Ranch entrance

It was a picture-perfect February day in Southern California! There were quite a few people starting and finishing in the late morning when we got there. The trail starts on a paved mile walk down to the old ranch. It never ceases to amaze me how a rancher would chose such a remote site for a ranch! There was fresh water feeding into here, which is an obvious necessity, but you can also see large open areas that were likely fields back in the day.

We were able to get some nice views to the South, overlooking the outskirts of Escondido.

Tijuana

We were lucky enough to host our good friends, Aaron and Dara on their trip to SD! We were looking for some new and high-end tequilas, and we thought a great place to explore would be Tijuana, a quick 15 mile, 30 min drive South. We heard a great way to visit was to park on the US side, where there is plenty of parking next to the premium outlet mall lots, and walk across using the West Pedestrian entrance. It was fast and easy!

We planned on calling an Uber but ended up walking to everywhere we wanted to go!

  1. Our first stop was Casa Cocoa for a delicious mole-based meal with a variety of refreshing cocoa-based drinks.
  2. We continued to the Mercado El Popo to explore a variety of stalls with local foods and ingredients. I wanted pretty badly to stock the pantry but help myself back so we could continue our adventure.
  3. Next stop was, of course, to get some beer! Just off the main drag, Revolucion, we were told about Azteca Craft Brewing which has an eclectic space that you could easily miss.
  4. Beer was great, but we were looking for tequila! So, we headed to a trendy cocktail bar, Estacion. The menu looked good, and the food smelled divine.
  5. Ok, so the Tequila came from an unlikely place… Victor’s Liquor Store. Don’t let the sign in front of the building fool you- “Want to get drunk?” it has some HIGH END tequilas on the shelf! Many we had never heard of, of course. There were some amazing looking bottles, so many kinds from blancos to 23+ super anejos. We walked out with a good find, very satisfied.
  6. We took the hike back to the car, and what do you do after a good day of walking and trying tequilas? TACOS! We went to one of the hottest places in the city – Tacos El Gordo in Chula Vista! At 8:30pm there was a line down the street, maybe no surprise. It’s a strange setup with ad hoc lines that are based on the type of food and protein you are getting. The crazy long line is for the adobada which is an amazing-looking, seasoned and slow-roasted pork skewered on pineapples. Pro tip- For a quick bite, grab the shortest line- it’s all so good and will only take a couple minutes!

Big Laguna Mountain

So… Who is ready to get outside?? The expansive Cleveland National Forest offers quite a variety of landscape, including some moderate altitude, 5k ft trails. The air does feel a bit thin coming up from sea level. We headed straight into Big Laguna trail at the Penny Pines Trailhead for a 10 mile moderate hike/run. This is a very run-able course for anyone looking to leg it. We ran about half of it on-and-off to burn a little energy and enjoy the fresh air.

Penny Pines Trail to Big Laguna Mountain looking East into the desert 3k ft below

This area has a very different feel from the trails around the San Diego area. The higher altitude and pine forests really bring us back to a Colorado landscape. The reminder that we’re in Southern California comes early when you look East and see a massive drop-off into the desert landscape.

The lakes (2 of them!) midway through the hike are beautiful to look at, containing many water foul. You can definitely tell this was (is??) range land, with much of it pasture land that is clear of scrubs and plants from the grazing cattle and many fences along the perimeter of the trails.

Beautiful tree growing on dead growth- what is it? Mangrove, Arbutus?

January 2020 Hikes

Kitchen Creek Falls

Kitchen Creek Falls is a moderately trafficked, 5 mile out-and-back portion of the Pacific Crest Trail. We continued along the trail for a bit after the falls making our hike an even 6.5 miles. The great thing about the PCT is that you can make your hike as long or short as you like. It is located in the Cuyamaca Mountains about 50 miles east of San Diego. The trail is on the easy side of moderate; the trail climbs 600 ft. very gradually over the course of 2.25 miles. There is a steep portion right as you get to the falls, which is what puts this into the moderate section. We’d recommend some poles as this portion can be a little tricky to maneuver. The turn off to the falls is easy to miss, so keep your eyes peeled or have a map handy. The falls are a series of small waterfalls along a creek. In the winter, after a rain, there was quite a bit of water flowing, but we’ve heard that it can be pretty dry in the summer.

Paradise Mountain Loop

Paradise Mountain Loop is an 8 mile trail located in Hellhole Canyon near Escondido. Hellhole Canyon is a nature preserve that is only open Friday-Monday and is not open during the month of August due to high heat. Keep that in mind as you plan your visit. In our opinion, the trail is on the hard side of moderate. It climbs 1,900 ft. over the course of 8 miles with all but 300 ft occurring in the first half of the trail. It’s not too steep, but it is rocky and we definitely recommend hiking poles if you have them. On a Sunday in January, the trail was lightly trafficked, though this may change during high tourism seasons. The best part of the trail was how quiet it is. Many of the trails around San Diego are also near large interstates, but Hellhole Canyon is nestled in the mountains away from traffic. There were great vistas along the trail and the top had amazing views across the valley. We did read that in the spring and summer the trail can get quite overgrown, but we had no issue with brush while we were there.

Pacific Beach, San Diego

We traded Portland’s gray winter for 6 months in sunny San Diego. We’re nearing the 3 month mark now, and got to spend the first month living in Pacific Beach. Due to some unforeseen circumstances, we had to move before Thanksgiving, but that’s just given us the opportunity to explore another area of the city. Silver lining!

We’ve found that, of all the beaches in San Diego, Pacific Beach is our favorite. In fact, we still venture there at least once a week to hit up a yoga class and let the pup splash in the water. It’s a bit more residential and laid-back, and you have everything you need (grocery store, food, beach) within a 1-1.5 mile radius.It’s much more pedestrian and biker friendly than any other area of the city. There are plenty of bike rental options if you’re visiting, and bike lanes aplenty. There are also walking paths along all of the waterways and you’ll regularly see runners, walkers, roller bladers, and bikers enjoying the sunny weather. On weekends, it’s common to hop into a free beach yoga class.

Snickers loves the water! When she smells the ocean she will march like a lady on a mission until she gets to the sand. It’s been a lot of fun taking her to splash around. We’ve been pleasantly surprised with how dog-friendly San Diego is. There are a few dedicated dog beaches, where dogs are allowed off-leash at all times, but all of the beaches in town allow dogs between 4pm-9am during the winter. We’ve gotten to catch numerous sunsets over the water because of this.

Some of our favorite PB spots so far:

  • Bird Rock Yoga
  • Mission Bay bayside walk – unbroken walking/biking/running trail around the bay
  • Pacific Beach Fish Shop
  • Dirty Birds – wings and beer after a day at the beach
  • Bird Rock Coffee Roasters – San Diego isn’t a hot spot for coffee, but these guys do it right!

Mocha Cake

For New Year’s Eve Matt requested a decadent chocolate cake. I debated a couple of different frosting options (chocolate, vanilla, and even peanut butter) before deciding that the best complement would be coffee buttercream and dark chocolate ganache. Thus, the mocha cake was born. I definitely need to invest in some proper cake decorating tools, but, looks notwithstanding, this cake was amazing.

IMG_1779

The chocolate cake base is an adaption of the classic Hershey’s cake. I’ve been using it for years and it never disappoints. It’s perfectly chocolatey and amazingly moist. For the buttercream, I went with an American buttercream since it is a bit less finicky than my favored Swiss meringue. I added brewed coffee to get a subtle flavor and a few drops of food coloring for color (though next time I would go without). The ganache is a classic dark chocolate ganache that was added between layers as well as the top to give it an extra boost of chocolate. And for the garnish, I tempered some chocolate and made some chocolate covered coffee beans. These are tasty on their own but do pack some serious caffeine – we learned the hard way that it’s not wise to eat them before bed!

IMG_7981

Check out the recipe below and let me know if you give it a shot!

IMG_7995

Mocha Cake

  • Difficulty: medium
  • Print
 

Chocolate Cake

This recipe is adapted from Hershey’s and produces three 9″ cakes.

  • 3 oz dark chocolate – I use Ghirardelli dark chocolate chips, but feel free to use the chocolate of your choosing. Semi-sweet or milk chocolate will yield a sweeter cake.
  • 1 cup freshly brewed coffee, hot 
  • 1 cup buttermilk 
  • ½ cup canola oil 
  • 3 large eggs, room temperature 
  • 2 tsp pure vanilla extract 
  • 2 cups all purpose flour 
  • 2 cups sugar 
  • ¾ cup Dutch process cocoa powder – I use Ghirardelli 100% cocoa, but any cocoa powder will work
  • 2 tsp baking soda 
  • 1 tsp baking powder 
  • 1 heaping tsp coarse kosher salt 
  1. Preheat oven to 350°F. Grease and flour cake pans.  
  2. Place the chocolate chips in a small bowl. Pour the hot coffee over it and let sit for 5-10 minutes. Stir together until smooth.
  3. In a medium bowl, whisk together the buttermilk, canola oil, eggs and vanilla. 
  4. In the bowl of a stand mixer fitted with the paddle, mix together the flour, sugar, cocoa powder, baking soda, baking powder and salt on low until combined. With the mixer running on low, slowly add the buttermilk mixture. Increase the speed to medium and beat until combined, 20-30 seconds. 
  5. With the mixer running on low, slowly pour the coffee/chocolate mixture into the batter and mix until just combined. Give the batter a few turns by hand with a spatula to make sure everything is well incorporated. 
  6. Pour the batter evenly into the prepared pans. Bake for 25-30 minutes. 

Chocolate Ganache

  • 8 oz dark chocolate chips
  • 8 oz heavy whipping cream
  1. Place chocolate in small bowl
  2. Heat cream in microwave or on stovetop until simmering – do not let boil.
  3. Pour cream over chocolate and let sit for 5-10 minutes.
  4. Stir until smooth.

Note: ganache will thicken as it cools. Allow to cool to your desired consistency. For this cake, will want it to be spreadable and not overly thick.

Coffee Buttercream

  • 1.5 C butter 
  • 4-4.5 C powdered sugar, sifted 
  • 3oz brewed coffee, cooled 
  • 2 T heavy cream
  1. In bowl of stand mixer fitted with paddle attachment, add butter and beat on high until light and fluffy (~5 minutes).
  2. Sift in powdered sugar 1 cup at a time, beating for 2-3 minutes after each addition (this will help keep the icing from becoming grainy).
  3. Once all powdered sugar has been incorporated, add coffee and cream and beat on high for 5-10 minutes until smooth and fluffy.

Note: the buttercream may break and appear curdled after the addition of the liquid. This can happen because buttercream is an emulsion and we’re incorporating a lot of liquid into the fat – sometimes more than it can handle. Don’t worry! Continue to mix on high and it will come back together. This happens to me all the time and, without fail, a few additional minutes is all it takes to bring the buttercream back together.

Assembly

  1. If cakes are very domed, level-off the tops with a serrated knife.
  2. Place one cake on plate or cake stand.
  3. Spread ~1/3 cup of buttercream on the cake and drizzle 1/3 of the ganache over the top. If ganache is runny, pop in the fridge or freezer for 5 minutes to allow it to set.
  4. Place second cake on top of ganache and repeat step 3.
  5. Place third cake, top down on top and spread a thin crumb coat of buttercream on top and sides of cake.
  6. Place cake in freezer for 10-15 minutes to allow crumb coat to set.
  7. Frost cake with remaining buttercream.
  8. Drizzle remaining ganache on top and garnish with chocolate covered coffee beans, if desired.

Â